Category Archives: Food

Charleston Farmer’s Market

Standard

Today I got to go to my first Charleston Farmer’s Market. My friend Holly Herrick took me through and introduced me to all kinds of wonderful farmers and producers. I took home a full load of fun things to work with from tomatillos to fresh chorizo. I got a half bushel of those great South Carolina peaches and some stone ground grits from the Colonial Charleston Kitchen.

Image

Image

I had a Vietnamese Five Spice Pork Taco for breakfast

Image

Image

Image

Image

Image

And, the best thing about going to the farmer’s market is what you make for lunch! Two big slices of a “Pineapple” tomato, drizzled with olive oil and sprinkled with smoked salt and fresh ground pepper. Image

Image

 Monday afternoon, James Island has a farmer’s market, so of course I will have to check that out too!

Vidalia Onions and the First Yellow Squash of the Season

Standard

Low Country Squash with Pork Chops and Butter Leaf Salad

For me, it is a right of passage of sorts. I remember back over 30 years ago when as a young bride in the Low Country we had just moved in to a new house on the St. Helena Sound. my neighbor brought me over a little brown paper sack filled with yellow squash. She told me to go to the Piggly Wiggly and buy a “mess” of Vidalia Onions and explained this very simple recipe. Every spring I make this and think of the gift that Belle gave me. These two vegetables which appear at the same time every spring in the South will always be a perfect pairing in my mind. You can use any sweet onion to make this. Fortunately I had the amazing luck to come upon a shipment of Vidalias here in Hawaii. I grabbed them up and have been making all kinds of good things with them. But when I was at the farmer’s market and saw this yellow squash, I had to make this.

The recipe is embarrassingly simple and I am sure you will love the velvety texture that is the result.

Vidalia Onions and the First Yellow Squash of the Season

3 Vidalia or other sweet onions sliced

3 tender yellow squash sliced

3 cloves of garlic finely minced

Olive oil

Salt and Pepper to taste

Freshly grated Parmesan

In a generous skillet, heat the olive oil and put in the squash in an even layer. Brown and turn.

Add the onions and stir, sautee till the onions start to sweat.

Clean a hot spot in the center of the pan and add  the minced garlic. Stir again.

When the onions turn translucent and just start to brown, add the cheese and stir till it starts to melt.


Add salt and pepper.  Serve immediately.


Salted Caramel Cupcakes

Standard

Image

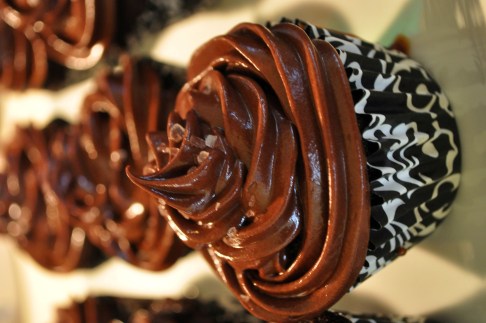
Chocolate Salted Caramel Cupcakes

The Cupcakes
Ingredients
1 1/2 cups all-purpose flour 
3/4 cup unsweetened Dutch-process cocoa powder
1 1/2 cups sugar 
1 1/2 teaspoons baking soda 
3/4 teaspoon baking powder 
3/4 teaspoon salt 
2 large eggs 
3/4 cup buttermilk 
3 tablespoons vegetable oil 
1 teaspoon pure vanilla extract 
3/4 cup warm water 

Directions
Preheat the oven to 350°F. Line mini muffin tin with paper liners. Whisk together flour, cocoa, sugar, baking soda, baking powder, and salt. With mixer on low speed, add eggs, buttermilk, oil, extract, and the water; beat until smooth and combined.

Spoon the batter into liners about two-thirds full. Bake approximately 15 minutes, or until tester comes out clean. Transfer tins to wire racks and allow to cool for 10 minutes; turn cupcakes onto racks and let cool completely. Cupcakes can be stored overnight at room temperature, or frozen up to 1 month in air tight containers.

To finish, use a paring knife to cut a cone-shaped piece (about 1/2 inch deep) from the center of each cupcake and throw away the pieces (or eat them). Spoon 1 to 2 teaspoons warm Salted Caramel Filling into each hollowed-out cupcake. You will notice the caramel will sink into the cupcake a little, just fill it up a bit more. Sprinkle a pinch of sea salt over filling.

Use a pastry bag with a medium open-star tip and pipe Dark Chocolate Frosting onto each cupcake, swirling tip and releasing as you pull up to form a peak. Garnish each cupcake with a pinch of sea salt. Cupcakes are best eaten the day they are filled and frosted. Store at room temperature in airtight containers – do NOT refrigerate. 

Salted Caramel Filling
Ingredients:
2 1/2 cups sugar 
2/3 cup water 
1 tablespoon light corn syrup 
3/4 cup heavy whipping cream 
2 1/2 teaspoons sea salt, preferably fleur de sel 

Directions
Heat sugar with the water and corn syrup in a heavy saucepan over high, stirring occasionally, until syrup is clear; clip a candy thermometer to side of pan and stop stirring.

Cook until syrup comes to a boil, washing down sides of pan with a wet pastry brush as needed. Boil, gently swirling pan occasionally, until mixture is caramelized and just reaches 360°F. Remove from heat and slowly pour in cream; stir with a wooden spoon until smooth. Stir in sea salt.

Use immediately; if caramel begins to harden reheat gently until pourable.

Dark Chocolate Frosting
Ingredients:
1/2 cup plus 1 tablespoon unsweetened Dutch-process cocoa powder
1/2 cup plus 1 tablespoon boiling water 
2 1/4 cups (4 1/2 sticks) unsalted butter, room temperature 
3/4 cup confectioners’ sugar, sifted 
1/4 teaspoon salt 
1 1/2 pounds best-quality semi-sweet chocolate, melted and cooled

Directions:
Combine cocoa and boiling water, stirring until cocoa has dissolved.

With electric mixer on medium-high, beat butter, confectioners’ sugar, and salt until pale and fluffy. Reduce speed to low. Add melted and cooled chocolate, beating until combined and scraping down sides of bowl as needed. Beat in the cocoa mixture. 

Frosting can be refrigerated up to 5 days, or frozen up to 1 month in an air tight container. Before using, bring to room temperature and beat on low speed until smooth again. Pipe onto cupcakes. 

Ancho and Brown Sugar Crusted Smoked Corned Beef

Standard

I made one of these for St. Patricks Day, but there were no leftovers! And I am a woman that loves a good Ruben Sandwich. So when I noticed that the corned beefs were on sale , I just had to buy another. I have a Digital Bradley Smoker which is one of my favorite pieces of cooking equipment. This is my second one, my first one was not digital, I bought it 12 years ago before they came out with the digital model. But you can do this with any smoker that does not place the food directly above the heat.

Make your rub:

2/3 cup brown sugar

1/3 cup dried Ancho chile powder

1 tablespoon salt

1 tablespoon crushed black pepper

1 tablespoon mustard seeds slightly crushed

1 Tablespoon fennel slightly crushed

Open your package of corned beef (or of course you can make your own easily, but that is another post) Pour the juice from the package into a dutch oven and reserve.

Apply the rub to the meat and place in smoker on low heat  for 4 hours.

Place the meat in the dutch oven and add 1 onion sliced and one pound of carrots cut up. Add liquid (beer or water) till it almost touches the top of the corned beef.

Bake at 350 for two hours.

Remove and let rest on a cutting board for 10 minutes. Slice and plate. I like to serve this with Champ (mashed potatoes with cream and chives).

Next comes the Rubens for tonight’s dinner!

Avgolemono Soup (Greek Egg and Meyer Lemon Soup with Rice)

Standard


In just 30 minutes you can whip this amazingly flavorful soup up. It is good hot or chilled. I served it with Spanakopita (click for the recipe).

INGREDIENTS 

3 cups chicken stock (homemade preferred) if you are using box stock or broth, simmer it down and reduce it by half (this means you need twice as much)

1/4 cup rice or orzo (optional, but I like it)

4 egg yolks

2 egg whites

Freshly squeezed juice of 4 Meyer lemons (if using another type of lemon, use one less)

1/4 teaspoon sea salt

2 tablespoons minced dill, mint, chives or fennel

Lemon zest from one lemon

One thin lemon slice for each serving

METHOD

  • Add rice or orzo to the chicken stock, bring to a boil and reduce to a simmer till rice (20 minutes) or pasta (10 minutes) is cooked once cooked add 1/2 of the lemon juice
  • Put egg whites in a container to be whipped (I use a stick blender with a whip attachment, but you can use a food processor or hand mixer to whip the whites)
  • Place yolks in a mixing bowl
  • Whisk 1/2 cup of the hot chicken stock/rice into yolks until well blended, then add the remaining stock/rice mixture stirring till blended
  • Whip the egg whites until soft peaks form
  • Marry 1/2 cup of the stock/rice/yolk mixture to the egg whites, then fold that mixture into the stock/rice/yolk being careful not to deflate.
  • Taste for salt and lemon juice, adding more as needed. Ladle into warm bowls (or allow to chill and serve in stemmed glasses), sprinkle with herbs and lemon zest and add one lemon slice.

    Yield: 4 to 6 servings. This does keep well in a covered container, but should be used in 1-2 days and be very careful when re-heating not to allow it to boil.

Shrimp and Pumpkin Curry

Standard

Based on a Thai Pumpkin Curry that I make, this silken & spicy dish definitely qualifies as SASSY in my book. It is easy to make, healthy and makes great leftovers. I steamed some Jasmine Rice with a few Kaffir Lime leaves and made my own sassy version of cucumber salad (recipe to follow on the next blog post.) I used the Japanese Kabocha  pumpkin that is abundant year round in Hawaii, but you could use any tender squash or pumpkin. Kabocha is sweeter and more tender than most and you can even eat the skin. It cooks rather quickly as do the shrimp, which makes this a prime recipe to whip up on a week night. The splash of cognac adds another dimension of flavor.

Garlic Man is the mascot for The Sassy Spoon! He will be featured somewhere in every post!

Ingedients: 

1 Kabocha Pumpkin cut in to 1″ squares

2 tablespoons curry paste (You can choose any style of curry paste, I have used yellow, green and red with this before. This time I used red).

2 cans of coconut milk

6-8 fresh kaffir lime leaves (there is no real substitute for this, but you can use lime zest).

1/2 pound of large raw shrimp (I used 18-21 per #)

2 tablespoons palm sugar (or dark brown sugar)

2 Tablespoons coconut oil

8 cloves fresh garlic finely minced

4-6 Shitake mushrooms, sliced thickly

splash of cognac (My “splash” is generous, about a jigger full)

Chopped cilantro for finishing

Method: 

In a large hot wok put a large spoon full of the cream from the coconut milk and stir in the curry paste, allow the paste to warm up completely, then pour in one can of the coconut milk & the kaffir leaves, stirring constantly as it thickens.

Add pumpkin and cook for 10 minutes, add the second can of coconut milk and the sugar. Check pumpkin to see if it is cooked thoroughly, be careful not to over cook it or the pumpkin will be mushy. Turn off the heat.

In another pan add the coconut oil, shrimp and mushroom slices. Saute till the shrimp turns pink, about 2-3 minutes. Add the garlic and slightly brown it.

Add a splash of cognac and cook for 30 seconds more. Add all of this into the wok, turn the heat back up and simmer for a minute, then sprinkle with cilantro and serve over rice.

Lavender Gelato

Standard

Image

Gelato is ice cream’s smoother more flavorful Italian cousin. In Italy there are gelaterie shops everywhere. The trend came to the US several years ago, but there are still many people I meet that are not familiar with gelato. It is best made in small batches. It has less butterfat than most ice cream and there are a few secrets to making it smoother. Most recipes for gelato use only egg yolks, no whites. The yolk works as a stabilizer in the process. The other secret is to cook the custard and then after straining let it sit for for several hours after pasteurization is complete for the milk proteins to hydrate, or bind. This hydration reduces the size of the ice crystals, making a smoother texture in the final product.

I have an Italian gelato machine. But you do not have to have one to make good gelato. It does help if you have a machine which stirs while refrigerating, but you can still get good results with an old fashioned ice cream machine. My machine is made by Lusso and I call her Lucille.Image

Here is the recipe:

Ingredients:

  • 2 cups whole milk
  • 2 cups heavy cream
  • 1/3 cup dried culinary lavender flowers
  • Zest of one lemon in large strips (use a vegetable peeler not a zester)
  • 7 egg yolks
  • 1 cup sugar
  • dash salt
  • 1/2 teaspoon vanilla
  • Purple food coloring paste (buy this in cake decorating section of a craft store) optional
Method: 
  1. Bring milk, lemon zest and lavender almost to a boil
  2. Turn off heat and allow to sit for 1 hour
  3. Strain and discard lavender & lemon peel
  4. Add cream with a whisk
  5. Reheat strained milk & cream until bubbles form around edge of the pan
  6. Beat the egg yolks with with sugar and a pinch of salt in a stainless steel bowl that will fit over a saucepan of water. Beat vigorously until the mixture is yellow and creamy (about 3 minutes)
  7. Add a ladle of the hot milk/cream to the egg/sugar mixture and continue to whisk, then add the remaining milk/cream mixture very slowly
  8. Maintain a simmer in the bottom of the double boiler, do not allow it to come to a rolling boil
  9. Beat by hand or with a mixer while cooking for about 15 minutes, do not allow it to boil
  10. When the back of a wooden spoon is coated with the mixture and you can draw a line with your finger it is ready.
  11. Stir in the vanilla and pour through a strainer into another bowl that will fit into a larger bowl fitted with ice
  12. Whisk in the coloring if you want to use it
  13. Place plastic wrap over the entire top of the mixture, touching it all the way around. This creates a seal and will not allow a skin to form.
  14. Place the bowl with the mixture in it into the bowl of ice and allow to rest until all of the ice melts.
  15. At this point you can place it in the refrigerator to chill further, as long as over night.
Image
Process according to your machine’s directions. Put into plastic containers and freeze or serve immediately
 You might want to try one of my other favorite gelato recipes: Salted Caramel Gelato  pictured below: 

Eggplant Rollatini

Standard

Devany's avatarMy Manhattan Kitchen

Involtini di Melanzane con Salsiccia e Mozzarella to be exact! I had two big eggplants, some spicy homemade Italian sausages and lots of great herbs and tomatoes. I sent a note to my friend and fellow blogger Peter Francis Battaglia (whom I also call Saint Peter sometimes) asking him if he had a good rollatini recipe that did not require ricotta. He sent me one via messages on Facebook and I made it last night. I even had some for breakfast. I served it on spaghetti that was simply tossed with butter, EVOO and some garlic. Here is the recipe pretty much as he sent it to me. I added just a couple of things in the mix.  This is a recipe that can be made *creatively* and you can easily increase the amounts if you want to. I had a little extra filling left, so I just stuffed it in around…

View original post 280 more words

Aloha Rolls

Standard

These slightly sweet rolls are quick and easy to make. They freeze well and the dough can be saved in the refrigerator for up to a week so you can make them fresh for each meal. If you want a more traditional Hawaiian Sweet Bread Roll add another egg or two.

Ingredients:
2 (1/4 ounce) packages active dry yeast or about 1 tablespoon 1 cup lukewarm water (105 to 115 F)
1/4 cup canola oil
1 large egg
3/4 cup raw sugar or honey
1 1/2 cups warm water (more if needed)
6 1/2-7 cups bread flour
1 teaspoon sea salt
Extra Virgin Olive Oil
Butter

Method:

  • Dissolve the yeast in a large mixing bowl with 1 cup of lukewarm water and let it stand for about 5 minutes
  • Add the oil, egg, sugar or honey, salt and the rest of the water and mix it with a whisk, let stand again for a few minutes
  • Add the flour and mix on medium with a dough hook until the dough forms a ball. It should be a moist dough, but not very sticky. Add a little more flour if needed. Allow the dough to rest for 15 minutes then knead  for 5 minutes
  • Put a small circle of olive oil in the bottom of a large bowl and put the ball of dough smooth side down into the bowl, then flip it over and cover with plastic wrap. And allow to rise for 90 minutes or until doubled
  • Pre-heat oven to 350 degrees Fahrenheit and get a large sheet pan spray with cooking spray or line with partchment paper or silicone mat
  • Punch down the dough and pinch off pieces of the dough and roll into golf ball size for dinner rolls or “slider” buns, or tennis ball sizes for sandwich rolls. Arrange the dough on the pan about 1-2 inches apart then cover with plastic wrap that has been sprayed with olive oil or Pam. Allow to rise for 20 minutes. The rolls will not quite double in bulk on the second rising
  • Bake rolls for 18 to 30 (shorter time for small rolls) mintues or until golden brown. When they come out of the oven brush lightly with olive oil or take a stick of butter and rub on the tops. You can also add seeds to the tops immediately after buttering. These can also be made into hot dog buns by making 4″ X 1 1/2 inch torpedo shapes and allowing to rise in the same manner. They make AWESOME hamburger buns too!

Avgolemono Soup (Greek Egg and Meyer Lemon Soup with Rice)

Standard


In just 30 minutes you can whip this amazingly flavorful soup up. It is good hot or chilled. I served it with Spanakopita (click for the recipe).

INGREDIENTS 

3 cups chicken stock (homemade preferred) if you are using box stock or broth, simmer it down and reduce it by half (this means you need twice as much)

1/4 cup rice or orzo (optional, but I like it)

4 egg yolks

2 egg whites

Freshly squeezed juice of 4 Meyer lemons (if using another type of lemon, use one less)

1/4 teaspoon sea salt

2 tablespoons minced dill, mint, chives or fennel

Lemon zest from one lemon

One thin lemon slice for each serving

METHOD

  • Add rice or orzo to the chicken stock, bring to a boil and reduce to a simmer till rice (20 minutes) or pasta (10 minutes) is cooked once cooked add 1/2 of the lemon juice
  • Put egg whites in a container to be whipped (I use a stick blender with a whip attachment, but you can use a food processor or hand mixer to whip the whites)
  • Place yolks in a mixing bowl
  • Whisk 1/2 cup of the hot chicken stock/rice into yolks until well blended, then add the remaining stock/rice mixture stirring till blended
  • Whip the egg whites until soft peaks form
  • Marry 1/2 cup of the stock/rice/yolk mixture to the egg whites, then fold that mixture into the stock/rice/yolk being careful not to deflate.
  • Taste for salt and lemon juice, adding more as needed. Ladle into warm bowls (or allow to chill and serve in stemmed glasses), sprinkle with herbs and lemon zest and add one lemon slice.

    Yield: 4 to 6 servings. This does keep well in a covered container, but should be used in 1-2 days and be very careful when re-heating not to allow it to boil.