Category Archives: Cheese

An Ode to The Northwoods Inn and their Fabulous Sides

Standard

Growing up in Southern California in the 1960’s and ‘70’s I  got to enjoy a lot of fun theme restaurants. They were somehow an extension of Hollywood and the era that ushered in Disneyland and many other area theme parks of that day. A few remain, but many have been shuttered over the years to make way for malls, freeways and most importantly housing developments as human encroachment took over the land of my birth. We had sunshine and great weather till the people came, then we had traffic, smog, inflated real estate prices and lots of other problems.

One of the few remaining theme restaurants is Clearman’s Northwood’s Inn in Covina. They also have sites in La Mirada and San Gabriel, but mine was in Covina. Opening in the height of LA fun and fancy in 1958 they still manage to draw crowds.

When you drive up on a hot southern California day, your eyes deceive you, it looks like a snow covered Alaskan log lodge. As you step into a North Woods Inn, you’ll slowly pull open a heavy wooden door and peer into a dimly lit and richly decorated room of rustic log walls, massive taxidermied bears, jewel-toned stained glass, sawdust-strewn floors and eccentric hunting-lodge kitsch. The signs tell you to “Please throw peanut shells on floor.” 

You must arrive hungry. Entrees include all you can eat of two salads, recipes below, their famous garlic cheese bread, rice pilaf, a one pound baked potato with cheese, butter, sour cream and mushroom gravy. And then there are the huge steaks!

So over the years I had to recreate the recipes since I moved thousands of miles away from these favorite salads and cheeese bread! Here are my takes on them. Some people mix the buttermilk blue cheese on iceberg with the red cabbage salad, but I like to use the red cabbage as a palate cleanser. The cheese bread is my favorite and I think it is also like the bread at a long gone nearby establishment The Trails.
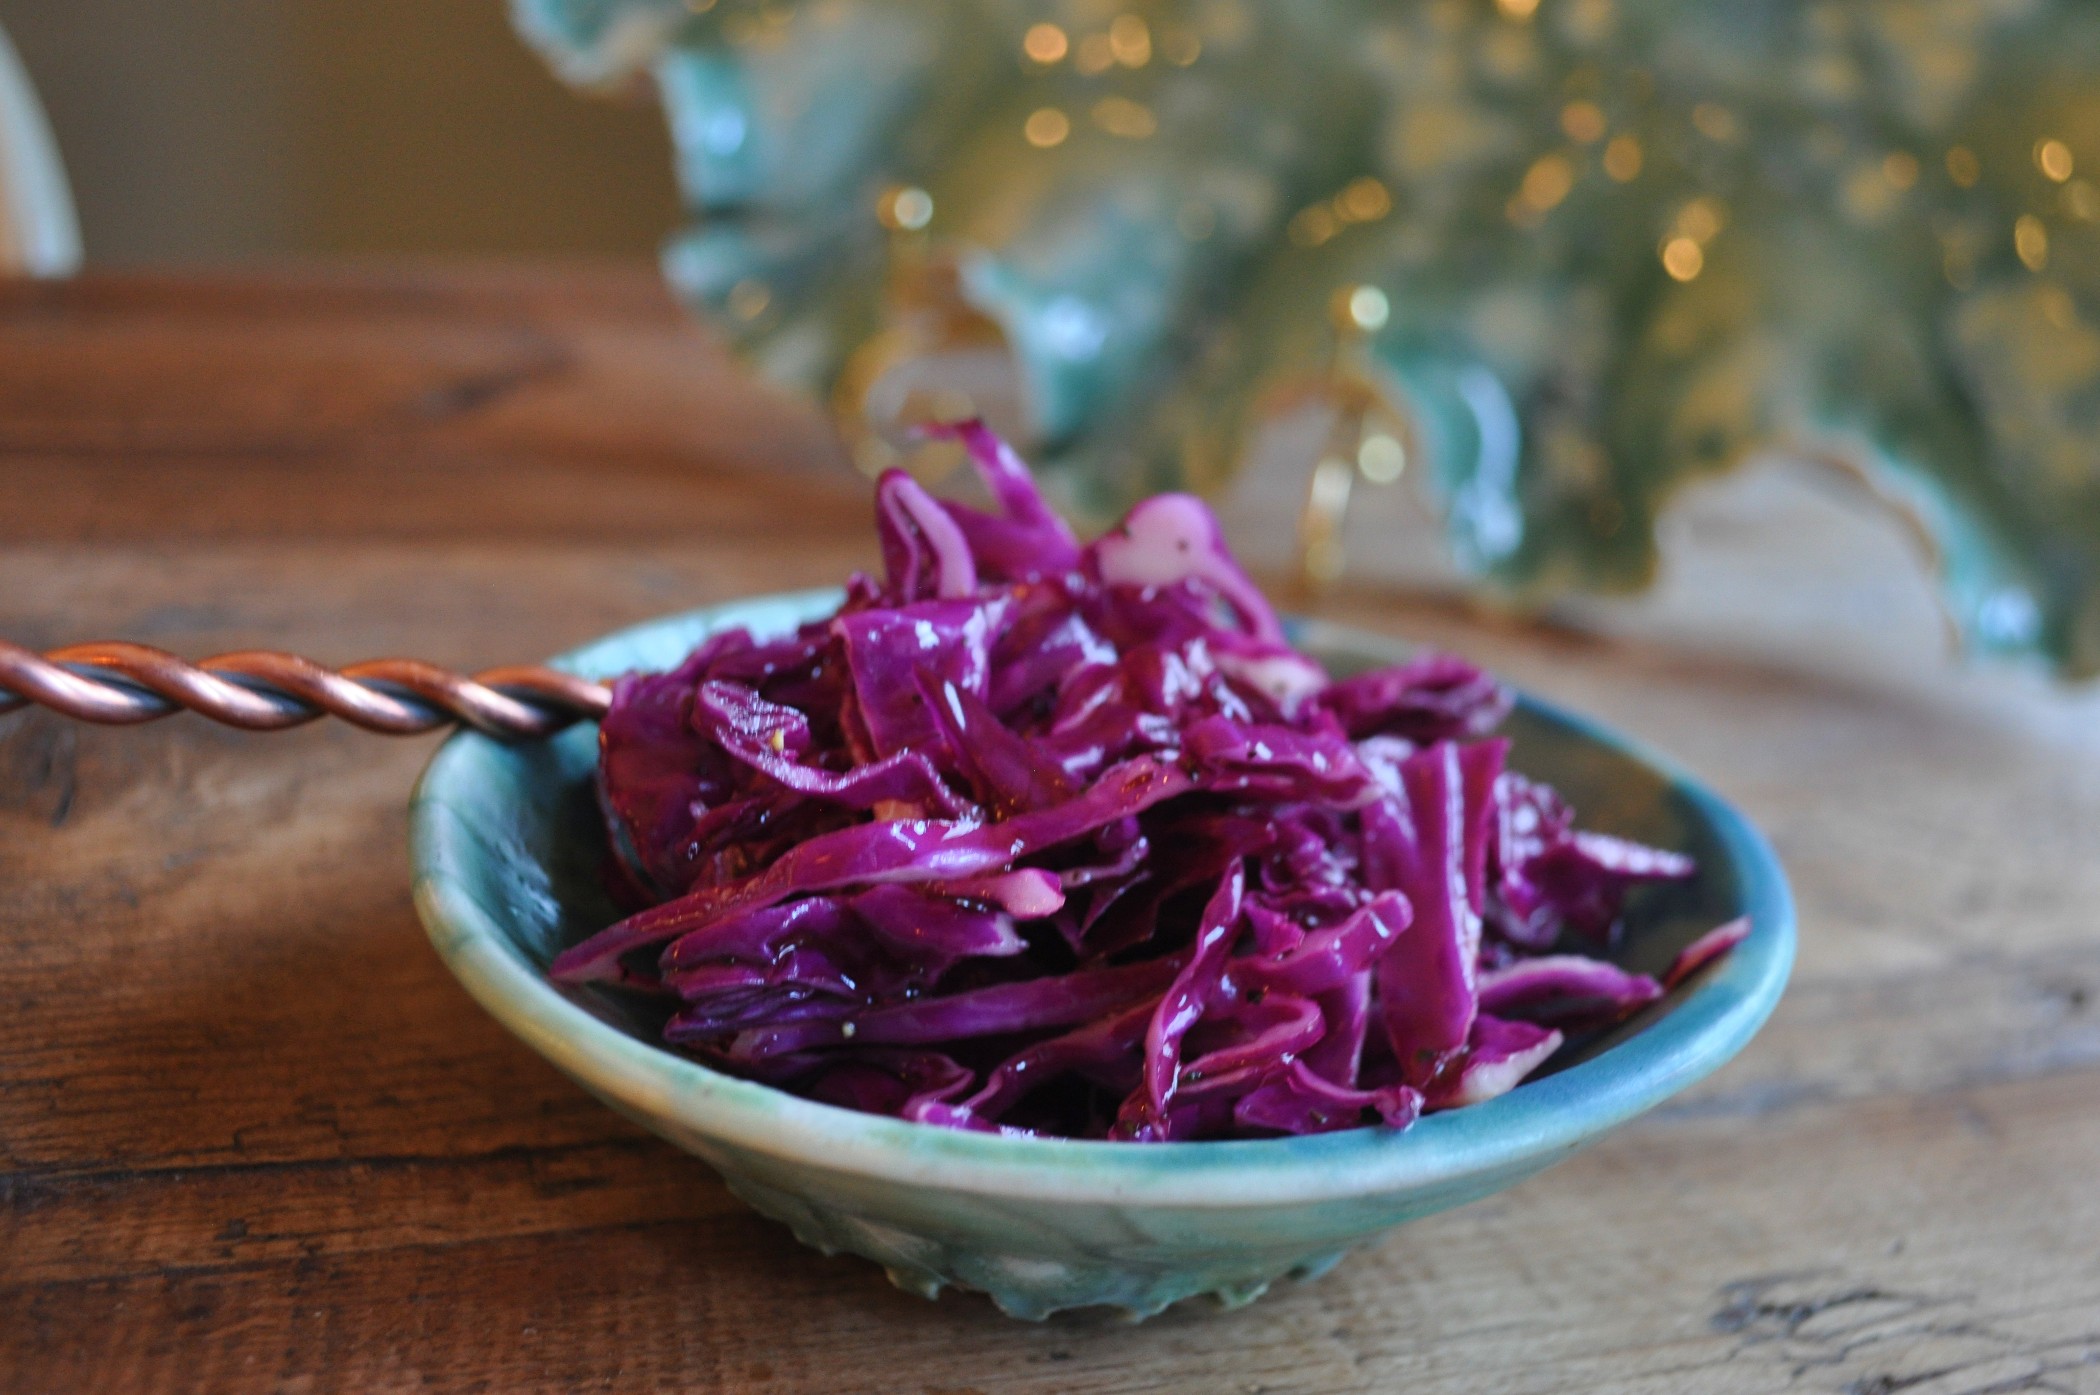
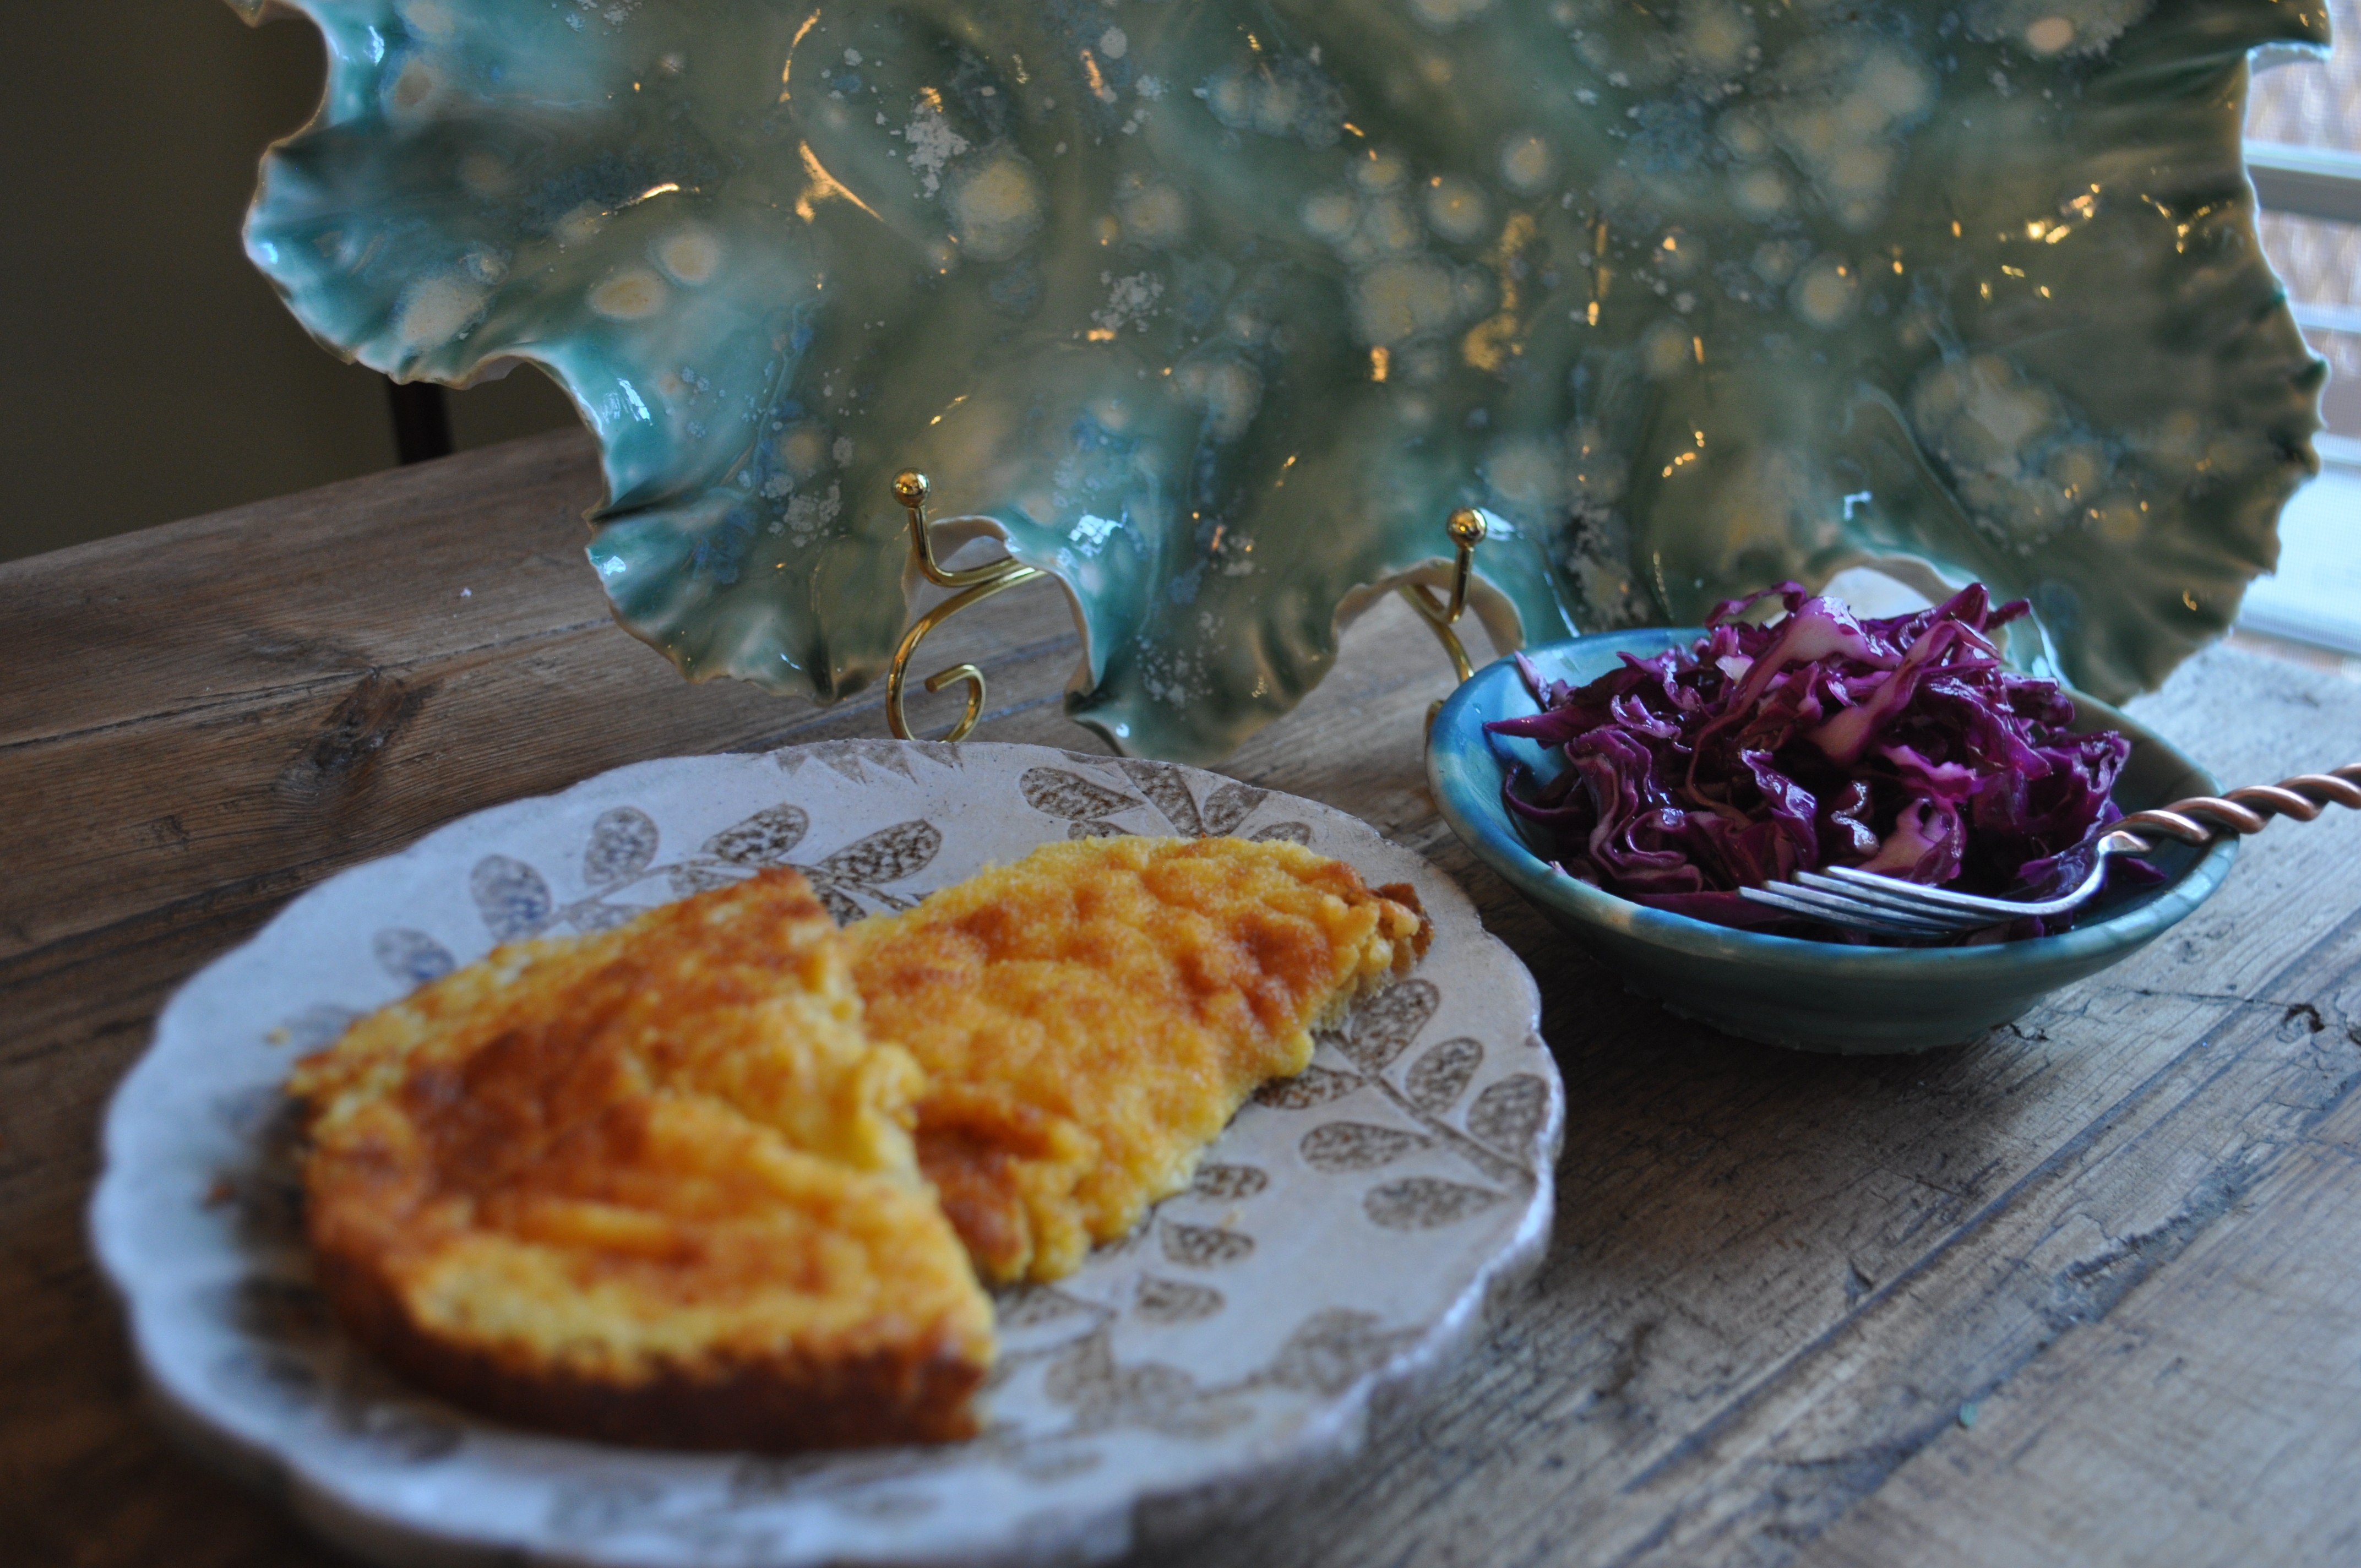
The Red Cabbage Salad

The Northwoods Inn Red Cabbage Salad 

1/2 cup . red wine vinegar 
4 T. sugar 
3 tsp. kosher salt 
2 tsp. seasoned salt 
1/4 tsp. pepper 
1/4 TBS. grated onion
1/2 cup olive oil 

1 head red cabbage, coarsely shredded 

Whisk together vinegar, sugar, salt, pepper, and onion until sugar and salt are completely dissolved. Whisk in oil. Dressing can be made ahead and stored in fridge. Bring to room temp before using. Pour over cabbage, toss well and let sit 10-15 minutes. Toss again and serve.

The Best Cheese Bread Ever

Clearman’S Northwoods Inn – Cheese Spread 

In a food proccessor add:

1/2 ts dry mustard 
1/2 ts celery salt 
2 ts garlic salt & 6 garlic cloves
3 tb plus 2 teaspoons fresh lemon juice 
2 ts tabasco 
1 ts paprika 
1 lb butter 
1 lb cheddar cheese – grated finely 
3 oz romano cheese, grated
Mix until well blended. Refrigerate

Put onto sourdough bread, place under broiler until lightly toasted.

Keeps 6 weeks in fridge, can be frozen

The Clearman’s Blue Cheese Dressing

They serve this on Iceberg, but I prefer it on butter lettuce

· 1 cup buttermilk 
· 1 cup sour cream
· 3 cloves garlic 
· 1/8 tsp sugar 
· 1 tablespoon Hungarian sweet paprika 
· 1 teaspoon salt 
· 6 tablespoons blue cheese
PREPARATION:
In a food processor combine buttermilk, sour cream, garlic, sugar, paprika, and salt. Blend until smooth. Add blue cheese, and pulse quickly once or twice. Do not blend. You want small chunks of blue cheese. 

Refrigerate 4 hours or more before serving to let flavors blend. 

Yield: About 1-1/3 cups 

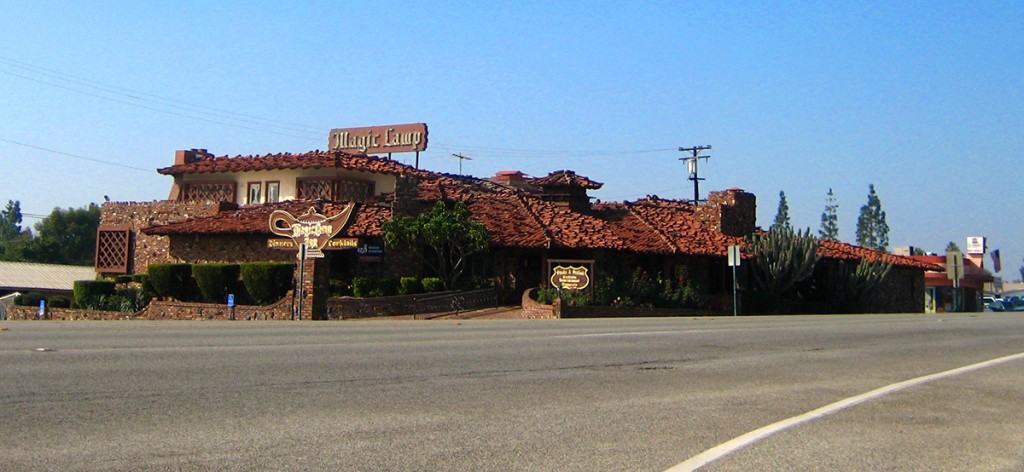
Another one of Mr Clearman’s fantastic establisments farther West in Cucamonga, now Rancho Cucamonga still stands, The Magic Lamp Inn.

Caramelized Onion, Cheese and Phyllo Tart

Standard

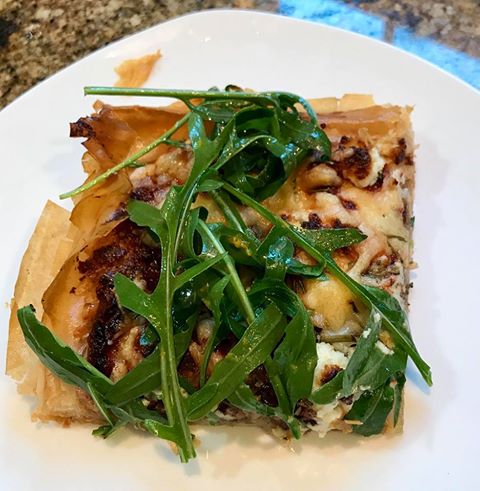
Tart on plate

This tart is so easy to make and it is scrumptious. Since I made it for two of us, I halved the recipe that I usually make for parties etc. When serving many people I cut it into one inch squares and place in cupcake papers. This full recipe is made in a half sheet pan. I use a quarter sheet pan for the half recipe.Line either size with parchment paper.

Ingredients:

  • Half a package of phyllo, thawed.
  • 6 onions
  • 4 tablespoons Sweet Onion Sugar (optional)
  • 1/3 cup olive oil
  • 1 box (5.2 oz) Boursin Cheese
  • 2 cups arugula
  • juice & zest of one lemon (Meyer if you can get it)
  • Salt and Pepper
  • Splash of olive oil

Method:

Heat oven to 400 degrees

  • Make caramelized onions by sauteeing the sliced onions in a little olive oil. Add the sweet onion sugar. cook down on low for an hour, stirring frequently. Allow to cool slightly,
  • Lay out the Phyllo dough, cover with plastic wrap and top with a wet kitchen towel.
  • Lay out two sheets of phyllo on to the baking sheet, then brush with olive oil and continue the process until all of the sheets have been laid out. Keep replacing the plastic and towel in between layers. Some of the phyllo should hang over the edge. Brush a layer of oil on the top sheet.
  • Spread the onions out evenly on the phyllo
  • Crumble the cheese over the onions
  • Add salt and pepper to taste
  • Bake for 20 minutes
  • Toss the arugula with the lemon juice and olive oil, then top the tart with it.
  • Lay the tart out on a cutting board (just pull the paper out onto the board) and cut with a pizza cutter.

This can be served warm or room temperature. It keeps for a week in an air tight container.

Bucatini two ways!

Standard

Bucatini

Bucatini is one of my favorite pastas. It is a long noodle (#6) and it is hollow. This makes a chewy and delicious pasta dish. The first method is with bread crumbs, garlic, olive oil and herbs, topped with cheese and bread crumbs. The second has a sauce of butter roasted tomatoes with anchovies and garlic. Both are super fast and easy. Both have two layers of garlic flavor, utilizing fresh garlic and Vik’s Garlic Fix, one of my favorite products.

garlic

Bucatini with breadcrumbs

Bucatini with Bread Crumbs and Garlic, serves 4

Ingredients:
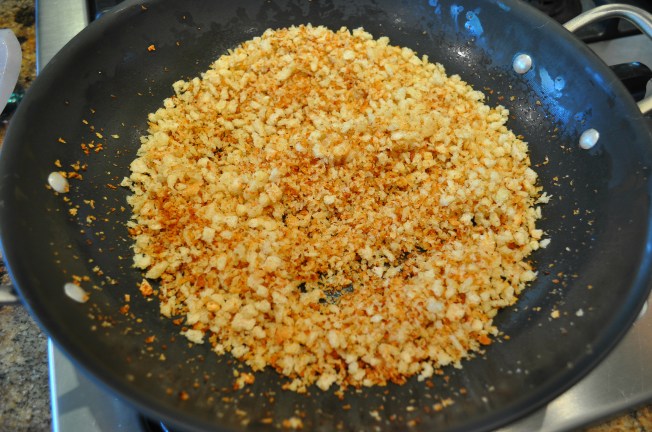
1 cup fresh bread (Italian or sourdough is best for this) crumbs toasted in a pan with 2 TBS butter
10 cloves garlic, chopped
2 TBS Vik’s Garlic Fix
1 TBS fresh cracked pepper
1/4 cup olive oil
1 bunch of fresh parsley or 1/4 cup dried parsley
crushed red pepper flakes to taste
1/4 cup parmigiana, grated
1/2 package bucatini pasta, cooked al dente

Method:

garlic and oil

The sauce is made as the pasta cooks. While your pasta is boiling place the olive oil, Vik’s and the red pepper in a frying pan and sear till the garlic is soft and lightly browned.

breadcrumbs

When the pasta is done strain and toss with the sauce. Add salt and pepper to taste. Then add the cheese and top with bread crumbs and parsley! It is delicious!

Bucatini with breadcrumbs
Next method: Butter Roasted Tomato Sauce, serves 4

DSC_0026

Ingredients:

8 cloves of garlic
1 TBS Vik’s Garlic Fix
2 cups cherry tomatoes
1 28 ounce can of chopped tomatoes (and juice)
6 small anchovies in olive oil
1/4 cup Sweet Onion Sugar
2 Tbs Italian Herb Blend
6 Tablespoons of butter cut into small pieces
Salt and Black pepper
1/2 package Bucatini Pasta, cooked al dente

Fresh Italian Parsley or Basil for garnish.
DSC_0024

In an oven proof pan with deep sides, place all ingredients. Roast at 350 degrees for 40 minutes. After removing from the oven, smash the garlic, tomatoes and anchovies with a fork to achieve a thick chunky sauce. Toss half of the sauce with the bucatini and a ladle of pasta water. Then dish up and put remaining sauce on the pasta. Garnish with the fresh herbs.

DSC_0035

Five Onion “French Onion Soup” ~ Best Recipe!

Standard

French Onion Soup

This really is easy to do, it just takes about 40 minutes prep time and a couple of hours of cooking time. I always make a large pot of it. It freezes well and keeps in the refrigerator for at least a week.

Ingredients:

  • 8# of assorted onions: Red, Sweet & White, cut in half and sliced in 1/4 inch slices
  • I cup of TSTE dried Shallots (or 2# of fresh shallots coarsely chopped)
  • 4 leeks greens cut off, cut in half then sliced thinly
  • 2 tablespoons of TSTE Vik’s Garlic Fix
  • several grinds of TSTE Four Peppercorn Blend
  • 1/4 cup TSTE Sweet Onion Sugar
  • 6 stems of fresh thyme or 1 teaspoon TSTE dried thyme
  • 1/4 cup of olive oil 
  • 1 bottle dry vermouth
  • 6 quarts of stock. I used duck, but chicken, beef or even vegetable stock is fine. DO get low sodium though if you buy it.
  • Splash of cognac
  • For each serving: 1/2 cup of Gruyère cheese, shredded and 1 slice of toasted baguette

Duck Stock

Method:

  • In a very large stock pot pour in the olive oil and add the onions and leeks in stages allowing the onions to caramelize a little before adding more.

Onion Soup 011

  • After all the onions are cooked deglaze pot with a bottle of vermouth. This adds immense flavor to the soup, so don’t skip this step.
  • Add seasonings, stock and the dried shallots (if you use fresh, add them with the onions).
  • Bring to a boil then allow to simmer with the lid off for about 2 hours, stirring once every 15 minutes. Liquid should reduce by about half.
  • Add the cognac to taste
  • Turn on broiler
  • Toast the baguette slices.

cheese

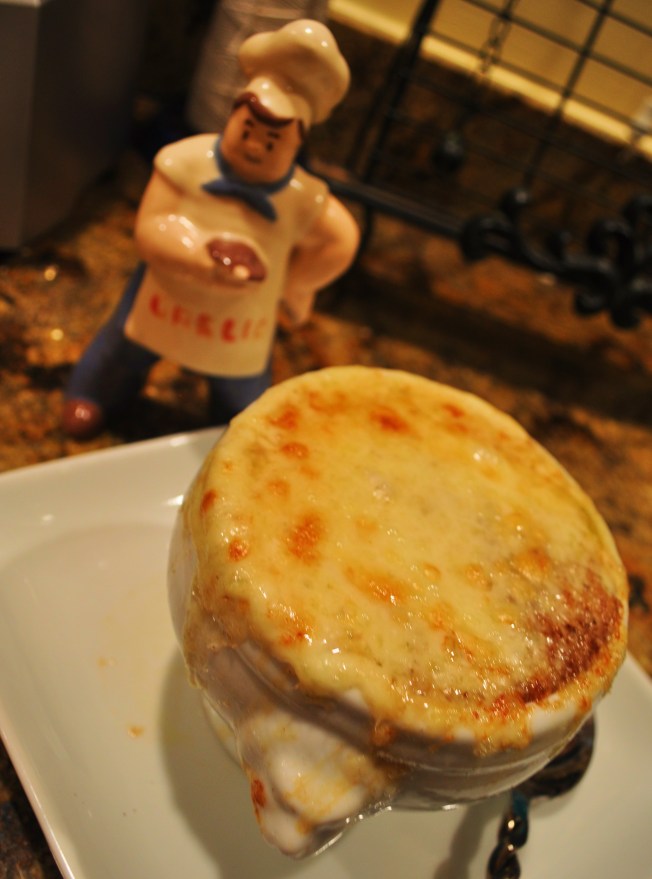
  • Fill oven proof crocks with soup. Place on a cookie sheet for transferring to the oven. put a baguette slice in each of the crocks. Add a tiny bit more soup on top to soften. Pile with cheese and put under the broiler till the cheese starts to brown and bubble. Remove and serve.

SO easy and so delicious!!!

Southern Macaroni Pie

Standard

Macaroni Pie

Macaroni…. an ubiquitous word. For hundreds of years in the south it was the word for any pasta, which was basically only spaghetti until mid 20th century.

Pie… yet another all present culinary term in the south. Many “pie” recipes here are savory, not sweet and sometimes served in a variety of casserole dishes. Generally they did start out in a pie dish, but were expanded to larger dishes to feed more people.

The inspiration recipe, from my friend Nathalie Dupree, comes from Social Circle, Georgia. Her mother in law made it and Nathalie figured it out over time. I made a smaller amount, as I was only feeding 2 (plus leftovers) and so I did make mine in a pie plate. If you get Nathalie’s book, Mastering the art of Southern Cooking  you will find the original recipe on page 268, along with the original Charleston version from 200 years of Charleston Cooking. Another friend of mine who lived in Charleston many years makes hers with sour cream. I wanted to make mine with the traditional spaghetti but I was lazy, I only had penne, so that is what I used. I also added freshly grated nutmeg, it was calling out to me. I also choose to bake this in a bain marie, as that is how I usually cook custards.

A little about Pasta in America:

Pasta first came to the U.S. via Thomas Jefferson served as minister to France from 1785 to 1789, and was introduced to pasta during a trip to Naples. He returned to the U.S. with crates of “maccheroni” and a pasta-making machine (which he proceeded to redesign). In Most sources, including the National Pasta Association, credit a Frenchman with establishing America’s first pasta factory, in Brooklyn in 1848. A flour miller from Lyon, Antoine Zerega, had a horse in his basement to turn the millstone; and like the Neapolitans, he hung his spaghetti strands on the roof to dry. Today, the fifth generation of Zeregas run the leading supplier of pasta to the foodservice industry in North America.

Spaghetti and meatballs had yet to appear. Macaroni had been brought to England earlier by the Genovese sailors, and the British baked it with cheese and cream—in essence, making macaroni and cheese, a preparation also popular in the north of Italy. They also baked pasta in sweet dessert custards, similar to German-Jewish noodle puddings. These recipes crossed the pond and were enjoyed by 19th-century Americans. According to Corby Kummer, upper-class Americans also purchased pasta imported from Sicily, which then, as today, had more cachet than the domestic product. The information in the remainder of this article comes largely from Mr. Kummer’s extensive piece, Pasta: Where It Came From And How It Got There. 

As other pasta factories sprouted up, the cost of pasta became more affordable. By the time of the Civil War (1861 to 1865), even the working classes could afford a pasta dinner. Cookbooks of the period indicate that the common way to prepare pasta was still baked with cheese and cream.

  • In the mid-1880s, according to food historian Karen Hess, cookbooks published as far west as Kansas included recipes for macaroni, some involving a tomato and meat sauce.
  • But pasta did not become the beloved dish it is today: It lost its cachet once the masses could afford it. The fashionable restaurants of New York, which served Continental cuisine, did not serve pasta or any other traditional Italian dish, even though many of these restaurants were run by Italians.

The huge wave of Italian immigration that began toward the end of the 19th century was ultimately responsible for pasta becoming an American staple.

And on on to our Macaroni Pie…

This recipe is for enough to fill a large pie dish. Feeds 4 as a main dish, 6 as a side dish

Ingredients

  • 3 cups cooked and drained spaghetti
  • 3 Tablespoons butter melted
  • 3 eggs
  • 2 cups milk
  • 1 teaspoon Dijon mustard
  • 1/2 a nutmeg, grated
  • 1 teaspoon salt
  • freshly ground black pepper
  • 1 teaspoon crushed red pepper (optional)
  • 1 pound sharp Cheddar or Gruyere cheese, grated

Method

Pre-heat the oven to 350.

Boil the pasta to al dente

While the pasta boils:

  • Lightly whisk the eggs with the milk
  • Add the mustard, salt, nutmeg, peppers and half the cheese
  • Cut the pasta into 3 inch pieces and toss with 1 tablespoon of the melted butter
  • place half of the pasta into a deep pie dish
  • sprinkle with cheese to cover, then ladle on 1/2 of the custard mixture
  • Add the remaining pasta
  • Ladle on the remaining custard
  • Top with cheese and remaining butter

Bake in a water bath (bain marie) for 30 minutes. check to see if it is browning, if so, loosely top with foil. Reduce heat to 325. Bake 20-30 minutes longer. Insert a knife in the center. If it comes out clean, it is ready. Allow to rest at least 10 minutes before serving.

DSC_0030

Pastitsio: Greek Lasagna

Standard

Tight shot

This recipe is so good that I revisit it every few months. It makes a great centerpiece for a dinner party and the leftovers are better than the first night’s meal. The noodles are difficult to find, but I get them on Amazon.com, buying 6 bags at a time.

Greek Lasagna Pastitsio

When teaching others to make this dish, I have often joked that the word pastitsio (pa-STEE-tsee-oh) translates to “messy kitchen” in Greek. I was only kidding, but there is a hint of truth to that statement. The Greek word pastitsio derives from the Italian pasticcio, which loosely translates to a mess or a hodgepodge.

Three essential components make up this dish – pasta, meat filling, and a creamy bechamel sauce which are layered in a pan and baked to a golden brown. Each stage will require dirtying some pots and pans, but I think you will agree that the end result is well worth the clean up!

Prep Time: 45 minutes

Cook Time: 45 minutes

Total Time: 90 minutes

Ingredients:

  • 1/2 cup olive oil
  • 2 lbs. ground lamb
  • 1 large yellow onion, chopped
  • 1 cup dry white wine
  • 1 14 oz. can tomato puree or sauce
  • 3 tbsp. chopped fresh parsley
  • 1/2 tsp. ground allspice
  • 1 tsp. ground cinnamon
  • 1 tablespoon Greek Seasoning Blend
  • 1 1/2 cups grated Parmesan cheese (or Kefalotyri if available)
  • salt and freshly ground black pepper to taste
  • 3 tbsp. breadcrumbs plus 1/2 cup for topping if desired
  • 1 pkg. #2 Macaroni for Pastitsio (500g)- available at Greek or ethnic groceries.
  • 4 egg whites (reserve the yolks for bechamel sauce)
  • 1/2 cup unsalted butter (1 stick)

greek noodles

For the bechamel sauce:

  • 1 cup unsalted butter (2 sticks)
  • 1 cup all purpose flour
  • 1 quart milk, warmed
  • 8 egg yolks, beaten lightly
  • 1/2  of a whole nutmeg, grated with a microplane

Preparation:

This recipe will yield about 12 servings depending upon the size of your pieces. I use a lasagna pan that is 9 x 13 x 3 inches deep.

Begin with the Meat Filling:

Heat olive oil in a large saute pan. Add ground lamb and cook over medium-high heat until pink color disappears, about 5 minutes. Add onions and cook until they are translucent, about 5 minutes more.

Add wine, tomato sauce, parsley, allspice, cinnamon, salt, and pepper and allow sauce to simmer over low heat for 10 minutes. While sauce is simmering put water on to boil for pasta.

Cook pasta noodles according to package directions and drain well. Rinse noodles in colander under cold water to cool them slightly.

Stir in 3 tbsp. breadcrumbs to meat sauce to absorb excess liquid and remove from heat.

Melt 1/2 cup butter in pasta pot and return cooked noodles to the pot. Stir in beaten egg whites and 1 cup of grated cheese and toss lightly, being careful not to break the noodles.

Brush the bottom and sides of the lasagna pan with olive oil. Layer the bottom with half the pasta noodles and press down so that they are somewhat flat.

Add the meat filling in an even layer to the pasta. Top with remaining pasta noodles and flatten top layer as best you can.

Pre-heat the oven to 350 degrees while you prepare the bechamel sauce.

Bechamel Sauce:

Melt butter in a saucepan over low heat. Using a whisk, add flour to melted butter whisking continuously to make a smooth paste or roux. Allow the flour/butter mixture to cook for a minute but do not allow it to brown.

Add warmed milk to mixture in a steady stream, whisking continuously. Simmer over low heat until it thickens but does not boil.

Remove from heat and stir in beaten egg yolks. Add pinch of nutmeg. If sauce still needs to thicken, return to heat and cook over very low heat while continuing to stir.

Bechamel is thicker than gravy but not quite as thick as pudding. It should be somewhere in between. One way to tell if it is thick enough is to dip your wooden spoon in the sauce and draw your finger across the back of the spoon. If the sauce holds a visible line then it is thick enough.

DSC_0007

Pour the bechamel over the pasta noodles making sure to pour sauce down in to the corners as well. I even pull back th sides of the pasta to let some go down the sides. Sprinkle with remaining 1/2 cup of grated Parmesan cheese and bread crumbs if desired.  Bake in 350 degree oven for approximately 45 minutes or until the top is a nice golden color.

tight shot 2

Pan De Yuca con Mantequilla de Guayaba y Chile: Yuca Bread with Cheese and Guava Chile Butter

Standard

yuca bread close up

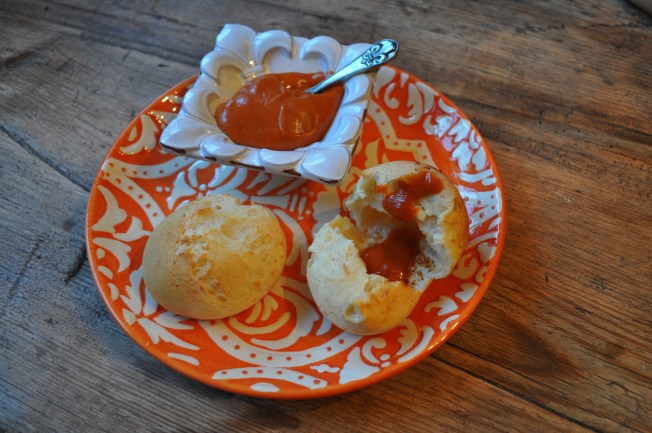
This gluten free recipe is an inspiration by Jose Garces from his fantastic book, The Latin Road Home. He is an Ecuadorian who was raised in Chicago. The book covers foods from Ecuador, Peru, Mexico, Spain & Cuba. This bread is made all over South America, but the recipe varies greatly from country to country.

The Yuca flour is easy to find in most Hispanic Markets, it is often called Casava Flour or Tapioca. The brand I got was Brazilian and reading the label was a challenge. I do read Spanish, but Portuguese, not so much. The ratio of flour to cheese sounds kind of crazy, but it works. Serve the bread hot from the oven for a spongy texture or warm (for a denser interior with the dough settling more and forming air pockets).

yuca bread dough balls

Ingredients:

  • 1 cup yucca flour
  • 1 pound queso fresco finely grated
  • 1 large egg, beaten
  • 1 tsp baking powder
  • 2 Tbs whole milk
  • 1 Tbs butter, melted
  • 1 tsp sea salt
  • 1 tsp granulated raw sugar
  • Guava Chile Butter (recipe follows: optional)

Method:

yuca bread baked

Preheat oven to 375

  • Line a baking sheet with parchment or a Silpat
  • In the bowl of a food processor, combine the flour, baking powder, salt and sugar. Pulse a few times to combine.
  • Put the cheese in the processor, then mix all of the wet ingredients together and pour into the processor bowl while the blade is going. It will form a ball in about a minute, Take it out of the processor and lay it on a yucca floured surface.  Allow to rest a few minutes
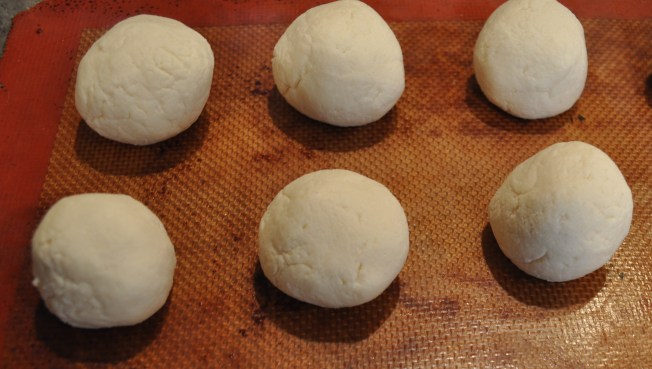
  • Form into a log and cut into 10 equally sized pieces. Roll into balls, These will be slightly larger than a golf ball.
  • Place the balls onto the baking sheet and bake for 20 minutes or till golden brown

Serve warm. To re-heat place in a 200 degree oven for 6-8 minutes, loosely covered with foil

Yuca bread guava chile butter

Guava Chile Butter

Ingredients:

  • 1 21 ounce package or can of guava paste (find at Latin Markets or online)
  • ¼ cup Chinese Black Vinegar
  • ¼ cup Sriracha Sauce
  • 2 Tbs room temperature butter

Method:

  • In the bowl of a food processor, place the guava paste.
  • Pulse a few times to loosen it up.
  • Add the remaining ingredients and pulse till incorporated. This can be stored in the refrigerator for up to two weeks.

I served this with green chile and chicken posole. It would go great with soup, stews, chili or as an appetizer course. I will be sharing the Posole recipe next.

posole

Crab Rellenos: Cangrejo Rellenos

Standard

Crab Rellenos

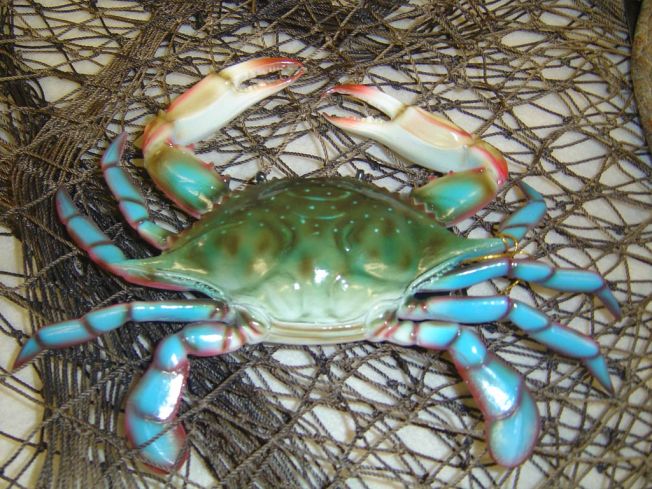
Here in the low country, Blue Crabs abound. But what do you do with all of that crab meat? It is sweet stuff, but not served on the half shell like Dungeness or King Crab. You have to meticulously pick the crab from her tiny shells. So this will be the first in a series of crab adventures. Things you can do with this lovely little Low Country crustacean.

blue-crab-

Day 1:

Make the sauce (below) this can be made up to a week in advance

Make basic filling using 1 pound of crab meat. Here is a primer on how to cook and pick the crabs. You can of course always go to your fish monger and get a pound of crab meat. It is available pasturized in cans. If you buy this, ask for lump meat.

Whip 2 large packages of cream cheese. Add them to the crab and thoroughly blend. Remove 1/3 of this mixture for crab rangoon, tomorrow’s treat.

Ingredients for Relleno Base:

3 ears of grilled Corn on the Cob, cut from the cob

1 cup of grated sharp cheddar, 1 cup of grated jack cheese

1/2 cup of fresh cojita cheese crumbles

2 red onions medium chop, sauteed and caramelized

Add 1 tablespoon of finely chopped garlic into the onions for the last 4 minutes of cooking.

3 green onions finely chopped

1/2 cup slow roasted grape tomatoes cut in quarters

Stir all of this together  

DSC_0010

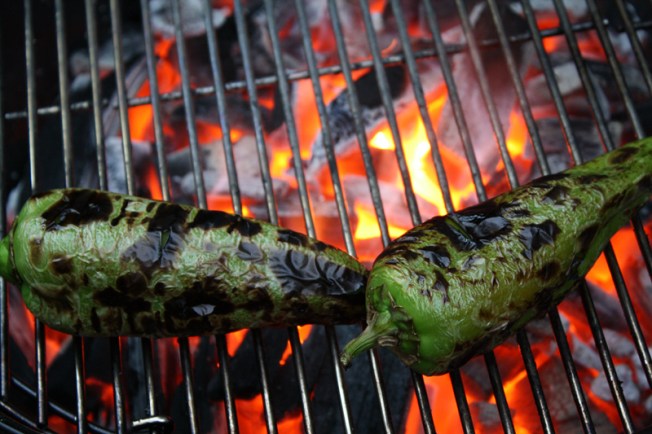
Poblano Peppers (you can also use the smaller, thinner Anaheim Chile), slit clean and roasted then peel. This part can be tricky. I have learned that if you remove the seeds and membranes before putting them on the grill, they come out easier and there is less ripping of the pepper. Do this by making a T shaped cut, horizontally across the top and then one vertical slit from top to bottom. This picture is of Anaheim chiles on the grill. Grilling-Poblano-PeppersWhenever I grill peppers, I always retain few, usually ones that have torn to be used in sauces and fillings, or ropas. Once you roast your peppers on the grill or the open flame of your stove, place them in a plastic bag to steam. The skin will come off much easier then.

DSC_0013


Allow the peppers to cool and then stuff with the filling. Bring the opening as close together as you can. Since there are only two of us and these are big peppers, I only made two. But you can certainly make at least 6 with this amount of filling. I am going to be making some other dishes with the filling.

Relleno coating:

(for two large peppers, double it for 4)

4 eggs, separated

3 Tablespoons cream

salt

flour for dredging

about 1 inch of oil in a large frying pan

roll the peppers through the flour till coated

While the oil is heating, whip the egg whites & salt till they have stiff peaks. Whisk the yolks with the cream. Fold into the whites carefully.

When the oil is about 250 degrees, take a large spoon and put enough of the egg mixture into the oil to make a bed for the pepper. It will spread slightly. lay the pepper down, then cover with more egg mixture. After about 2 minutes carefully turn the pepper and cook on the other side till golden brown. Place on a drip pan and put in a warm oven while you continue the process.

Sauce and plate: You can choose any kind of sauce for this, but this is the one I made ahead of time. The base is something I use for enchiladas and other meals. I added cream and sherry to lighten this one up because the peppers and crab are so delicate.

New Mexico Rojo

1 cup New Mexico Red Chiles

2 tablespoons masa (finely ground)

2 tablespoons butter

2 cups chicken stock

Melt the butter in a saucepan, slowly stir in the masa,  till a roux is formed. Whisk in the chicken broth and simmer. Allow to simmer for a while adding more stock as it thickens.

For the relleno sauce I then added 1 cup of cream and stirred for a while, letting it reduce a bit, then about 1/4 of Spanish sherry. Stir again and then turn off the heat.

Plating: 

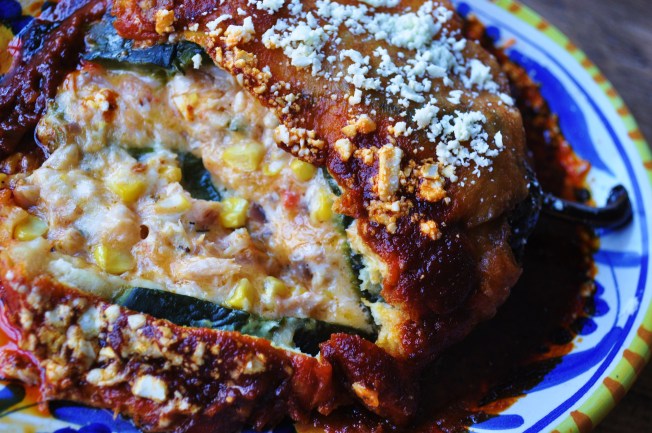
Use a small plate with a good upturn to hold the sauce. Puddle the sauce on the plate, then add the relleno. Squiggle crema on top. Serve with a simple salad of radishes, pea shoots, pepitas and cojita.


interior


Tamale Time

Standard

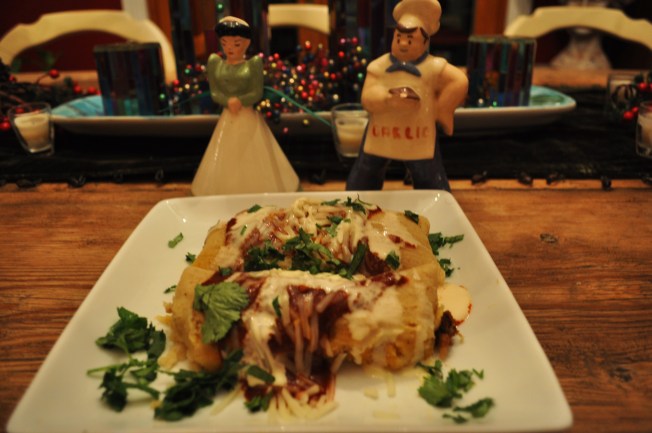
tamales to steam

I make a big batch of tamales several times a year. Yesterday I made a batch of pork and green chile tamales. They are not at all difficult to make and they freeze really well. They are also easy to re-steam. Here is the recipe, but keep in mind the filling can be any number of things, from chiles and cheese to chicken, pork, crab, beef etc. Once you get the rolling technique down you will be able to make them with anything. I often triple this recipe. This recipe makes about 20 good sized tamales. You can make them smaller if you are using them as an appetizer.

filling and husks
You will need: 

Cornhusks or banana leaves for wrappers

String

4 cups of Masa para tamales (this can be found in the Hispanic aisle of most large grocery stores.

1 1/2 cups of home rendered lard (see here how to do it and why) or butter

4 cups of good stock (I used duck stock, but turkey chicken or veal stock works great)

2 tablespoons of baking powder

1 teaspoon of salt

A large pot fitted for steaming. You need a lot of water for this, so raise your steaming basket to allow for a lot of water. This has to boil for 40-60 minutes.

filling

Filling: 

2 tablespoons lard or olive oil
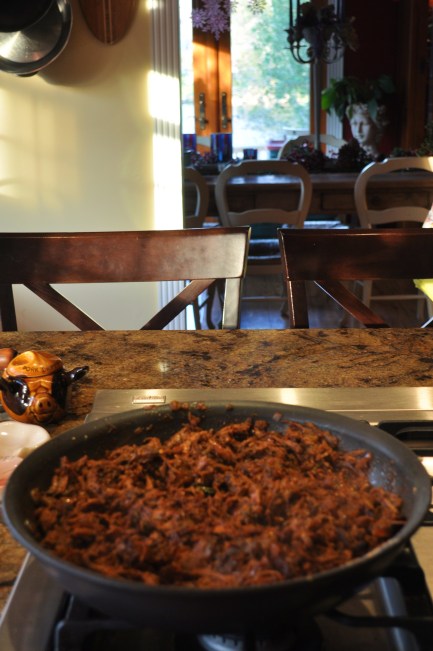
2 cups of well seasoned shredded pork shoulder (see my recipe here for making smoked braised pork shoulder Latin style).

1 onion finely chopped

6-8 roasted poblano chiles seeded, skinned and chopped into 1/2 inch pieces (or in a pinch you can use canned green chiles)

8 cloves of garlic finely minced

1 tablespoon Vik’s Garlic Fix

1 tablespoon Sweet Onion Sugar

1 teaspoon of smoked salt (I make my own, but you can buy it here)

2 tablespoons of Ancho Chile powder

1/2 cup of stock

queso

2 cups of Queso para Quesedillas, para papusas or Jack cheese grated. Any good melting cheese is fine for this.

sauce

Sauce:

4 tablespoons of masa para tamales

4 tablespoons of house rendered lard or butter

1 cup of New Mexico Red or Green Chile powder

3 cups of good stock

Method

Cut lengths of string long enough to wrap the tamales. There are different ways of folding and wrapping the tamales, but this is my favorite way to do it. You can also tie just the ends or you can fold it so there is one side open and don’t even use strings. If you do this, you must place them upright in your steamer. Some people use parchment paper instead of corn husks or banana leaves.

Soak the corn husks in hot water, weight them down so they are immersed. Just before making the tamales, pour out the water. If you are using banana leaves they need to be heated to soften. I blanch them and place them on a wet towel.

In a stand mixer (or bowl with a beater) whip the cold lard for about 3 minutes on high speed till it is fluffy

In a bowl, combine dry ingredients and stir. Fold that and the stock into the lard. Mix until a very moist (but not sticky) dough forms. Chill for about 20 minutes while you prepare the filling.

masa

In a large skillet melt the lard and add onions. Stir and cook till the onions are translucent, add garlic in a hot spot and stir, then add the chiles and spices and finally deglaze the pan with the stock and allow to simmer till the stock is absorbed, then cool.

Set up a station on a table or counter top. You will need the masa, the cheese, the filling, the string and a platter to stack the finished tamales on.

tamale ready to fold

Start with about 1/2 cup of masa on a corn husk. Fold the sides of the husk where you will want the ends of the tamales to be and spread the masa with the folded husk. Do the same thing with the top and bottom of the husk so that the dough is spread out and you end up with a square of dough about 4″ X 4″. You will need to select the husks that are large enough to accommodate this size of tamale. You should have at least an inch of exposed husk on all sides. Place the filling in the center of the masa and lightly push down on it. Then take the bottom end of the husk and roll it forward to meet the end of the dough. Pull the dough forward making the two ends of dough meet. Then fold in the sides and roll the tamale. Place the string under the tamale and tie like a package. Repeat till you have used all of the dough or filling.

tamale folded

In a steam pot, place the tamales on a rack, cover and boil vigorously for 40-50 minutes. While you are steaming make the sauce.

Chile Sauce:

You can use New Mexico Red or Green Chile powder for this. I used red this time, but my next batch of corn, cheese and chile tamales I am making green sauce.

Make a roux of the masa and lard, stir till slightly brown. Add the chile powder and stir, then whisk in the stock. Allow to simmer and thicken slightly. Keep warm till ready to serve.

To serve, open the husks and remove the tamales to a plate. The masa should be soft and supple, yet firm enough to hold together. Spoon the sauce over and add additional cheese, crema and chopped cilantro. Enjoy!

tamales steamed

tamales plated 2


Roasted Tomato & Fresh Mozzarella Ravioli

Standard

Image

Wonderfully easy and fresh Ravioli! So easy 40 minutes from oven to table. You can also roast the tomatoes ahead of time and make this even faster.

The tomatoes are mostly small grape tomatoes, but I tossed in a few others too. The ravioli dough is actually won ton wrappers. I cannot find my ravioli cutters after the move, so I used a biscuit cutter. This recipe serves 2, but you could easily double it.

Ingredients:

  • 1# of ripe cherry or grape tomatoes
  • Olive oil
  • Vik’s Garlic Fix (or fresh garlic minced with a sprinkling of Kosher salt)
  • finely chopped Italian Parsley, Basil and rosemary (about 3 tablespoons total)
  • 8 nice leaves of Italian Parsley and Basil for the raviolis
  • 8 small balls of fresh mozzarella
  • 1 package of wonton wrappers
  • 1 cup of dry vermouth (or chicken stock)
  • Reggiano Parmesan for grating
  • Additional seasoning to taste for the sauce, smoked salt, Vik’s Garlic Fix, coarse black pepper & crushed red pepper.

Cut the tomatoes in half. Place on a cooking sheet with rim. Drizzle with olive oil, Vik’s Garlic Fix, a spring of rosemary leaves and black pepper.

Roast at 350 for 30 minutes

Remove and cool slightly

Image

On a floured counter, lay out 8 wonton wrappers and place one parsley leaf, one basil leaf, one tomato half and one ball of mozzarella ball on each. On 8 other wonton wrappers, brush the egg wash and then place on top of the “loaded” wrappers. Seal carefully and then cut with a ravioli cutter or leave square. Place these on a cookie sheet lined with wax paper and allow to dry a bit. 10 minutes is optional, but 5 is fine.

Image

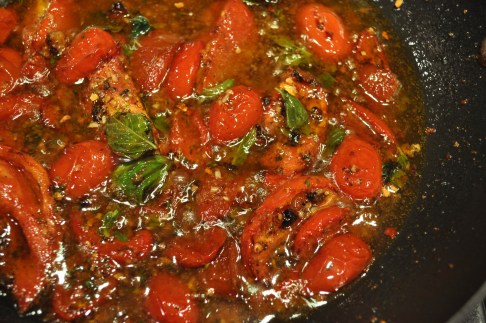
While the ravioli is drying, put remaining tomatoes and juices in a saute pan and simmer with the vermouth and additional basil, parsley and rosemary. Season to taste.

Image

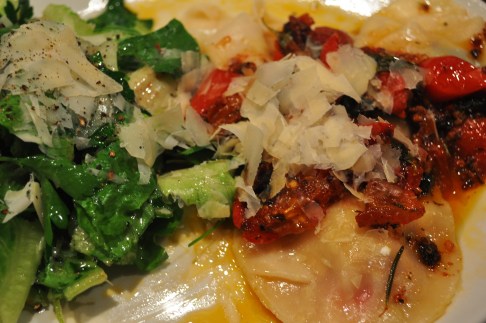
In a pot of boiling water, cook the ravioli for 3-4 minutes in small batches. Use a slotted spoon to plate and cover with sauce and top with cheese.

Image