Tag Archives: Vegetarian

Pomegranate and Blueberry Pancakes

Standard

Pomegranate pancakes 4

These are one of my favorite fall/winter breakfast dishes…. each bite bursts with flavor and they are full of antioxidants too. As soon as my pomegranates are ripe I start making things from them and this is just one of many things I like to do with them. I sometimes make them with sourdough starter, but you can also use buttermilk and flour as I give instructions for here. I use good Vermont Maple Syrup on the side. You can change out the fruit, but I really think this is an amazing combination. Bacon on the side is a perfect compliment. Bring on the Mimosas!

Ingredients:

  • 2 cups self rising flour (White Lily preferred)
  • 2/3 to 1 cup of buttermilk
  • pinch of salt
  • 2 eggs
  • 2 tablespoons of melted butter
  • 1 cup of blueberries
  • 1 cup of pomegranate

DSC_0004

Method:

  • Using a stand mixer blend together all but the fruit. You want a fairly thin consistency, but not as thin as crepe batter. Add more buttermilk or flour as needed. Make a plain test pancake first, it should be about 1/3 of an inch thick.
  • Preheat a griddle and wipe a used butter wrapper on the griddle
  • Test heat by dropping a drop of water on it, it should immediately bounce.
  • Pour two pancakes at a time unless you have a double size griddle.
  • As soon as you have poured them on to the griddle, generously drop berries and pomegranate all over the top of the pancakes.
  • When the pancakes start to have air bubbles, it is time to flip.
  • Continue cooking till the bottom of the pancake is golden. You can lift the edge to check. This should take 1-2 minutes.

Pomegranate pancakes


Easy Tabbouleh (Tabouli)

Standard

Tabouli

This is such a nutritious and delicious thing to have on hand. It can be served with grilled pita bread, rustic breads, slices of radishes, carrots or cucumbers or eaten as a salad on its own. There are a lot of recipes out there, this one is based on a Palestinian version, basically a parsley salad. Chop and stir! This keeps for about a week in the refrigerator. I used fresh and dried parsley to get different levels of flavor.

Ingredients:

  • 1/2 cup fine bulgur wheat, soaked for 2-4 hours in boiling water, then strained
  • 1 pound of grape tomatoes, finely chopped
  • 1 large shallot finely chopped
  • 4 Tbs fresh lemon juice
  • 2 large bunches fresh flat leaf parsley finely chopped
  • 1/2 cup dried parsley 
  • 2 large bunches mint (not peppermint) finely chopped
  • 2 Tbs Baharat seasoning (see below)
  • 1 Tbsp Sumac (more if you prefer)
  • 1/2 cup good olive oil
  • freshly ground black pepper (I use a four peppercorn blend)
  • Sea salt to taste

Baharat Spice Mix

To make spice mix: Toast all but the nutmeg in a dry pan, being careful not to burn. Use a spice grinder or mortar and pestle to grind to a fine powder).  Add the nutmeg and stir. Keeps for 8-10 weeks

To make Tabbouleh:

Add all ingredients in a large bowl and stir. Taste before adding salt and pepper. Serve with additional lemon quarters.

Best Fried Green Tomatoes… Southern Bliss

Standard

Fried Green Tomatoes

I never even thought of Fried Green Tomatoes as a recipe until a few people asked me how to make them. They are super easy and very tasty when done right. My great grandmother used to make them, though hers were made with just flour, not the combo of flour and cornmeal that I use now. This method if dredging, dipping and dredging again is the secret to fried chicken and most any coated fried food. The final dredge changes, anything from seasoned flour to panko, but the method stays the same. In the fall green tomatoes are pulled from the vines before first frost, but here in the south, people treasure them all year and green tomatoes are sold in our farmer’s markets. To keep them from ripening, store in the refrigerator till ready to use. They will keep several weeks. I never refrigerate ripe tomatoes, as that kills the sweetness.

fried green tomatoes

Set up a dredging station:

Pan 1: All Purpose flour

Pan 2 :1 cup of buttermilk 1-2 eggs whisked in

Pan 3: This is where you get a little creative:

Then slice up the green tomatoes about 1/2 inch thick. This thickness allows for a crispy crust and tender interior.

Heat canola or peanut oil to 350 degrees in a frying pan, about 1  1/2 inches deep.

Dredge the tomato slices in the flour, then the buttermilk mixture, making sure that the entire slice is covered in liquid.

Finally dredge the slices in the seasoned flour, making sure that all surfaces are covered.

Place in the frying pan, taking care not to crowd. fry till crispy and golden brown on each side and remove to a rack to drain. Repeat.

They can be served with a remoulade sauce, sweet chile sauce or put them on a BLT! They are even good cold.

Fried Green Tomatoes and Remoulade

Roasted Balsamic Cherries

Standard

Really good cherries are hard to beat for flavor and beauty. This application is something that goes well with duck, pork  or chicken as a side dish, but also is good as a dessert over ice cream. It is super simple. You just have to find some really super cherries! I got mine from Whole Foods just as the cherry season was beginning.  I used bing cherries but any large firm variety would work for this.

Start with firm ripe cherries

Start with firm ripe cherries

1 lb of cherries,(don’t  pit or remove stems)
2 Tablespoons olive oil
1/4 cup good quality balsamic vinegar
Whole nutmeg, grated
Fleur de Sel salt and coarsely ground black pepper to taste 

1. Preheat the oven  to 400°F.

2. Rinse the cherries with cold water and pad them dry gently with a kitchen towel.

3. Place cherries in a bowl and toss them with olive oil and balsamic vinegar, and season generously with salt and pepper.

4. Transfer cherries to a non-reactive baking dish (glass or porcelain are ideal) with the stem standing up. Preferably, the cherries will fit really close to one another. Cover the baking dish with aluminum foil.

5. Roast the cherries in the oven for 20 minutes or until they start to release their juices. Remove the foil, and place the baking dish back in the oven for another 5 minutes to allow the juices caramelize a bit.

6. Remove from the oven and let them sit for 5 minutes. Serve cherries as desired spooning some of the juices over the cherries.

Roasted Cherries

Quinoa and Corn Chowder from Ecuador

Standard

This fabulous recipe was inspired by the book The Latin Road Home by Jose Garces. The book explores the cuisines of Ecuador, Spain, Cuba and Mexico. This is one of the best cookbooks I have picked up in a while. In this recipe, I used fresh corn, but good frozen corn would work too. I also added some seasonings and chiles to the recipe. I make my own achiote paste, but you can buy it in Hispanic or Asian markets. Quinoa is an amazing chenopod, full of protein and fiber.

Quinoa and Corn Chowder

Crema de Quinoa de Zuleta; Quinoa Chowder with Sweet Corn

Ingredients:

2 cups Canola Oil for frying

2 small russet potatoes, peeled and cut into match sticks or cut on a spiral cutter 

Kosher Salt

2 Tbs unsalted butter

1 Tbs extra virgin olive oil.

½ Spanish onion, finely chopped or TSTE dehydrated shallots reconstituted

6 cloves minced garlic or 2 Tablespoons TSTE Vik’s Garlic Fix 

1 Tbs achiote paste (click here for my recipe)

1 ½ cups quinoa (any color)

Kernels cut from 3 ears of corn or 1 cup of thawed and drained frozen white sweet corn

5 cups chicken or vegetable stock

1 cup heavy cream

2 Tbs minced fresh parsley

1 Tbs Aji Amarillo Chile Powder 

4 roasted poblano chiles, seeds and membranes removed, then diced

2 Tbs minced fresh chives (or leave in 1 “ strips)

Sliced Avocado for serving (optional)

Method:

  • Fry the potato strips in 375 degree oil till crispy and drain, season with salt
  • Heat the butter and olive oil in a stockpot over medium heat, cook the onion and garlic till translucent, about 10 minutes.
  • Rinse and strain the quinoa
  • Stir in the achiote paste and cook for another 5 minutes
  • Stir in the quinoa and corn.  And cook, stirring often, till the quinoa is lightly toasted
  • Stir in the roasted poblano chiles

Add the cream and stock and bring to a light boil. Lower the heat to a light simmer,  uncovered till the quinoa is tender and the liquid has reduced by about one quarter, about 45 minutes.

Quinoa and Corn Chowder 2

To serve, fold in the parsley, and top with fried potatoes and chives. Garnish with avocado. This also goes perfectly with the Yuca Cheese Bread and Guava Chile Butter I posted last week.

yuca bread close up

Pan De Yuca con Mantequilla de Guayaba y Chile: Yuca Bread with Cheese and Guava Chile Butter

Standard

yuca bread close up

This gluten free recipe is an inspiration by Jose Garces from his fantastic book, The Latin Road Home. He is an Ecuadorian who was raised in Chicago. The book covers foods from Ecuador, Peru, Mexico, Spain & Cuba. This bread is made all over South America, but the recipe varies greatly from country to country.

The Yuca flour is easy to find in most Hispanic Markets, it is often called Casava Flour or Tapioca. The brand I got was Brazilian and reading the label was a challenge. I do read Spanish, but Portuguese, not so much. The ratio of flour to cheese sounds kind of crazy, but it works. Serve the bread hot from the oven for a spongy texture or warm (for a denser interior with the dough settling more and forming air pockets).

yuca bread dough balls

Ingredients:

  • 1 cup yucca flour
  • 1 pound queso fresco finely grated
  • 1 large egg, beaten
  • 1 tsp baking powder
  • 2 Tbs whole milk
  • 1 Tbs butter, melted
  • 1 tsp sea salt
  • 1 tsp granulated raw sugar
  • Guava Chile Butter (recipe follows: optional)

Method:

yuca bread baked

Preheat oven to 375

  • Line a baking sheet with parchment or a Silpat
  • In the bowl of a food processor, combine the flour, baking powder, salt and sugar. Pulse a few times to combine.
  • Put the cheese in the processor, then mix all of the wet ingredients together and pour into the processor bowl while the blade is going. It will form a ball in about a minute, Take it out of the processor and lay it on a yucca floured surface.  Allow to rest a few minutes
  • Form into a log and cut into 10 equally sized pieces. Roll into balls, These will be slightly larger than a golf ball.
  • Place the balls onto the baking sheet and bake for 20 minutes or till golden brown

Serve warm. To re-heat place in a 200 degree oven for 6-8 minutes, loosely covered with foil

Yuca bread guava chile butter

Guava Chile Butter

Ingredients:

  • 1 21 ounce package or can of guava paste (find at Latin Markets or online)
  • ¼ cup Chinese Black Vinegar
  • ¼ cup Sriracha Sauce
  • 2 Tbs room temperature butter

Method:

  • In the bowl of a food processor, place the guava paste.
  • Pulse a few times to loosen it up.
  • Add the remaining ingredients and pulse till incorporated. This can be stored in the refrigerator for up to two weeks.

I served this with green chile and chicken posole. It would go great with soup, stews, chili or as an appetizer course. I will be sharing the Posole recipe next.

posole

Heart Woodfire Kitchen

Standard

Tucked away off of Folly Road on James Island, Heart Woodfire Kitchen is a very special place. It is fun and hip and the first thing that hits you when you open the door is the sweet deep aroma of wood burning. This touches me tenderly, as I once owned a wood burning oven at my cooking school in Chicago and I miss it so much. The very core of this place is the Valoriani wood burning oven and a wood fired rotisserie grill. It does not stop there. Clever cocktails, local produce, pork and chicken raised in the Low Country, nice wine and beer selections and a creative upscale menu without being pretentious. This is not fast food, not BBQ and not white tablecloth dining, it is great flavorful dining at the mid price level, something we do not have a lot of in Charleston.

We went on a Tuesday night after going to see a film. It was balmy outside, so we opted for outside dining. The restaurant was unusually busy for a Tuesday and it was obvious that this was a bit unexpected for the staff. The assistant manager became our server because they were short staffed and we were very lucky because she was on top of her game and gave us second glasses of wine on the house because the kitchen was jammed. The food was excellent. Full of smoky flavor and interesting textures.

splendi heart woodfire

We started with a small order of one of their “Speidie,” little skewers. cooked close to the flame. We had the Fontina wrapped in prosciutto & balsamic with a wheat berry salad. 2 skewers for just $6, quite the perfect thing to nibble on while you are drinking one of their fabulous cocktails. They offer two other Speidie, one with Beef Short ribs, rosemary oil & almonds and another with Bacon wrapped Chicken Livers & chimichurri. The menu has several other small plates including some interesting soups& salads  that change with the seasons.

We shared  a spinach salad with roasted beets, wheat berries, romaine,onions and a green garlic vinaigrette.  It was crisp and yet warming with the roasted beets. The green garlic vinaigrette was perfect. I would have liked a little piece of their fabulous house made bread to go with it.
spinach salad
My husband ordered the blackened catfish sandwich which comes on one  of their sturdy house made rolls. It was round and he was expecting more of a poor boy style bread, but the flavors were fabulous and the fish was crusty with spices on the exterior and warm, tender and white on the interior, just as it should be. He ordered creamed mustard greens as his side and they were stellar. I had a few bites and we brought the rest home because after a bag of popcorn at the movies we were fuller than we thought we were.

flat bread

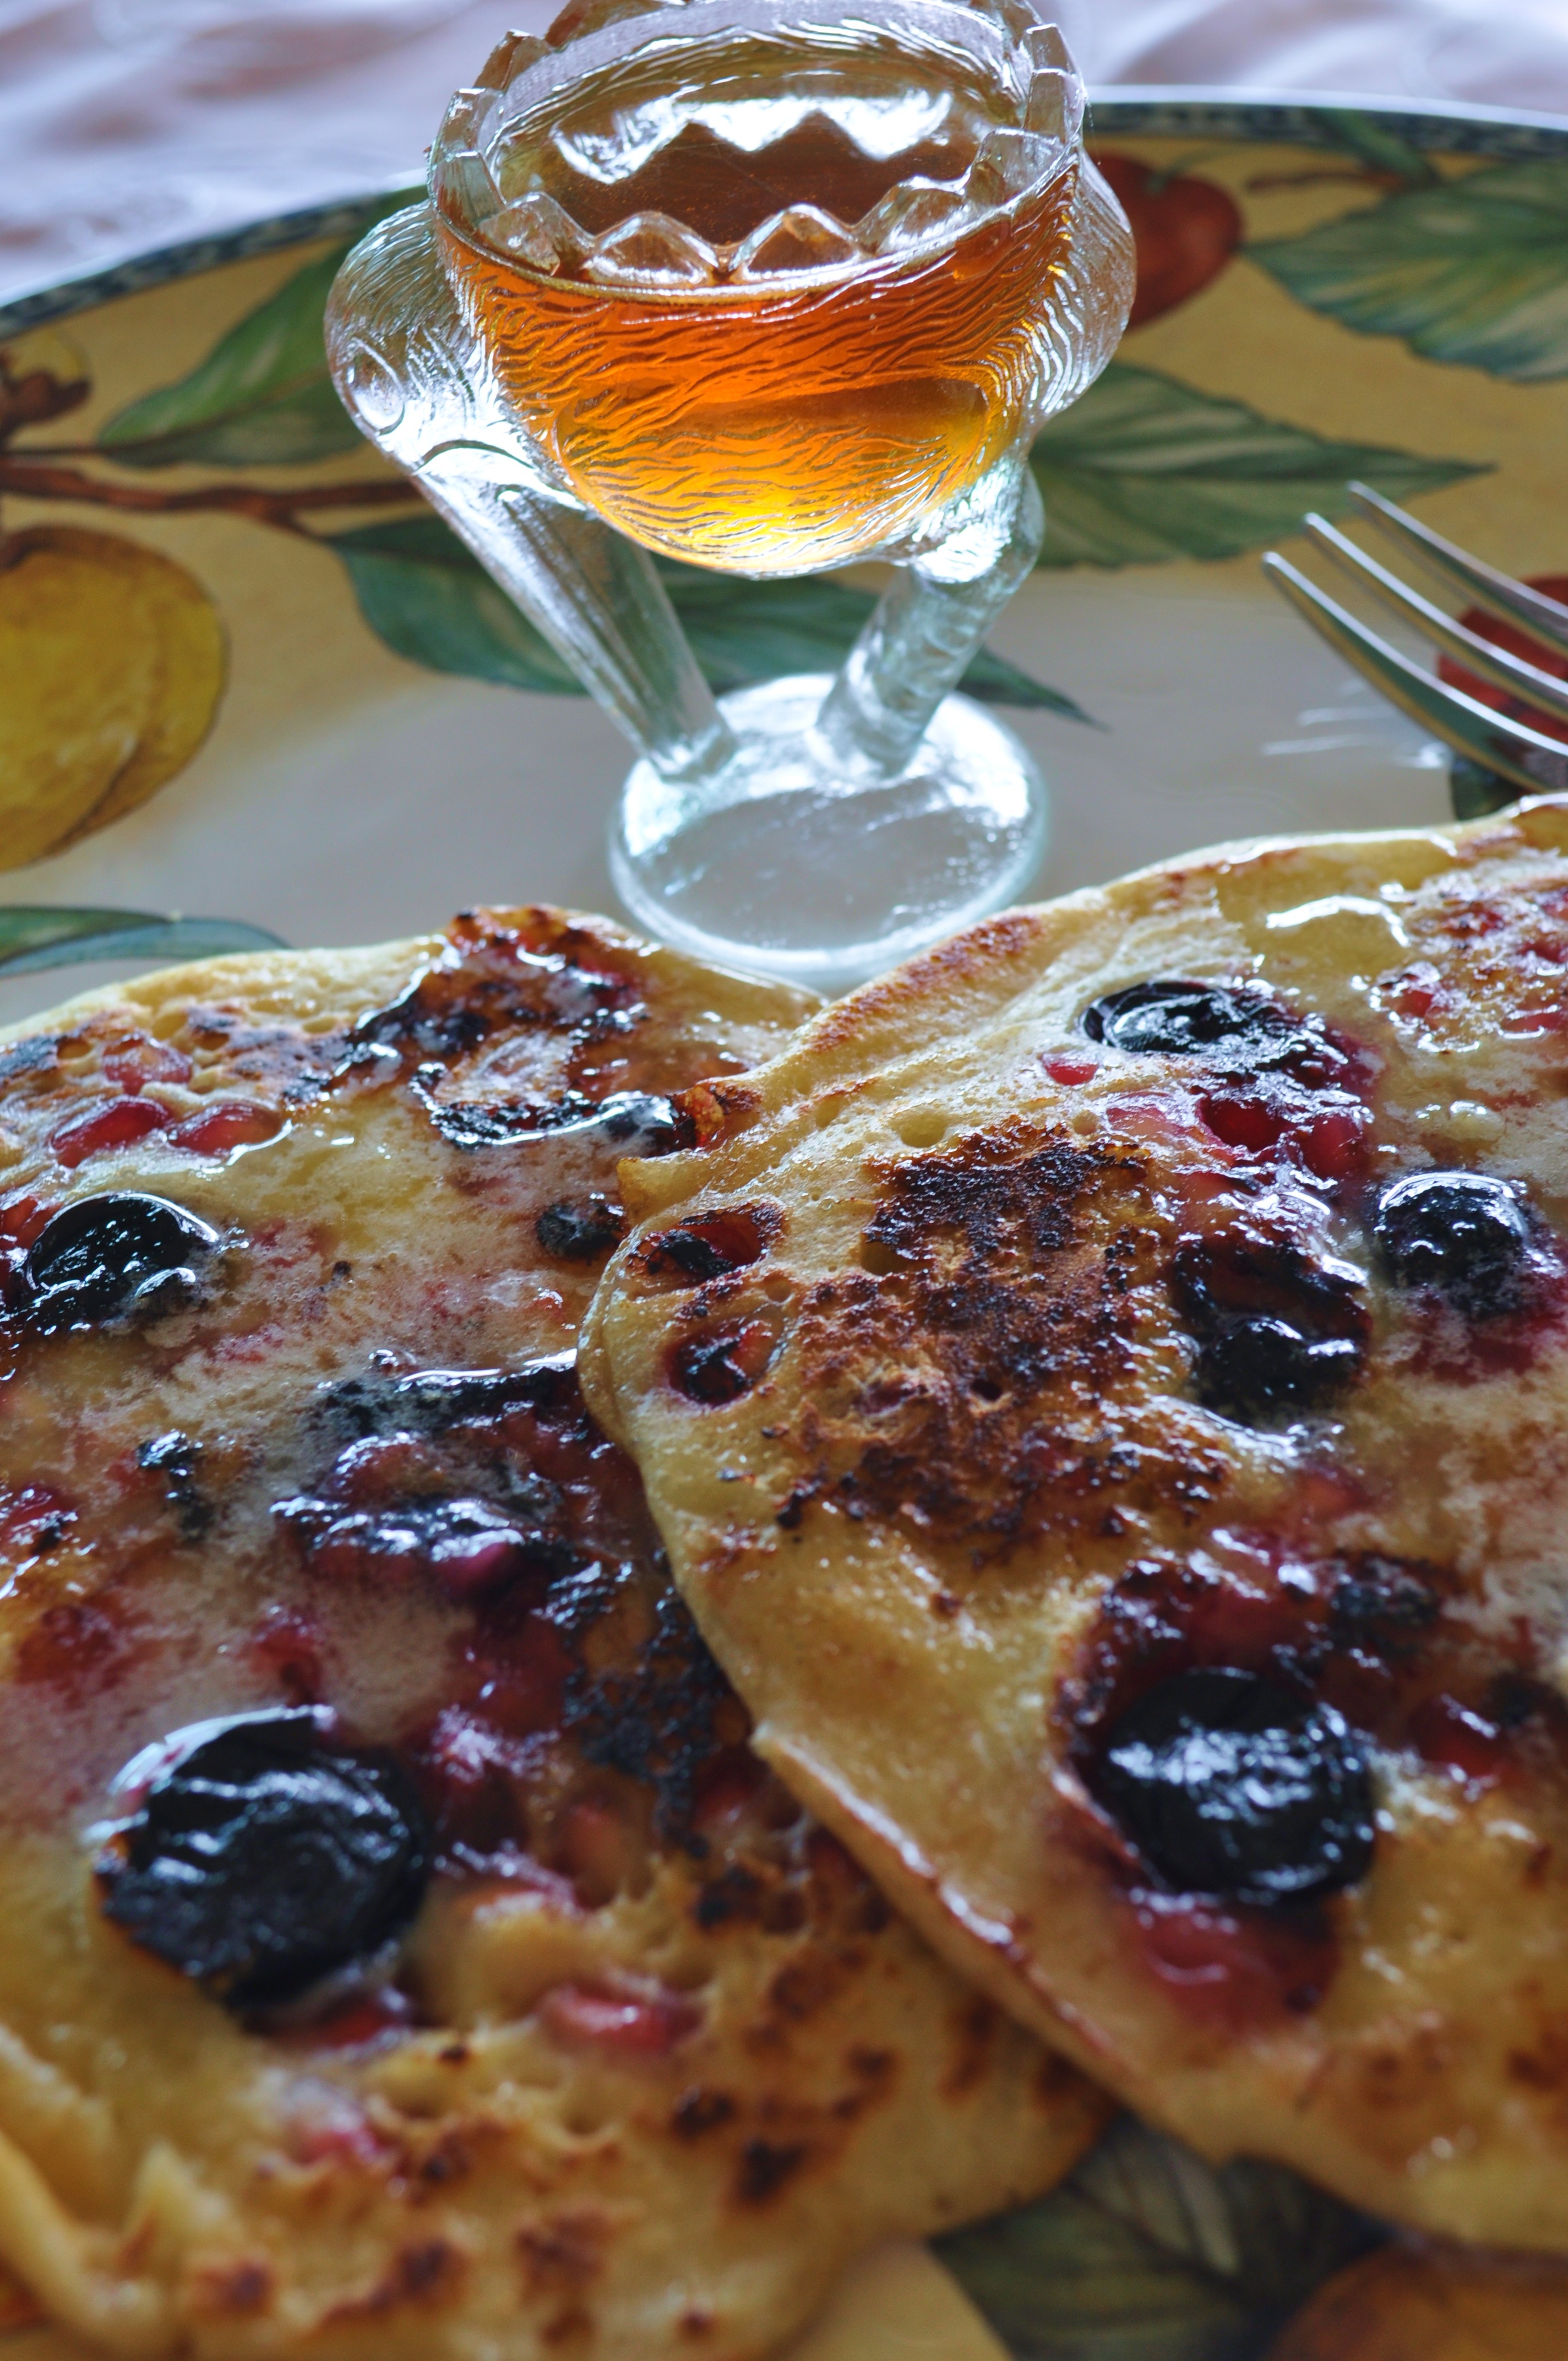
I had one of their signature flat breads, really a crispy little pizza. I opted for the vegetable flat bread with Acorn Squash & Goat Cheese, fennel, cauliflower & arugula pesto.I bought some home and will be having it for lunch today.

We are looking forward to going back and trying some of their local fish from the wood fired oven. We also saw dishes of their baked pasta with four cheeses walk past us and they looked delicious. Their rotisserie chicken looked fantastic and I can only imagine that their Grilled Butcher’s Steak with roasted mushrooms & onions, herb butter is fantastic. The Wood Fired Vegetable Stew, basmati rice, basil pesto, lemon yogurt, toasted almonds & apricots also sounds interesting to me.

Wood fire cooking

They have an extensive lunch menu and what looks like a fun brunch menu. They have happy hour from 4-6 and the offerings are a good way to taste several things at a reduced price.

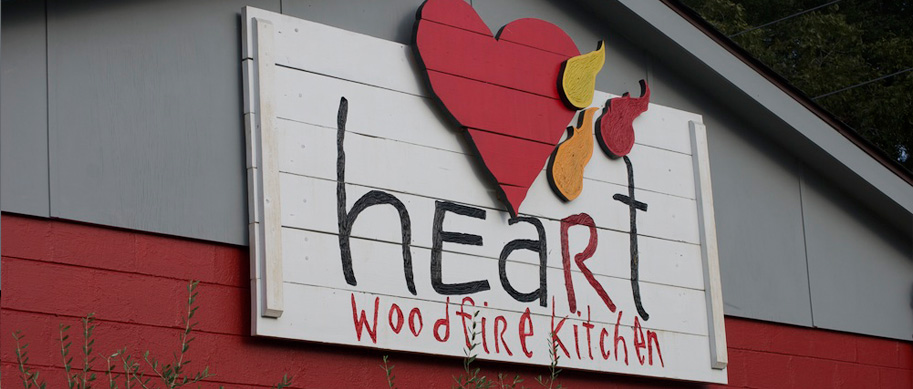
My suggestion? Run don’t walk to this hidden gem of a restaurant. Heart Woodfire Kitchen at 1622 Highland Ave Charleston SC 29412  (843) 718-1539 Look for this sign off of Folly Road:
Heart woodfire

Pepita Granola

Standard

Granola 3

I have been making granola forever, it was probably one of the first foods I made in my adult life as a cook. When I was in cooking school in Cuernavaca, Mexico we had some with pepitas (pumpkin seeds) and since then this has been my favorite recipe. My favorite way to eat granola is on top of fresh Greek style yogurt with some fresh berries or fruit. This is very easy to make and far better than most store bought versions. I do not add dried fruit to the granola until serving as it tends to soften the granola, but this goes nicely with dried fruits as well as fresh. You can also store granola in the freezer to prevent softening.

granola 1
This recipe was adapted from Calle Ocho in New York City.

Pre-heat oven to 375 degrees.

6 Cups old fashioned rolled oats
1 1/2 cups hemp seeds (available at health food stores)
2 Cups unsweetened flaked coconut
1/2 cup vegetable oil (you can use pumpkin seed oil if you have it)
1/2 cup sliced almonds
2 cups green hulled pepitas (pumpkin seeds)
3/4 cup local honey
1/4 cup molasses
1/2 cup maple sugar
sprinkle of nutmeg and cinnamon
pinch of salt

granola 2

Mix all in a very large bowl. Bake on baking sheets lined with parchment or silpat for 15minutes, remove from oven and stir well, then bake for another 10 minutes. If the granola is browned, remove from the oven. If it is not browned, stir and put in for another 5 minutes. When golden brown cool, then place in airtight containers.


Individual Cheese Soufflés

Standard

I like to serve soufflés  in individual dishes. This recipe makes two generous soufflés. I used ramekins that are 5″ across. For dinner parties I like to double this recipe and use smaller ramekins. I served the soufflés with a sauteed chicken breast and brandied cranberry sauce. They would be equally good with a large herb salad. Fresh eggs are important in this recipe. Contrary to rumors, soufflés are actually very easy to make as long as you follow the instructions and do not open the oven while cooking. I also use a ceramic oven liner that retains heat and makes for even baking. Have fun with this!

 Individual Cheese Soufflés

  • 1 teaspoon of Piment d’Espelette (optional; you may find this favorite seasoning of mine difficult to find)
  • 3/4 cup finely grated aged Parmigiano-Reggiano cheese, plus 1/4 cup for topping (used the food processor with blade for grating the cheese)
  • 1 tablespoon unsalted butter, at room temperature and more for coating the ramekins
  •  2 tablespoons all-purpose/plain flour
  •  1/2 of a nutmeg, freshly grated
  •  3/4 teaspoons sea salt
  • 3/4 cup whole milk
  • 1 garlic clove, minced
  •  1 cup finely grated semi-hard cheese such as Comté Manchego, Gruyère. I used Comté and did the food processor method for both the Comté and the Parm (but do make sure that there are no large lumps)
  •  3 large very fresh eggs, separated + one extra white.
  • 1 tsp freshly squeezed lemon juice (I used Meyer lemons, they are my favorite and my tree is loaded)


Preheat the oven to 375˚F with a rack in the middle of the oven. Butter ramekins sprinkle with Parmigiano-Reggiano to coat completely all the way to the top. Shake any excess cheese out into a bowl. Place the molds in the freezer to chill.

Melt the 1 tablespoon butter in a medium saucepan over low heat. Whisk in the Piment d’Espelette , flour, nutmeg, and salt; whisking constantly, cook the flour without browning, about 5 minutes. Whisk in the milk and garlic and continue to cook, whisking, at a low simmer until the mixture is smooth and thick like pudding, about 5 minutes.

Stir in the Comté and any Parmigiano-Reggiano left over from coating the molds and cook, stirring, until the cheese melts. Remove from the heat and stir in the egg yolks, one at a time. Continue stirring vigorously with a rubber spatula to cool.

Whisk the egg whites and lemon juice in a clean bowl. I use my Kitchen Aid Stand Mixer with the  beater on medium-high until they just hold a soft peak. * DO NOT not over-whip the whites, which would give your soufflé a cloudy instead of creamy consistency.

Fold one-fourth of the egg whites into the cheese mixture with a rubber spatula, carefully turning the bowl and mixing gently until the whites are streaked throughout. Add the remaining whites and fold in but don’t overmix, which can deflate the whites.

Transfer the batter to the chilled mold and scatter the remaining  Parmigiano-Reggiano over the top. Place the dish on a baking sheet/tray and set in the oven, decrease the oven temperature to 325˚F/ 165°C/, and bake until the soufflé is golden, puffed, and set but just a touch wobbly inside, 30 to 40 minutes. Serve immediately. After a few minutes a slight deflation is normal, this is why they must be served immediately for the most impact. Enjoy!

Squash Blossoms

Standard

Image

Squash or pumpkin blossoms offer up multiple opportunities. While in cooking school in Mexico, we used them as a filling ingredient for quesedillas, empanadas and tacos. They were also tossed in salads and soups for color and nutrition. Of course they are also lovely when filled and fried or baked. Squash blossoms are a unique ingredient. Unless you have a big patch of squash or pumpkins, you are at the whim of the farmer who brings these highly perishable ingredient to market. At the Charleston Farmer’s Market yesterday, I spied a little box of the blooms and grabbed it. My mind was swimming with filling ideas as we drove home. I decided on some queso fresco that I bought at a small Hispanic market on John’s Island with herbs and peppers & a little mascarpone for smoothness.

Image

The recipe:

Ingredients

10-12 squash blossoms

1/2 cup queso fresco ( you can also use a creamy feta) allow it to warm up to room temperature

1 jalapeno or hotter pepper if you want more spice cut into small pieces

3 tablespoons mascarpone or cream cheese

a hand full of grated jack cheese

1 Tablespoon TSTE Vik’s Garlic Fix

1 Tablespoon of TSTE Aleppo chile

6 sprigs of cilantro

salt and pepper to taste

For batter:

1 1/2 cups flour

1 can or bottle of beer

salt and pepper

Method

About 2 hours before you plan to serve, mix the beer and flour together with salt and pepper. Cover and leave on the counter.

Clean blossoms by brushing off any soil, do not run under water. Pull out the stamen.

For filling:

Place the cheeses, cilantro, Vik’s Garlic Fix, aleppo pepper, jalapeno and salt and pepper in the small bowl of a food processor. This can also be done by hand, but if you are doing it that way, you will need to finely chop the pepper and cilantro.

Pulse until the filling is smooth. Using a spatula, fill a small zip lock bag. Push all of the filling down so that there is no air in the bag. Just before filling cut a small piece of the corner off and pipe the filling into the blossom, carefully wrapping the petals around the filling. Leave the top 1/2 inch unfilled and twist to enclose the filling. Refrigerate.

In a large pot or fryer heat peanut or canola oil (at least 3 inches) to 375 degrees.

Image

Put a few stuffed blossoms into the batter and then place carefully into the hot oil. After about a minute of frying, turn the blossoms and allow them to fry till golden. Remove with a spider and drain. Serve immediately.

ImageYou can find another post of mine about squash blossoms made with sourdough batter here on my Hawaii blog.