Jan31
Monthly Archives: January 2013
Jan31
Perfect French Fries
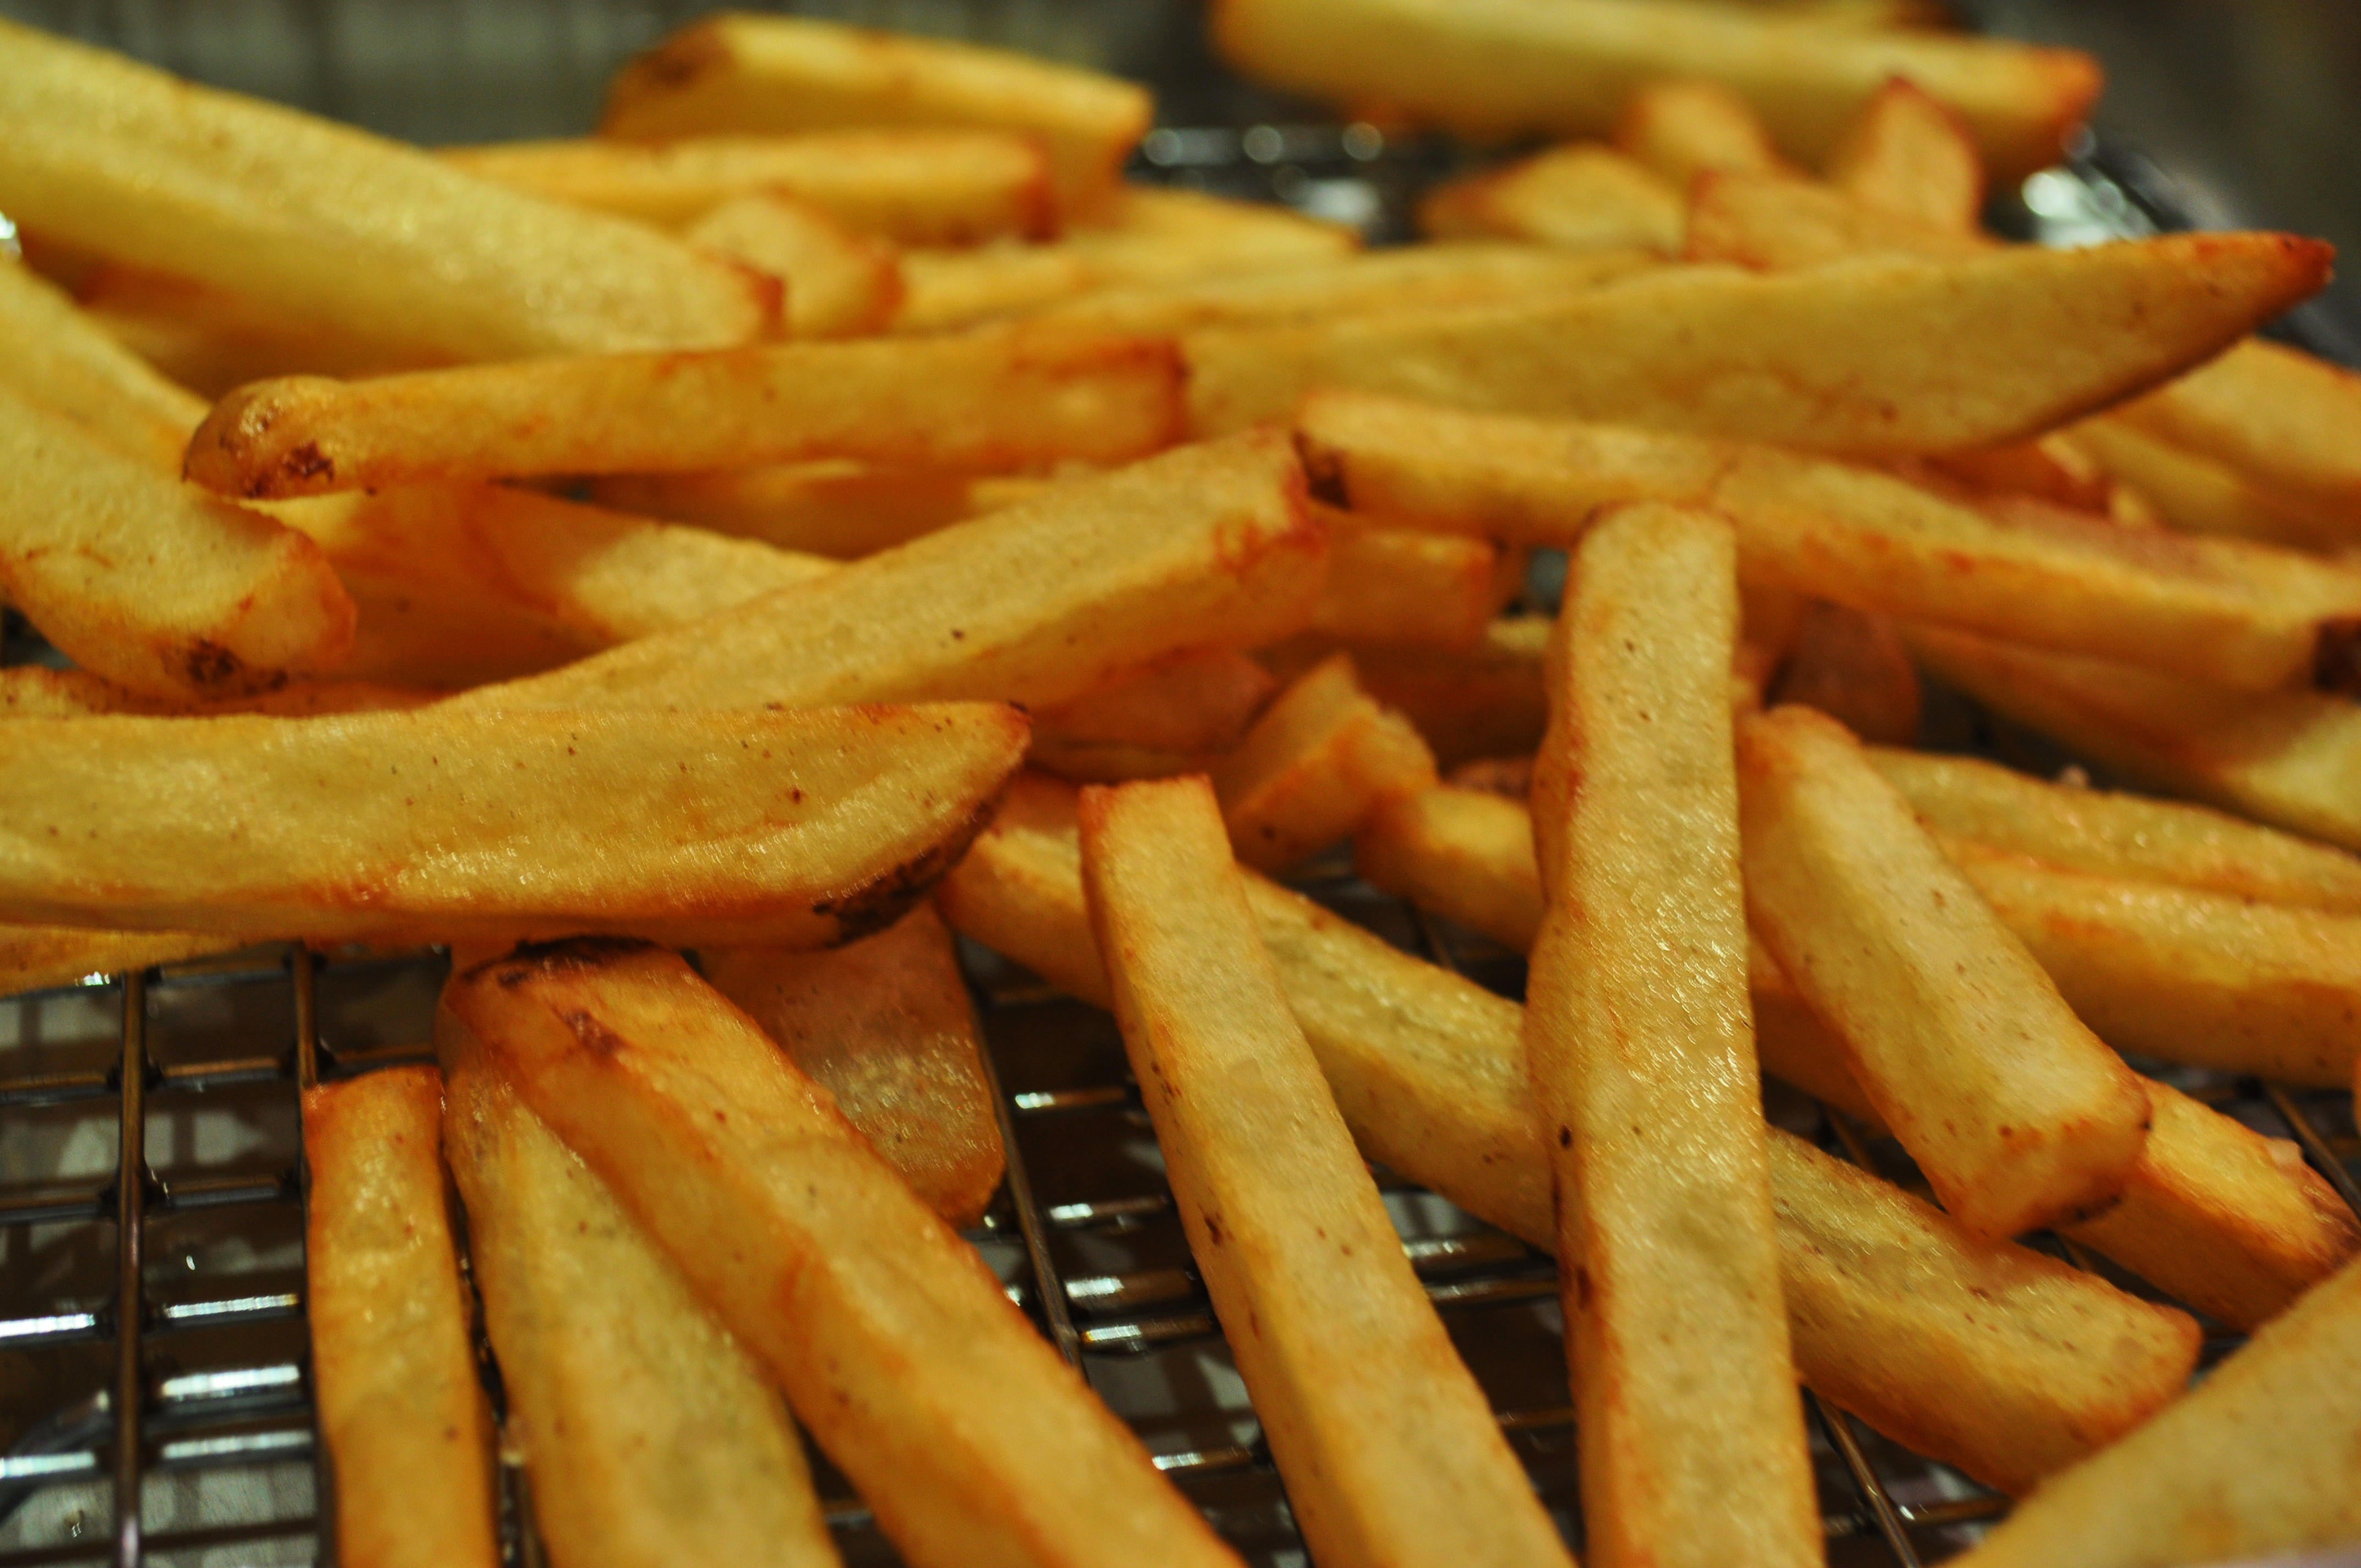
I love French fries. I am constantly seeking a way to make the best ones. Sometimes I like them thin and crispy, sometimes thick and pillowy light inside (best done by roasting at a high temp.). Most often like Goldilocks, I like them “just right.” That means that they are medium cut fries, a little crispy on the outside and soft on the outside, full of potato flavor, not the grease they were cooked in. I like fries cooked in duck fat, but that is not always something I have an abundance of. Here is the method, it is simple and only requires a large pot (best for keeping splatters contained) a deep thermometer used for frying or cheese making, a spider (or other mesh spoon to retrieve your fries and some good quality canola oil. The thermometer is the only thing you may need to go out and buy. Here is an example. You need this because you will need to control the temperature of the oil.
Ingredients:
Russet Potatoes, well washed
Canola Oil at least 3 ” deep
Smoked or Kosher Salt
Method:
- Cut the ends off of the potatoes and then the rounded edges. lay flat and cut into 1/2 ” strips. Place in salted water till finished cutting.
- Preheat the oil to 250 degrees.
- Use either a salad spinner or a dish cloth to completely dry the fries. Once the oil is ready place fries into the oil. You should not be crowding them, you may need to do this in batches.
- Cook until they start to look slightly golden, about 4 minutes, making sure that the oil temperature stays at 250.
- Carefully remove to a straining tray (cookie sheet or steam pan) with a rack. I say carefully because the potatoes are very tender at this point and can easily tear.
- Bring the heat of the oil to 365 degrees.
- Add the potatoes in batches and allow to cook till they are perfectly golden with a subtle bit of brown on the edges. Remove to the draining tray again and salt IMMEDIATELY. Serve right away with home made mayonnaise, BBQ sauce or ketchup.

Jan29
Meyer Lemon Focaccia
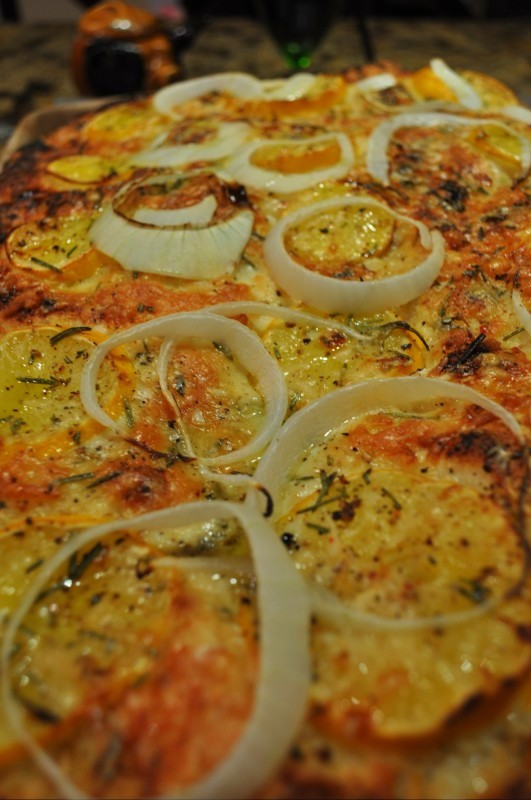
It is Meyer Lemon season. I have been in love with Meyer Lemons since I was a little girl. My great grandmother had an ever bearing Meyer. Coming from a citrus family has advantages. I wonder how that 60+ year old tree in Glendora, California is doing now. I do lots with the lemons on my tree and those I buy to supplement my habit. Here is what I did with some of them yesterday.
Meyer Lemon Focaccia
Ingredients:
Makes 1 focaccia.
- 1 package (1/4 ounce) instant yeast or 2 1/2 teaspoons if you use bulk
- 5 cups all-purpose flour, preferably organic
- 2 1/2 teaspoons sea salt
- Olive oil, for bowl and baking sheet
- 1/2 cup mozzarella or pecorino toscano thinly shredded
- 2 lemons, very thinly sliced crosswise
- about a tablespoon of fresh rosemary
- 1-2 meyer lemons sliced thinly and seeded
- Parmigiano Reggiano cheese to grate over the top
- 1/4 teaspoon crushed red pepper (more if you like a kick)
- thinly sliced sweet onion
3-4 tablespoons extra-virgin olive oil (I use smoked)
*Note: It is best to use very fresh lemons for this, as older lemons rinds become difficult to chew.

Method:
- In a large bowl, or in a bowl of a stand mixer, combine yeast and 2 1/2 cups flour with 2 cups water; whisk to combine. Let stand 15 minutes.
- Add remaining 2 1/2 cups flour and salt; mix until well combined. Change to the dough hook if using a stand mixer. If using the mixer, knead with the mixer. If doing by hand, turn dough out onto a lightly floured work surface; knead until wet and tacky, but not sticky, 8 to 10 minutes. Transfer to a well-oiled bowl and cover with plastic wrap. Let stand until doubled in size, 3 1/2 to 4 hours.

- Scatter semolina on a large rimmed baking sheet and press dough evenly into baking sheet. Let rise until puffy, about 1 hour.
- Preheat oven to 500 degrees.
- “Dimple the dough with your fingers Drizzle some olive oil on the dough. Cover dough lightly with Pecorino or Mozzarella and lemon slices, then sprinkle with rosemary and pepper; drizzle with more extra-virgin olive oil. Gate a little Parm over the top.


- Transfer to oven and bake for 15 minutes. Rotate baking sheet, and continue baking until lemons and crust are golden brown, about 15 minutes more.

- Remove bread from baking sheet and transfer to a wire rack to cool at least 10 minutes before serving.


Jan26
New England Clam Chowder with four Potatoes
Great post from Back Road Journal…. New England Clam Chowder with four kinds of potatoes.
Jan25
Tamale Time
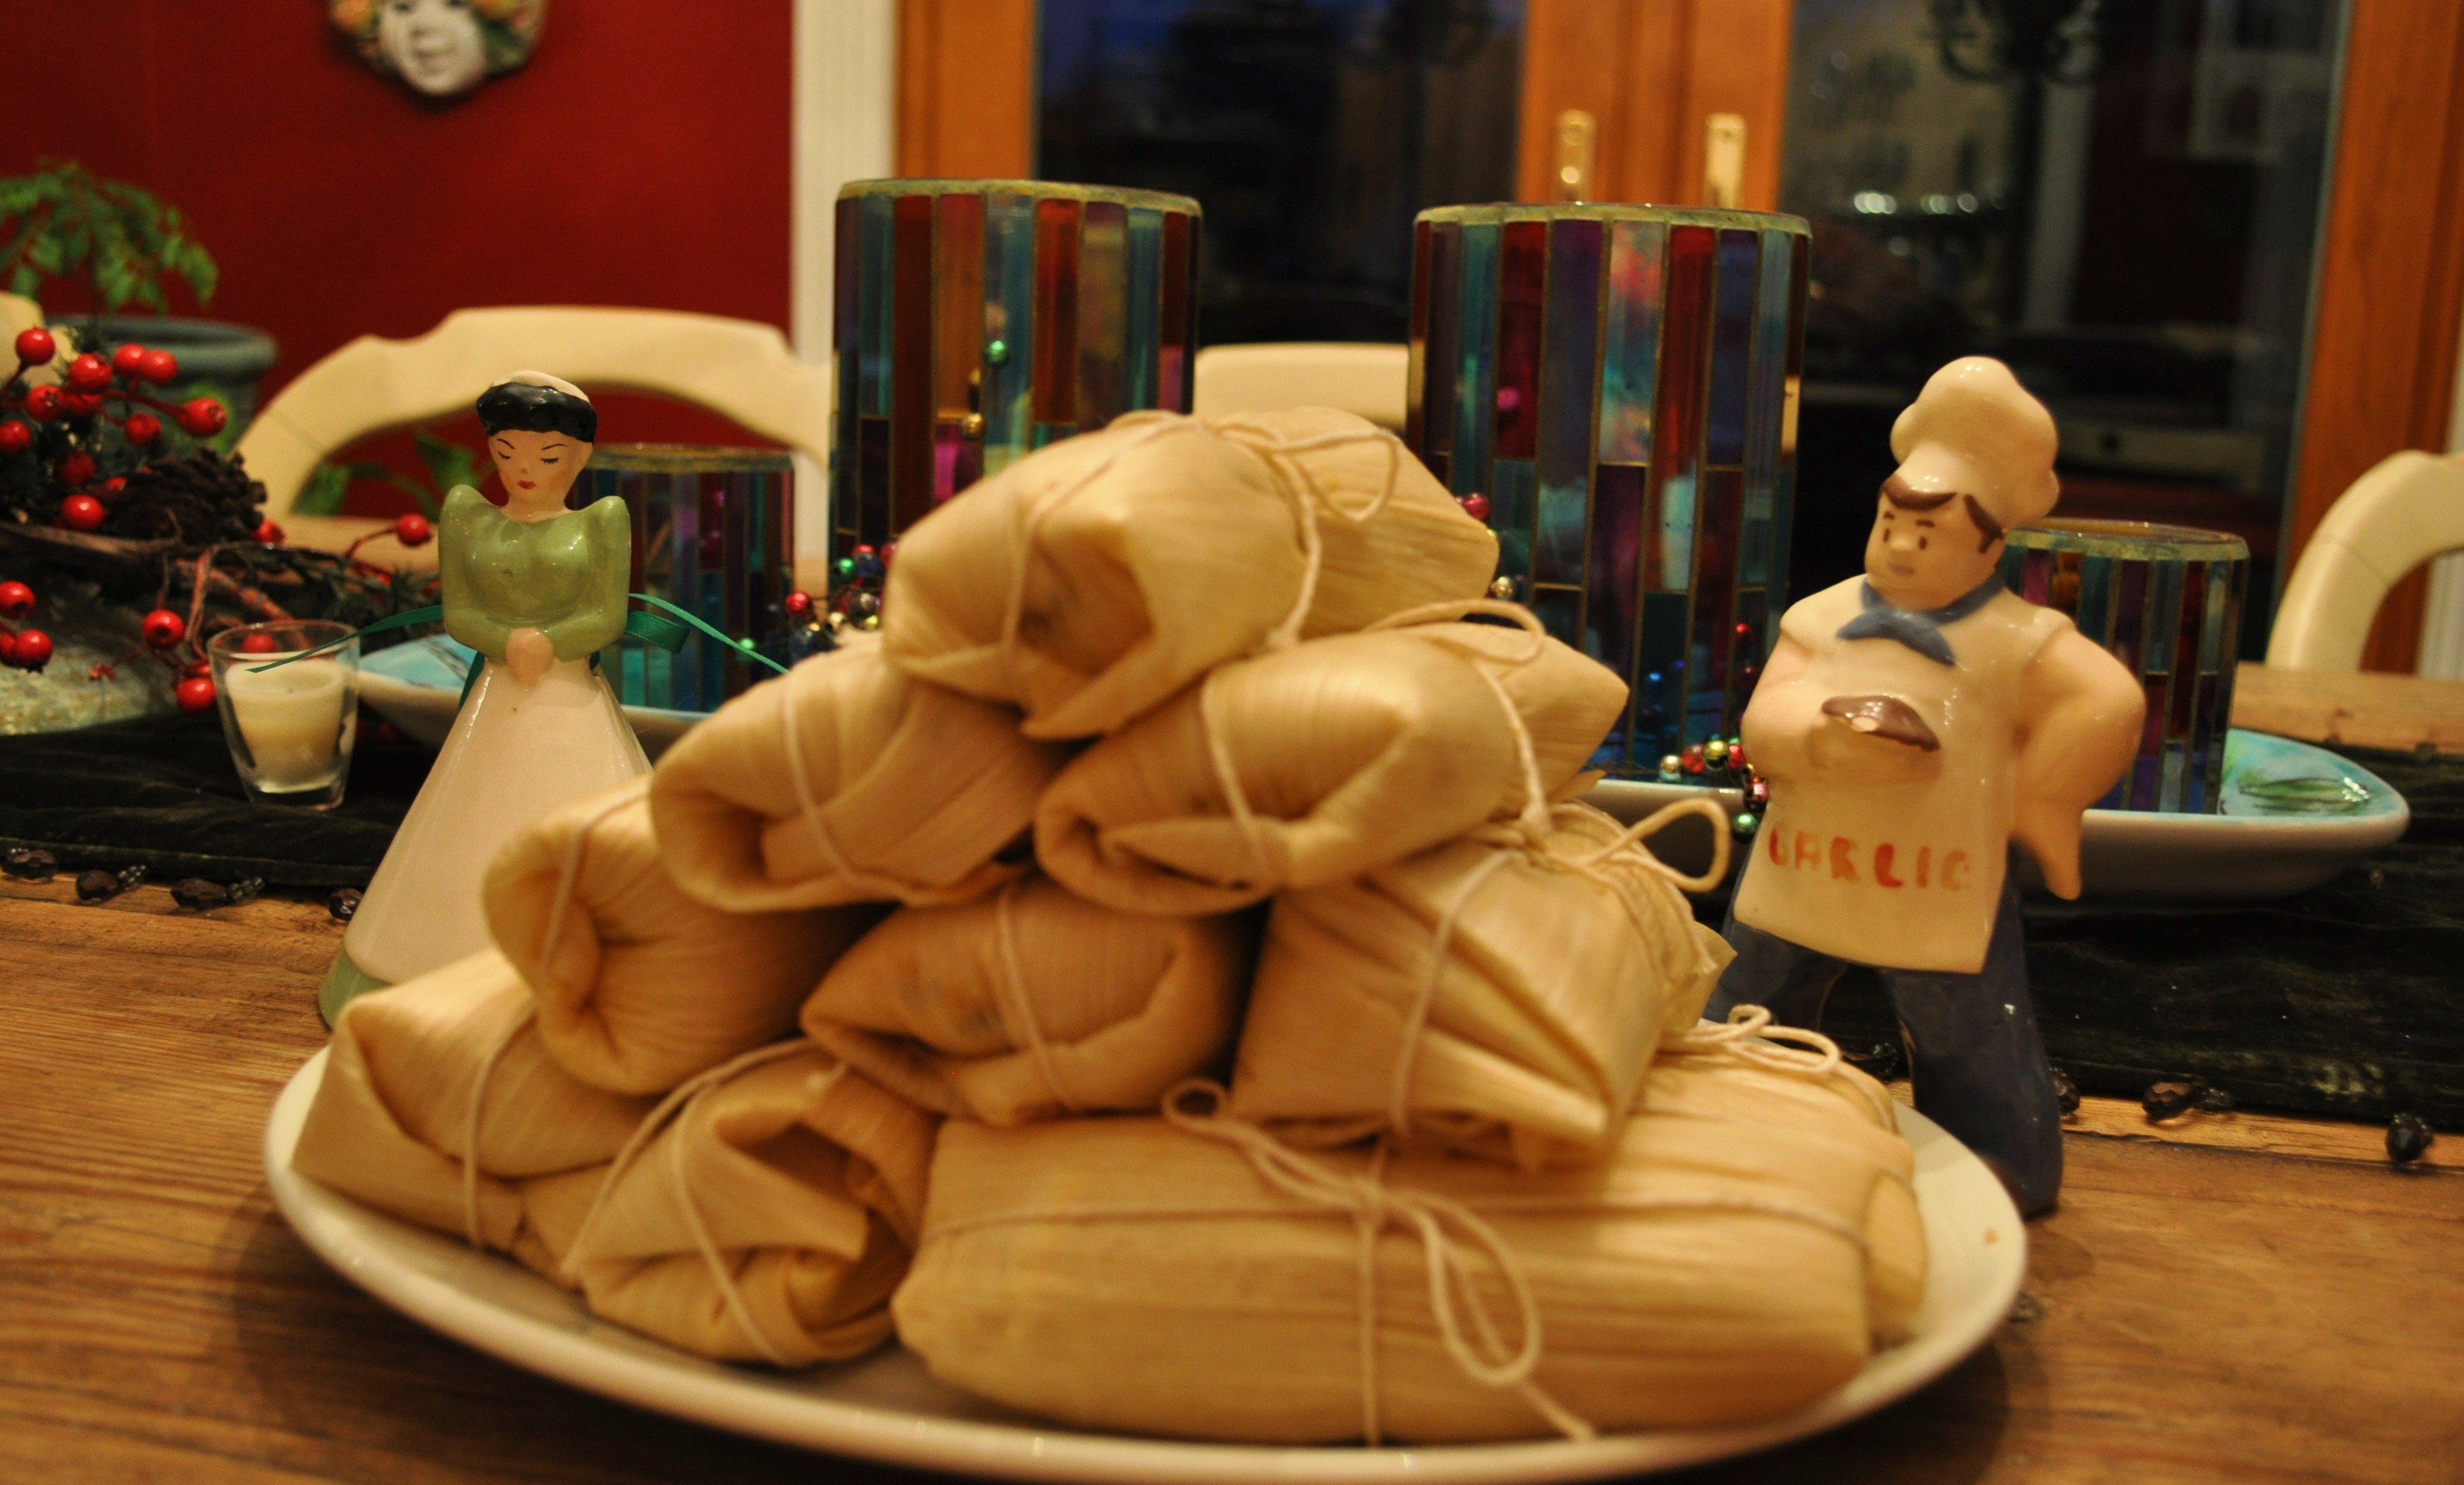
I make a big batch of tamales several times a year. Yesterday I made a batch of pork and green chile tamales. They are not at all difficult to make and they freeze really well. They are also easy to re-steam. Here is the recipe, but keep in mind the filling can be any number of things, from chiles and cheese to chicken, pork, crab, beef etc. Once you get the rolling technique down you will be able to make them with anything. I often triple this recipe. This recipe makes about 20 good sized tamales. You can make them smaller if you are using them as an appetizer.

You will need:
Cornhusks or banana leaves for wrappers
String
4 cups of Masa para tamales (this can be found in the Hispanic aisle of most large grocery stores.
1 1/2 cups of home rendered lard (see here how to do it and why) or butter
4 cups of good stock (I used duck stock, but turkey chicken or veal stock works great)
2 tablespoons of baking powder
1 teaspoon of salt
A large pot fitted for steaming. You need a lot of water for this, so raise your steaming basket to allow for a lot of water. This has to boil for 40-60 minutes.

Filling:
2 tablespoons lard or olive oil
2 cups of well seasoned shredded pork shoulder (see my recipe here for making smoked braised pork shoulder Latin style).
1 onion finely chopped
6-8 roasted poblano chiles seeded, skinned and chopped into 1/2 inch pieces (or in a pinch you can use canned green chiles)
8 cloves of garlic finely minced
1 tablespoon Vik’s Garlic Fix
1 tablespoon Sweet Onion Sugar
1 teaspoon of smoked salt (I make my own, but you can buy it here)
2 tablespoons of Ancho Chile powder
1/2 cup of stock

2 cups of Queso para Quesedillas, para papusas or Jack cheese grated. Any good melting cheese is fine for this.

Sauce:
4 tablespoons of masa para tamales
4 tablespoons of house rendered lard or butter
1 cup of New Mexico Red or Green Chile powder
3 cups of good stock
Method
Cut lengths of string long enough to wrap the tamales. There are different ways of folding and wrapping the tamales, but this is my favorite way to do it. You can also tie just the ends or you can fold it so there is one side open and don’t even use strings. If you do this, you must place them upright in your steamer. Some people use parchment paper instead of corn husks or banana leaves.
Soak the corn husks in hot water, weight them down so they are immersed. Just before making the tamales, pour out the water. If you are using banana leaves they need to be heated to soften. I blanch them and place them on a wet towel.
In a stand mixer (or bowl with a beater) whip the cold lard for about 3 minutes on high speed till it is fluffy
In a bowl, combine dry ingredients and stir. Fold that and the stock into the lard. Mix until a very moist (but not sticky) dough forms. Chill for about 20 minutes while you prepare the filling.

In a large skillet melt the lard and add onions. Stir and cook till the onions are translucent, add garlic in a hot spot and stir, then add the chiles and spices and finally deglaze the pan with the stock and allow to simmer till the stock is absorbed, then cool.
Set up a station on a table or counter top. You will need the masa, the cheese, the filling, the string and a platter to stack the finished tamales on.

Start with about 1/2 cup of masa on a corn husk. Fold the sides of the husk where you will want the ends of the tamales to be and spread the masa with the folded husk. Do the same thing with the top and bottom of the husk so that the dough is spread out and you end up with a square of dough about 4″ X 4″. You will need to select the husks that are large enough to accommodate this size of tamale. You should have at least an inch of exposed husk on all sides. Place the filling in the center of the masa and lightly push down on it. Then take the bottom end of the husk and roll it forward to meet the end of the dough. Pull the dough forward making the two ends of dough meet. Then fold in the sides and roll the tamale. Place the string under the tamale and tie like a package. Repeat till you have used all of the dough or filling.

In a steam pot, place the tamales on a rack, cover and boil vigorously for 40-50 minutes. While you are steaming make the sauce.
Chile Sauce:
You can use New Mexico Red or Green Chile powder for this. I used red this time, but my next batch of corn, cheese and chile tamales I am making green sauce.
Make a roux of the masa and lard, stir till slightly brown. Add the chile powder and stir, then whisk in the stock. Allow to simmer and thicken slightly. Keep warm till ready to serve.
To serve, open the husks and remove the tamales to a plate. The masa should be soft and supple, yet firm enough to hold together. Spoon the sauce over and add additional cheese, crema and chopped cilantro. Enjoy!


Jan22
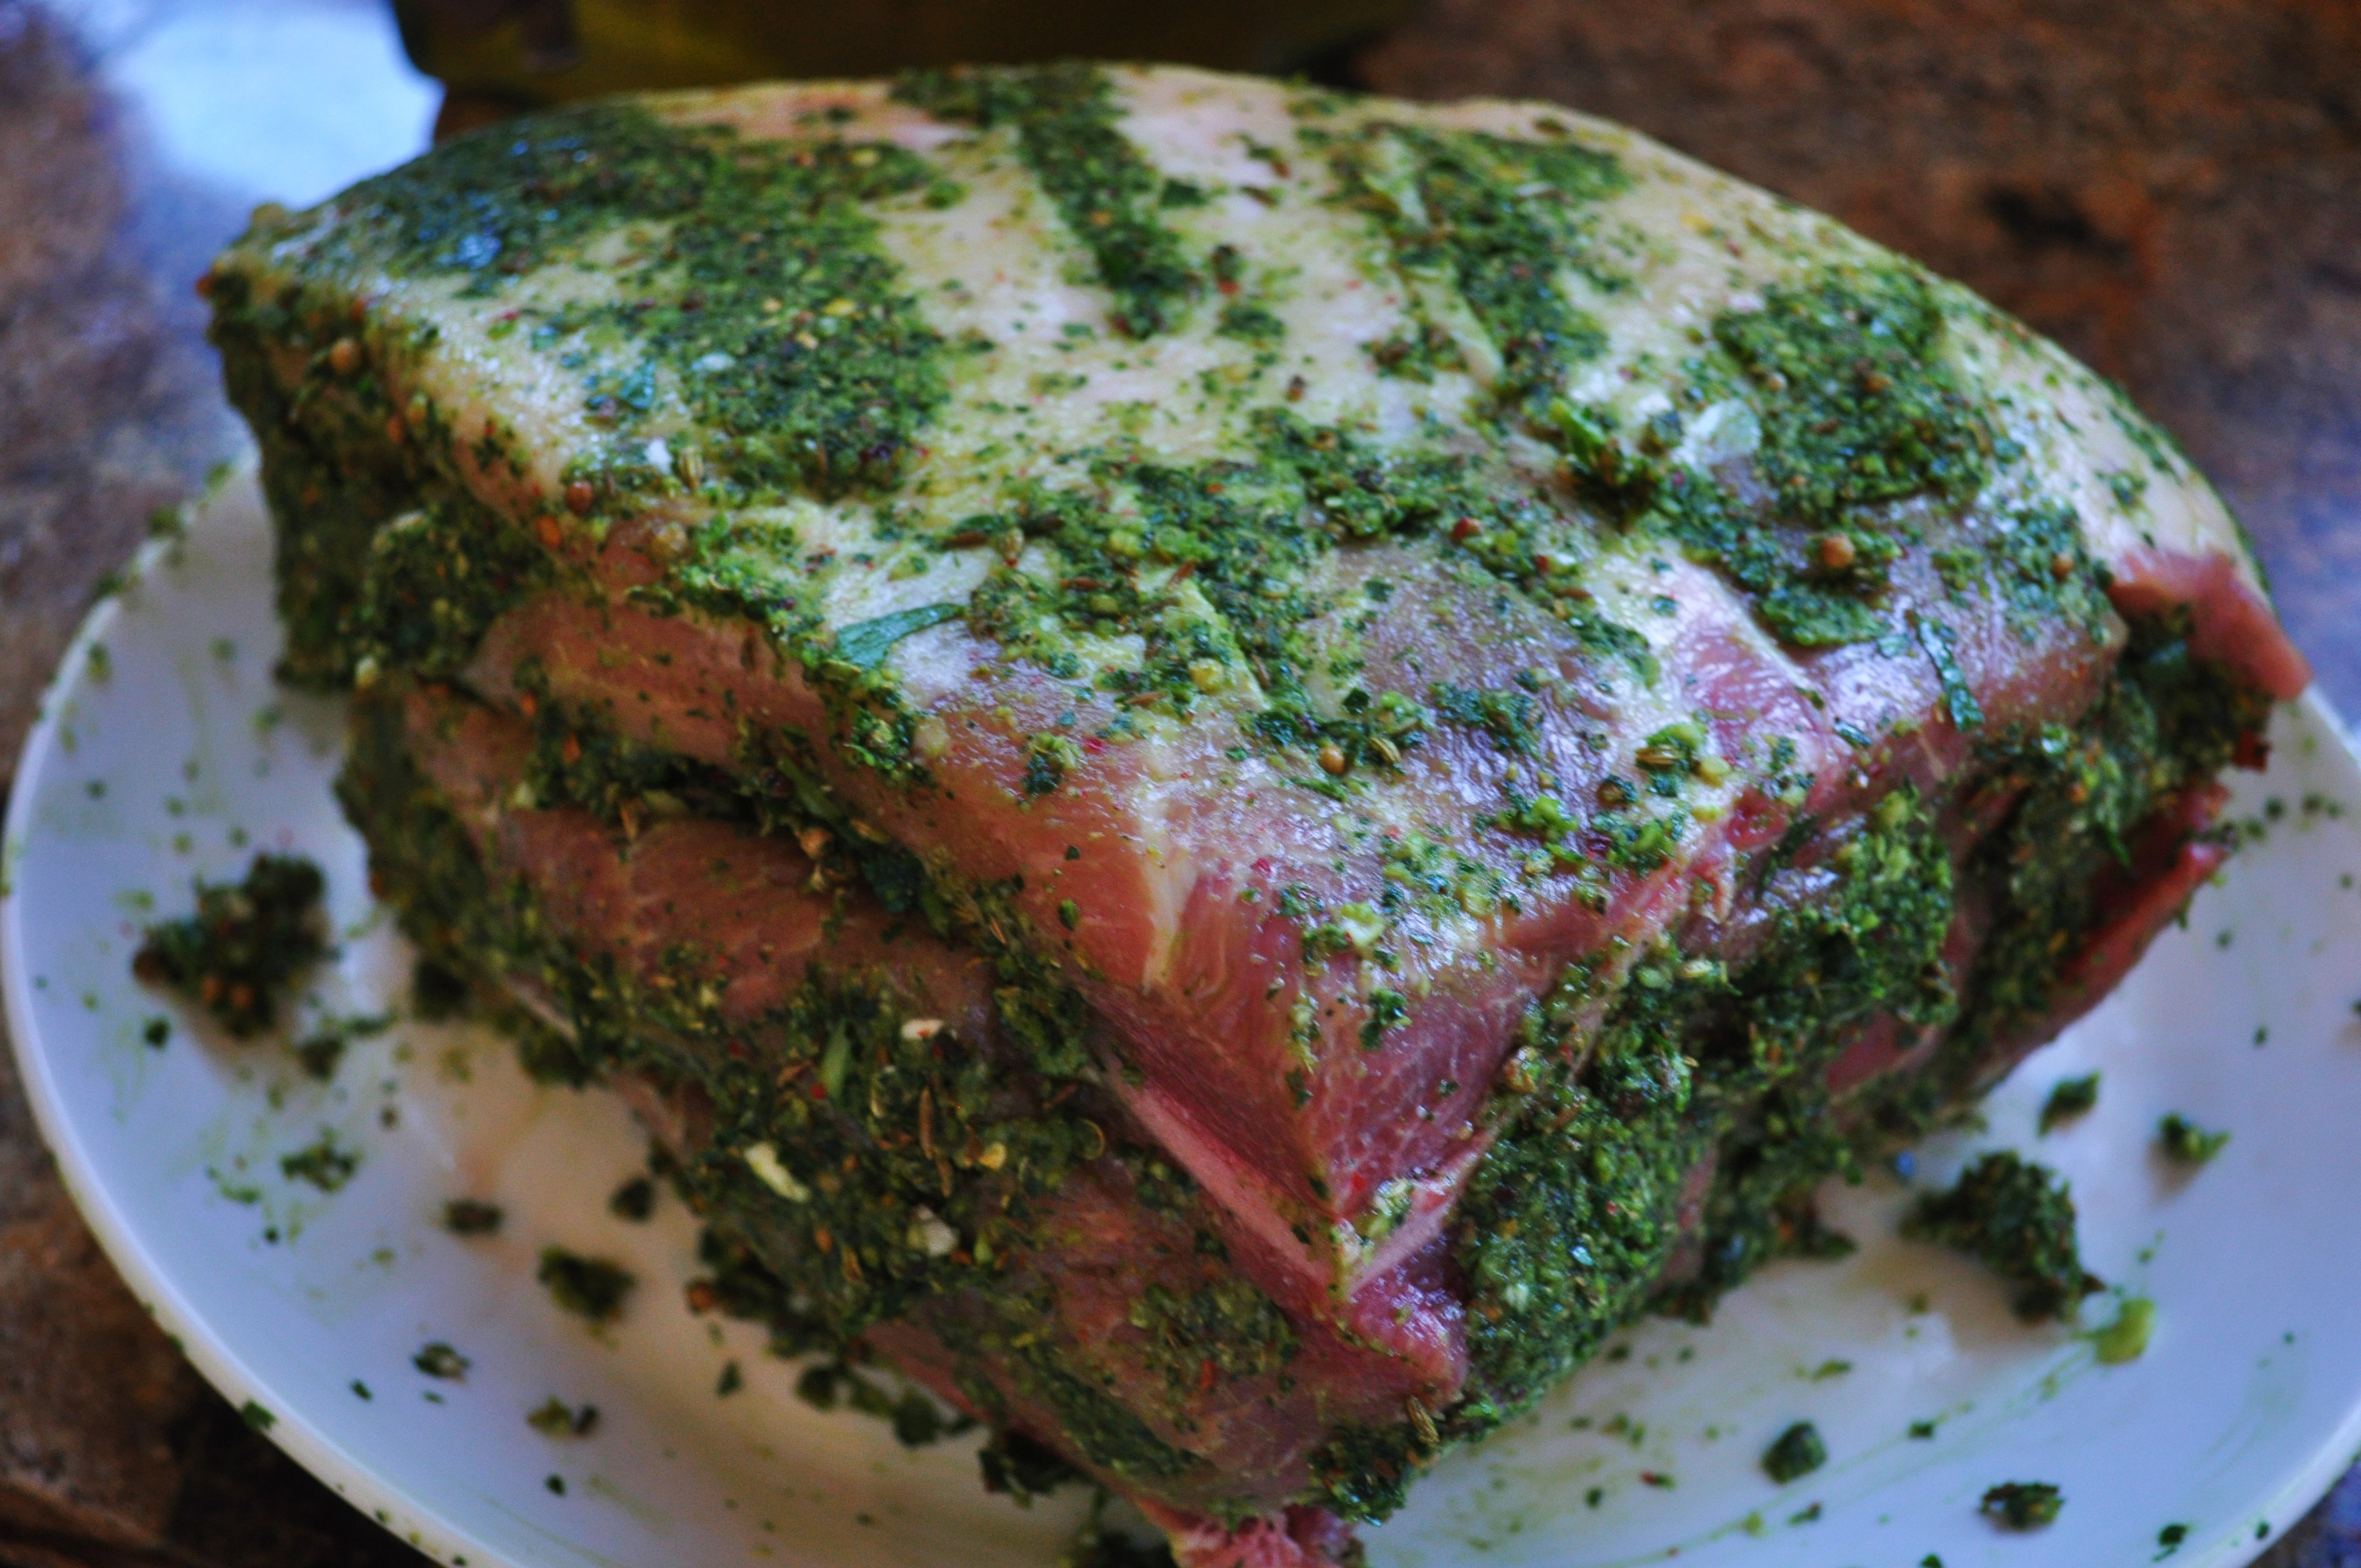
Smoked and Braised Pork Shoulder Latin Style
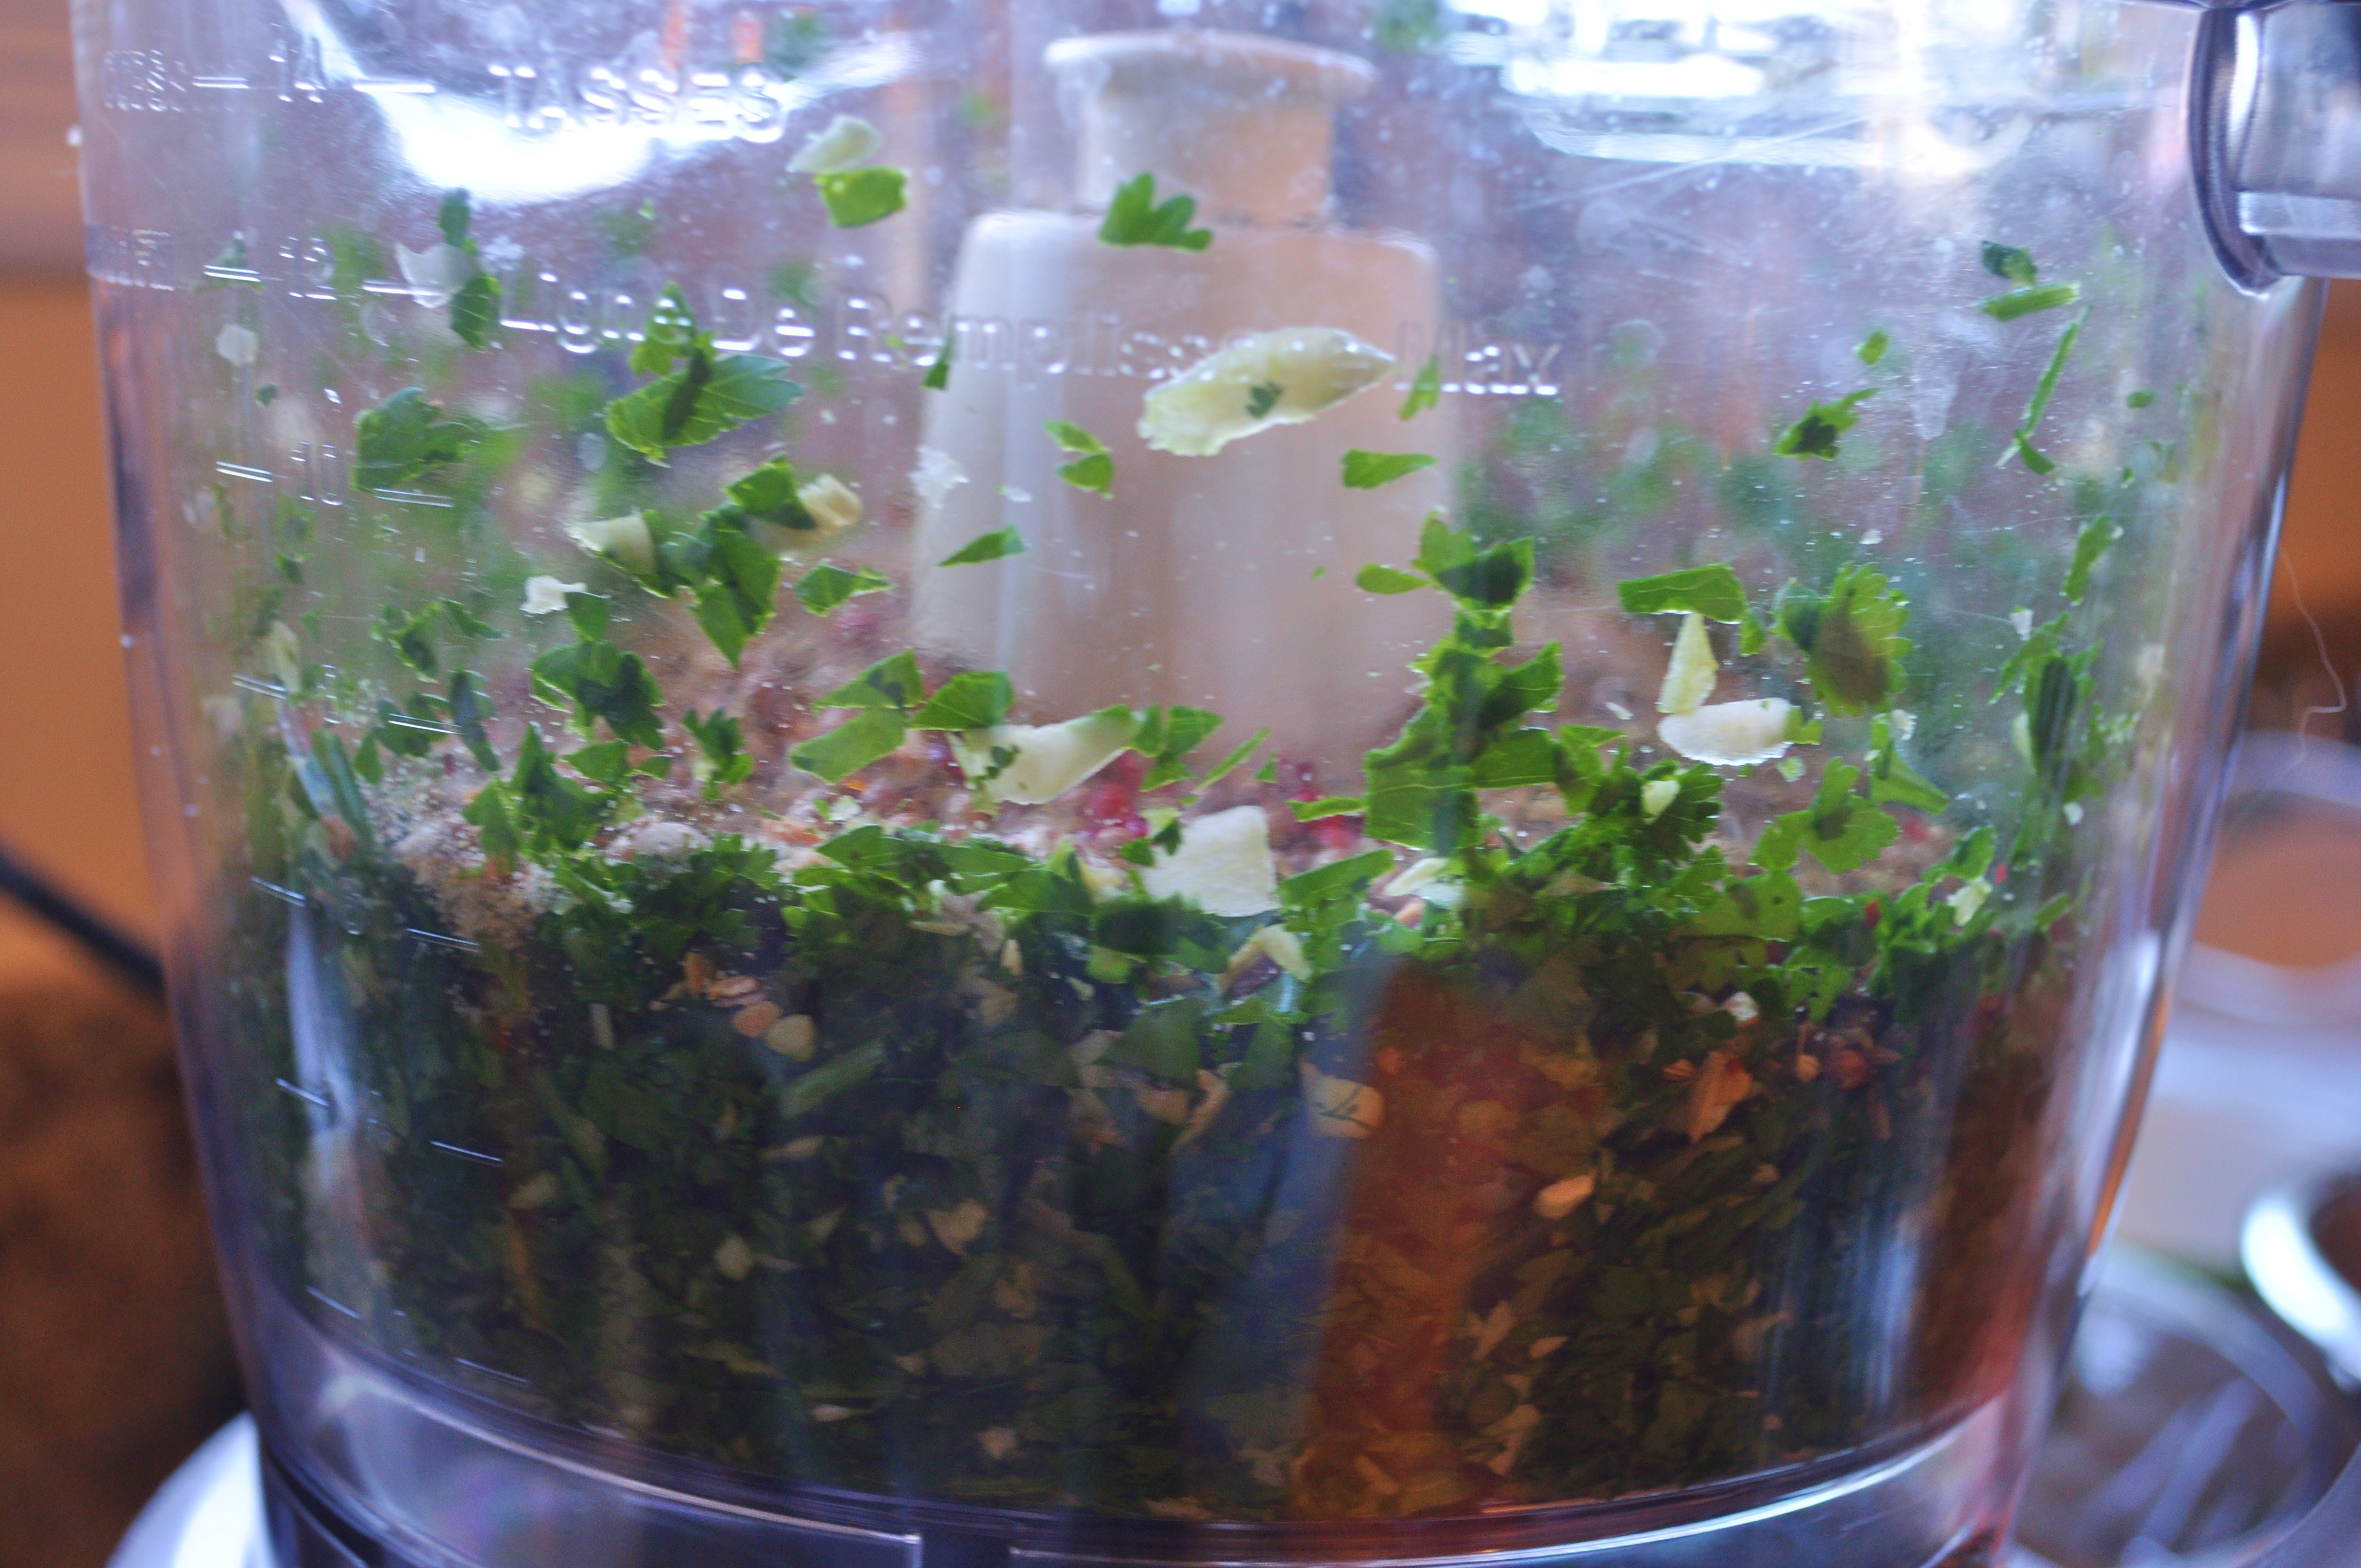
 This recipe has been one I have used for years. I used to make it at my cooking school for Cuban Night. I change out a few things here and there to go more Italian or more Cuban. Even if you do not have a smoker this is delicious braised or done in a slow cooker or dutch oven. You simply make a paste in the food processor and then make slits in the pork shoulder (bone in or out, your choice). Marinate it over night, smoke the next morning and then finish it off in a crock pot or in a dutch oven in the oven. Note: I do not add salt before cooking, but I offer it at the table.

Ingredients:
1 cup each of packed cilantro and flat leaf parsley
1/3 cup each of coriander, cumin and fennel seeds toasted
30 cloves of garlic
1/4 cup crushed red pepper (the kind you put on pizza)
1/4 cup pink pepper berries (optional)
1 tablespoon hickory powder if you are not smoking the meat
1/4 cup olive oil (I use smoked oil that I make)
1 5-7 pound pork shoulder (get them on sale and freeze)
2# Yukon Gold Potatoes
3 large onions, quartered
2 cans of beer
1/4 cup Spice and Tea Exchange Sweet Onion Sugar (optional)
Method:
Put the cilantro, parsley seeds, garlic, pepper berries, crushed red pepper, hickory powder if you are not smoking and the olive oil in a food processor. Pulse till you have a thick paste.
Put on latex gloves if you have them, this gets messy. Cut 1 1/2 inch slits into the meat on all sides. Stuff the slits with the paste. If you have any paste left over, smear it on the meat. Wrap tightly in plastic wrap and refrigerate 12-24 hours.
Remove the meat from the refrigerator and allow to come to room temperature. Meanwhile set up your smoker and turn your grill on high.
Sear the meat on all sides on the grill. Then place in the smoker at about 200 degrees over a drip pan and smoke for 6 hours. If you do not have a smoker, go directly to the slow cooker or roaster but cook for 8-10 hours on low.

Prepare the roaster or slow cooker by placing a bed of Yukon Gold potatoes (small ones or cut larger ones in half) and the onions. Sometimes I add other root vegetables too. Place the meat directly on the bed of veggies. pour two cans or bottles of beer over the meat. Sprinkle the sweet onion sugar all over.
Roast at 350 degrees covered with foil or in a dutch oven. Or you can use a slow cooker on high for 4 hours (either method). It is just that easy. The leftovers are sometimes my favorite part… tamales, tacos pulled pork sandwiches. 🙂

Jan22
From my friends at Frugal Feeding… Almond Biscotti!

There are certain things in life that one considers to be truly delightful – they are different for us all. For me, a strong coffee coupled with a crunchy biscuit or flaky pastry, preferably of Italian extraction, is one such delight. However, since moving away from my favourite coffee shop in Aberystwyth, obtaining such a treat has proved a little trickier. Happily, almond biscotti, the traditional Italian biscuit, are jolly simple to make – so there are no excuses not to follow this frugal recipe!
View original post 565 more words
Jan3
New Years Fun Food: Collard Green Empanadas

I had a New Years Day dinner party and decided to have a Hispanic theme. I usually make my Chiles en Nogada for Christmas, but I was busy working on Christmas Eve and decided to postpone that tradition till New Years. I have done a lot of regional Mexican and South American cooking, spent a great deal of time in Latin America from a young age and went to cooking school in Mexico. Since moving to the Low Country, I have been interested in the spin that my friend Sandra A. Gutierrez has put on some of the traditional Latino recipes and ingredients in her book The New Southern-Latino Table. I decided to incorporate a few of her recipes into my menu for New Years and the first one was Collard Green Empanadas. In the south it is a tradition to eat two things on New Years, greens which represent folded money and black eyed peas which represent good luck. Sandra had recipes using both ingredients, so I made them her way with a few twists of my own.

Here is the recipe for the empanadas. She suggested frying store bought empanada dough or baking pastry dough. and I wanted to bake, so I used store bought pie pastry & baked them because of the time and mess crunch with all of the other parts of the meal I was doing. But you can make them with your favorite pastry dough too. I have filling leftover and plan on doing that next weekend.
Heat oven to 375
Ingredients:
- 2 Tablespoons Bacon Drippings (or vegetable oil)
- 1/2 cup finely chopped red onion or shallots
- 4 garlic cloves finely chopped in a a teaspoon of salt
- 1 bag of chopped frozen collard greens
- 1/2 cup cooked and chopped bacon (I bake my bacon with Sweet Onion Sugar on it)
- 1 8 ounce package of cream cheese
- 1/2 cup cojita or fresco cheese (optional) these cheeses can be found at Hispanic markets or most grocery stores now days.
- 1/4 teaspoon cayenne
- 1/4 teaspoon chipotle powder
- 1 egg whisked
- Raw sugar for topping
- 16 empanada disks or 1 package of Pillsbury pie dough.
Method:

- In a large skillet heat the oil/drippings and cook the onions till translucent. Add the garlic and saute for about 20 seconds, then add the drained collard greens. Saute for a few minutes and remove from the heat, cool for 20 minutes. Add cheeses and spices.
- On a floured surface roll out the pie dough to an increase of about 25%. Cut circles with a biscuit cutter or glass. *you can make them bigger if you have a larger cutter, using more filling.
- Put a teaspoon of filling on each disk and brush the egg wash around the edges. Close and seal, using a fork to crimp the edges. Use the remaining egg was on top of the empanadas. Sprinkle with the flavored sugar. Top with Habenero Sugar. Bake for 20 minutes. Serve warm or at room temperature with salsa.

