Category Archives: Farmers Markets

Amazing Chicken with Pomegranate and Pistachio on Persian Saffron Rice

Standard

pomegranate chicken

The flavors of this dish were swimming around in my mind for a few days. Finally, I took the leap and made it. I used my pressure cooker to do the Persian Saffron Rice and it turned out fabulously. There was plenty left over for some more meals. The savory, sweet, sour and crunchy elements in this dish really sang to me. I think that they will to you.

The Chicken

Ingredients:

1 pound of chicken thighs, skin removed.

1 cup of Olive Oil

3 tablespoons hot smoked paprika

5 tablespoons Vik’s Garlic Fix (or your favorite garlic salt blend)

I sweet onion minced

4 garlic cloves minced

1 Tbs cinnamon

1 Tbs ground cardamon

1/4 cup golden raisins, plumped in hot water and strained

2 TBS corn starch dissolved in 3 TBS water

1/2 cup of pomegranate syrup or molasses

1/2 cup maple syrup

Zest and juice of one lemon

1/2 cup water

1/2 cup pistachios roughly chopped and toasted

fresh pomegranate arils and cilantro for garnish

Method:

Sprinkle the chicken with the garlic salt and the smoked paprika. Allow to sit for at least 1 hour or up to 12 hours.

Add the oil to a saute pan and brown each of the chicken pieces. Place into an oven proof dish while browning the other pieces then put into a 300 degree oven.

Remove all but 3 TBS of the oil from the pan.

For the sauce saute the onion and garlic in olive oil.

Add the pomegranate molasses, raisins, the lemon juice, maple syrup and zest and juice of the lemon, the water, the cardamom, cinnamon and the cornstarch slurry. bring to a high simmer and whisk while the liquid thickens.

Return the chicken to the pan, including juices and bring back to a full simmer. Continue to cook for about 30 minutes or until the chicken is tender. While simmering, continue to spoon the sauce over the chicken.

To serve, plate with saffron rice and top with the pistachios, cilantro and pomegranates

Best Fried Green Tomatoes… Southern Bliss

Standard

Fried Green Tomatoes

I never even thought of Fried Green Tomatoes as a recipe until a few people asked me how to make them. They are super easy and very tasty when done right. My great grandmother used to make them, though hers were made with just flour, not the combo of flour and cornmeal that I use now. This method if dredging, dipping and dredging again is the secret to fried chicken and most any coated fried food. The final dredge changes, anything from seasoned flour to panko, but the method stays the same. In the fall green tomatoes are pulled from the vines before first frost, but here in the south, people treasure them all year and green tomatoes are sold in our farmer’s markets. To keep them from ripening, store in the refrigerator till ready to use. They will keep several weeks. I never refrigerate ripe tomatoes, as that kills the sweetness.

fried green tomatoes

Set up a dredging station:

Pan 1: All Purpose flour

Pan 2 :1 cup of buttermilk 1-2 eggs whisked in

Pan 3: This is where you get a little creative:

Then slice up the green tomatoes about 1/2 inch thick. This thickness allows for a crispy crust and tender interior.

Heat canola or peanut oil to 350 degrees in a frying pan, about 1  1/2 inches deep.

Dredge the tomato slices in the flour, then the buttermilk mixture, making sure that the entire slice is covered in liquid.

Finally dredge the slices in the seasoned flour, making sure that all surfaces are covered.

Place in the frying pan, taking care not to crowd. fry till crispy and golden brown on each side and remove to a rack to drain. Repeat.

They can be served with a remoulade sauce, sweet chile sauce or put them on a BLT! They are even good cold.

Fried Green Tomatoes and Remoulade

Roasted Balsamic Cherries

Standard

Really good cherries are hard to beat for flavor and beauty. This application is something that goes well with duck, pork  or chicken as a side dish, but also is good as a dessert over ice cream. It is super simple. You just have to find some really super cherries! I got mine from Whole Foods just as the cherry season was beginning.  I used bing cherries but any large firm variety would work for this.

Start with firm ripe cherries

Start with firm ripe cherries

1 lb of cherries,(don’t  pit or remove stems)
2 Tablespoons olive oil
1/4 cup good quality balsamic vinegar
Whole nutmeg, grated
Fleur de Sel salt and coarsely ground black pepper to taste 

1. Preheat the oven  to 400°F.

2. Rinse the cherries with cold water and pad them dry gently with a kitchen towel.

3. Place cherries in a bowl and toss them with olive oil and balsamic vinegar, and season generously with salt and pepper.

4. Transfer cherries to a non-reactive baking dish (glass or porcelain are ideal) with the stem standing up. Preferably, the cherries will fit really close to one another. Cover the baking dish with aluminum foil.

5. Roast the cherries in the oven for 20 minutes or until they start to release their juices. Remove the foil, and place the baking dish back in the oven for another 5 minutes to allow the juices caramelize a bit.

6. Remove from the oven and let them sit for 5 minutes. Serve cherries as desired spooning some of the juices over the cherries.

Roasted Cherries

Crab Rellenos: Cangrejo Rellenos

Standard

Crab Rellenos

Here in the low country, Blue Crabs abound. But what do you do with all of that crab meat? It is sweet stuff, but not served on the half shell like Dungeness or King Crab. You have to meticulously pick the crab from her tiny shells. So this will be the first in a series of crab adventures. Things you can do with this lovely little Low Country crustacean.

blue-crab-

Day 1:

Make the sauce (below) this can be made up to a week in advance

Make basic filling using 1 pound of crab meat. Here is a primer on how to cook and pick the crabs. You can of course always go to your fish monger and get a pound of crab meat. It is available pasturized in cans. If you buy this, ask for lump meat.

Whip 2 large packages of cream cheese. Add them to the crab and thoroughly blend. Remove 1/3 of this mixture for crab rangoon, tomorrow’s treat.

Ingredients for Relleno Base:

3 ears of grilled Corn on the Cob, cut from the cob

1 cup of grated sharp cheddar, 1 cup of grated jack cheese

1/2 cup of fresh cojita cheese crumbles

2 red onions medium chop, sauteed and caramelized

Add 1 tablespoon of finely chopped garlic into the onions for the last 4 minutes of cooking.

3 green onions finely chopped

1/2 cup slow roasted grape tomatoes cut in quarters

Stir all of this together  

DSC_0010

Poblano Peppers (you can also use the smaller, thinner Anaheim Chile), slit clean and roasted then peel. This part can be tricky. I have learned that if you remove the seeds and membranes before putting them on the grill, they come out easier and there is less ripping of the pepper. Do this by making a T shaped cut, horizontally across the top and then one vertical slit from top to bottom. This picture is of Anaheim chiles on the grill. Grilling-Poblano-PeppersWhenever I grill peppers, I always retain few, usually ones that have torn to be used in sauces and fillings, or ropas. Once you roast your peppers on the grill or the open flame of your stove, place them in a plastic bag to steam. The skin will come off much easier then.

DSC_0013


Allow the peppers to cool and then stuff with the filling. Bring the opening as close together as you can. Since there are only two of us and these are big peppers, I only made two. But you can certainly make at least 6 with this amount of filling. I am going to be making some other dishes with the filling.

Relleno coating:

(for two large peppers, double it for 4)

4 eggs, separated

3 Tablespoons cream

salt

flour for dredging

about 1 inch of oil in a large frying pan

roll the peppers through the flour till coated

While the oil is heating, whip the egg whites & salt till they have stiff peaks. Whisk the yolks with the cream. Fold into the whites carefully.

When the oil is about 250 degrees, take a large spoon and put enough of the egg mixture into the oil to make a bed for the pepper. It will spread slightly. lay the pepper down, then cover with more egg mixture. After about 2 minutes carefully turn the pepper and cook on the other side till golden brown. Place on a drip pan and put in a warm oven while you continue the process.

Sauce and plate: You can choose any kind of sauce for this, but this is the one I made ahead of time. The base is something I use for enchiladas and other meals. I added cream and sherry to lighten this one up because the peppers and crab are so delicate.

New Mexico Rojo

1 cup New Mexico Red Chiles

2 tablespoons masa (finely ground)

2 tablespoons butter

2 cups chicken stock

Melt the butter in a saucepan, slowly stir in the masa,  till a roux is formed. Whisk in the chicken broth and simmer. Allow to simmer for a while adding more stock as it thickens.

For the relleno sauce I then added 1 cup of cream and stirred for a while, letting it reduce a bit, then about 1/4 of Spanish sherry. Stir again and then turn off the heat.

Plating: 

Use a small plate with a good upturn to hold the sauce. Puddle the sauce on the plate, then add the relleno. Squiggle crema on top. Serve with a simple salad of radishes, pea shoots, pepitas and cojita.


interior


Tomato Pie from the Stono Farm Market Tomato Shed Cafe

Standard

Tomato Pie
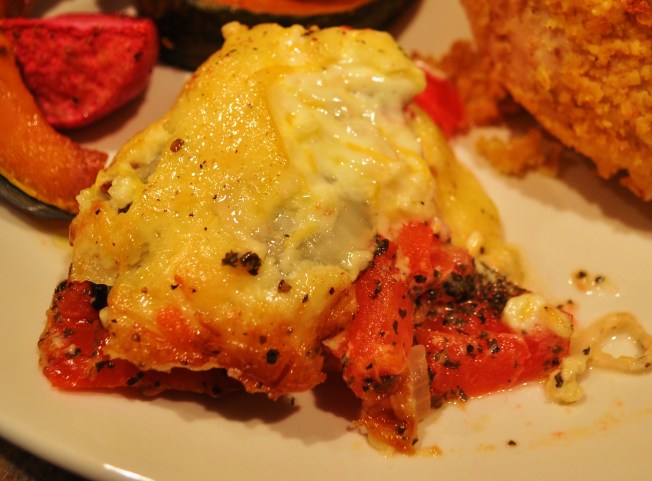
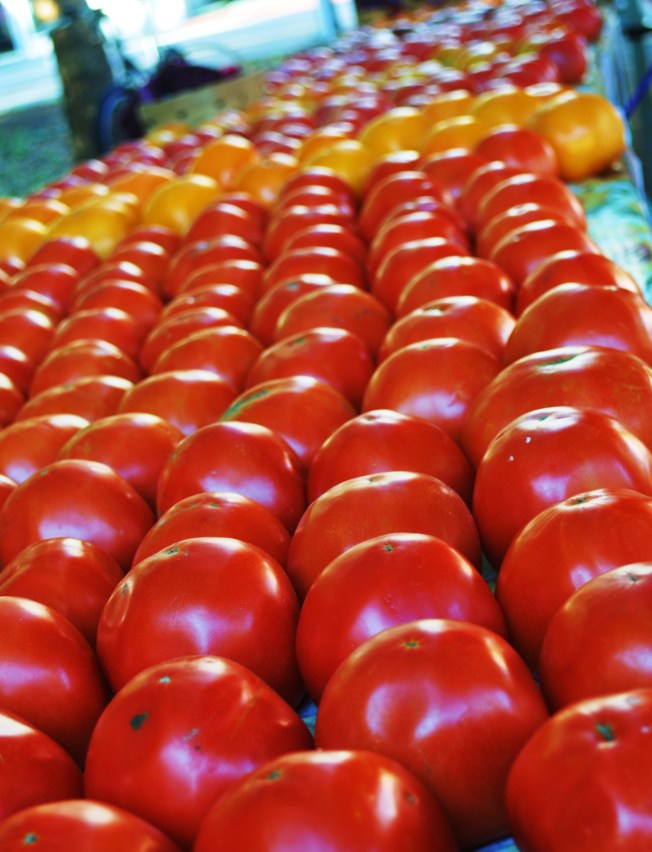
This really should be a mid summer recipe, but there are times when nothing tastes as good as this tomato pie and if you can find the tomatoes, it brings summer right to your plate. It is quite different from any tomato pie I have ever tasted. It is less of a pie and more of a juicy tomato casserole really. The key, and I really mean the KEY is beautiful  juicy ripe red tomatoes. They can be any kind of tomato, but they have to be deeply red and ripe. Fortunately the folks at the Stono Farm Market Tomato Shed Cafe  have access to the Ambrose Farm hoop house tomatoes, including some incredible heirloom tomatoes and some juicy red orbs of cherry tomatoes, even in February, which in the Low Country is not really all that cold.  I agree, that tomatoes are best in July and August, no matter where you live, sun ripened tomatoes grown in soil are the best.  South Carolina grows some delicious ones in her sandy loam. I have had this dish at the Tomato Shed Cafe many times, and have made it a few times for company with rave reviews. The best thing is that it is EASY!

Tomatoes

Here is the Ambrose family’s recipe:

Tomato Pie

Makes 8 servings

6 large ripe tomatoes or 2 # of good ripe cherry tomatoes

1 yellow onion thinly sliced

dried basil

fresh chives, chopped

Salt and Pepper

1 cup of Duke’s Mayonnaise

1 cup of shredded cheddar cheese

Biscuit dough, rolled thin and baked till golden (you can do this ahead in batches and freeze)

Method:

Place pieces of baked thin pieces of biscuit dough around the bottom of a pan, it can be a square 9 X 9 pan, a pie pan or a cake pan.

Slice the tomatoes in to 1/2 inch thick slices and salt, let sit for a few minutes, then fill the pan with several layers of tomatoes, salting and peppering and adding basil and chives on each layer. Add a layer of thinly sliced onions (you could insert garlic here too). I added some sweet onion sugar at this point, but if you do not have it, you can skip that. You can “fancify” it too by using smoked salt. I did.

Mix the mayo and cheese and top the pie.

Bake at 350 for 30-35 minutes.

Allow to rest for 10 minutes before cutting and serving.  I promise you, this is delicious! I have never had a tomato pie this good, or so easy to make.

New Years Fun Food: Collard Green Empanadas

Standard

empanadas with sauce

I had a New Years Day dinner party and decided to have a Hispanic theme. I usually make my Chiles en Nogada for Christmas, but I was busy working on Christmas Eve and decided to postpone that tradition till New Years. I have done a lot of regional Mexican and South American cooking, spent a great deal of time in Latin America from a young age and went to cooking school in Mexico.  Since moving to the Low Country, I have been interested in the spin that my friend Sandra A. Gutierrez has put on some of the traditional Latino recipes and ingredients in her book The New Southern-Latino Table. I decided to incorporate a few of her recipes into my menu for New Years and the first one  was Collard Green Empanadas. In the south it is a tradition to eat two things on New Years, greens  which represent folded money and black eyed peas which represent good luck. Sandra had recipes using both ingredients, so I made them her way with a few twists of my own.

New Southern2

Here is the recipe for the empanadas. She suggested frying  store bought empanada dough or baking pastry dough. and I wanted to bake, so I used store bought pie pastry & baked them because of the time and mess crunch with all of the other parts of the meal I was doing. But you can make them with your favorite pastry dough too. I have filling leftover and plan on doing that next weekend.

Heat oven to 375

Ingredients: 

  • 2 Tablespoons Bacon Drippings (or vegetable oil)
  • 1/2 cup finely chopped red onion or shallots
  • 4 garlic cloves finely chopped in a a teaspoon of salt
  • 1 bag of chopped frozen collard greens
  • 1/2 cup cooked and chopped bacon (I bake my bacon with Sweet Onion Sugar on it)
  • 1 8 ounce package of cream cheese
  • 1/2 cup cojita or fresco cheese (optional) these cheeses can be found at Hispanic markets or most grocery stores now days.
  • 1/4 teaspoon cayenne
  • 1/4 teaspoon chipotle powder
  • 1 egg whisked
  • Raw sugar for topping
  • 16 empanada disks or 1 package of Pillsbury pie dough.

Method:

Empanadas

  • In a large skillet heat the oil/drippings and cook the onions till translucent. Add the garlic and saute for about 20 seconds, then add the drained collard greens. Saute for a few minutes and remove from the heat, cool for 20 minutes. Add cheeses and spices.
  • On a floured surface roll out the pie dough to an increase of about 25%. Cut circles with a biscuit cutter or glass. *you can make them bigger if you have a larger cutter, using more filling.
  • Put a teaspoon of filling on each disk and brush the egg wash around the edges. Close and seal, using a fork to crimp the edges. Use the remaining egg was on top of the empanadas. Sprinkle with the flavored sugar. Top with Habenero Sugar. Bake for 20 minutes. Serve warm or at room temperature with salsa.

DSC_0012

Roasted Tomato & Fresh Mozzarella Ravioli

Standard

Image

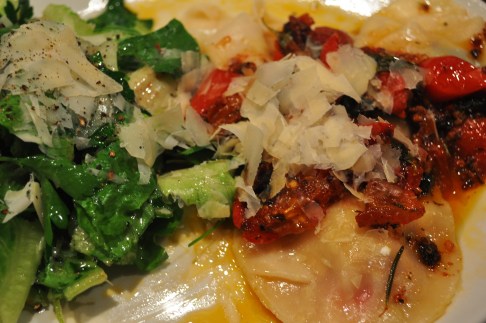
Wonderfully easy and fresh Ravioli! So easy 40 minutes from oven to table. You can also roast the tomatoes ahead of time and make this even faster.

The tomatoes are mostly small grape tomatoes, but I tossed in a few others too. The ravioli dough is actually won ton wrappers. I cannot find my ravioli cutters after the move, so I used a biscuit cutter. This recipe serves 2, but you could easily double it.

Ingredients:

  • 1# of ripe cherry or grape tomatoes
  • Olive oil
  • Vik’s Garlic Fix (or fresh garlic minced with a sprinkling of Kosher salt)
  • finely chopped Italian Parsley, Basil and rosemary (about 3 tablespoons total)
  • 8 nice leaves of Italian Parsley and Basil for the raviolis
  • 8 small balls of fresh mozzarella
  • 1 package of wonton wrappers
  • 1 cup of dry vermouth (or chicken stock)
  • Reggiano Parmesan for grating
  • Additional seasoning to taste for the sauce, smoked salt, Vik’s Garlic Fix, coarse black pepper & crushed red pepper.

Cut the tomatoes in half. Place on a cooking sheet with rim. Drizzle with olive oil, Vik’s Garlic Fix, a spring of rosemary leaves and black pepper.

Roast at 350 for 30 minutes

Remove and cool slightly

Image

On a floured counter, lay out 8 wonton wrappers and place one parsley leaf, one basil leaf, one tomato half and one ball of mozzarella ball on each. On 8 other wonton wrappers, brush the egg wash and then place on top of the “loaded” wrappers. Seal carefully and then cut with a ravioli cutter or leave square. Place these on a cookie sheet lined with wax paper and allow to dry a bit. 10 minutes is optional, but 5 is fine.

Image

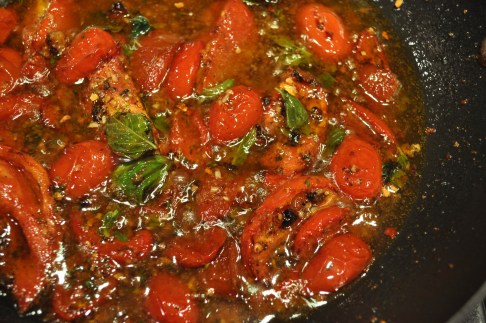
While the ravioli is drying, put remaining tomatoes and juices in a saute pan and simmer with the vermouth and additional basil, parsley and rosemary. Season to taste.

Image

In a pot of boiling water, cook the ravioli for 3-4 minutes in small batches. Use a slotted spoon to plate and cover with sauce and top with cheese.

Image

Prickly Pear Sorbet

Standard


This recipe is quite simple. You will need an icecream maker of some kind, but even the very inexpensive ones work well for this. You will also need a fine sieve.

8 Prickly Pears (they call these Tuna) in Mexican markets. They come in yellow, orange and pink. My favorite is pink.

1 cup of simple syrup (half water/half sugar till sugar melts) or light agave syrup. Sometimes I put fresh mint in the syrup too.

Juice of three limes

1/4 cup raspberry liqueur  such as Framboise. This step can be eliminated if you do not want the liquor.

Often times you can find these pears growing wild and in gardens. In Mexico they also candy them. In Italy they are used to make gelato ad sorbet in the fall.

When making your simple syrup, you can add spices, in this case I used one cardamom pod, mint, a cinnamon stick and 3 star anise. These just flavor the syrup slightly.

Using a fork, cut off the ends of the prickly pear. Commercial pears like you would find in a hispanic grocery will have the little prickles removed. If you harvest them your self, you will need to be more careful. Hold the fork on one end, stand the pear on the other end and using a sharp knife cut just the skin from the pear. Then cut into large chunks and place in a food processor. Pour in the simple syrup, lime and liqueur. Pulse until the mixture is smooth.

Strain carefully, there are a lot of seeds inside. Cool the mixture.

Process as you would in any ice cream or gelato machine. Pack tightly in freezer containers. It will be ready to eat within a couple of hours.

Pesto: Summer’s Gift

Standard

There are few things that can compare to home made pesto. It evokes the essence of the garden, all of that basil and garlic… but it also has a richness and depth because of very good olive oil, lots of Parmigiano Reggiano and most importantly pine nuts and pistachios! As my basil plants dictate (it takes ARMFULLS of basil), I make a big batch and freeze it. It does keep well in the refrigerator too, at least 6 weeks.  I never use a recipe, but I paid attention this time to the amounts so you too could make some of the best “green sauce” in the world. If you have a smaller amount of basil, you can divide this recipe. Just remember to taste the pesto for balance and seasonings. It should have a little tang to it and also be rich and slightly crunchy. Some people use other nuts, such as walnuts, but I promise nothing can compare with the combination of pine nuts and pistachios. The are expensive, but really worth it in this instance. And a little pesto can go a long way too! 

Ingredients:  

1 1/2 cups pine nuts

1 1/2 cups pistachios

16 cups of basil leaves and flowers if you have them. I sometimes add parsley and arugula to the mix, but the predominate flavor needs to be basil. 

Zest and juice of three large lemons

3 heads (not teeth, full heads) of garlic, skinned and cut into chunks

1 1/2 -2 cups of good olive oil you judge when the consistency is ideal

2 tablespoons smoked sea salt (non smoked is fine too)

3 tablespoons fresh cracked pepper

1 tablespoon raw sugar

1-2 tablespoons crushed red pepper

3 cups freshly grated Parmigiano Reggiano (you can do this in the food processor ahead)


You will need a food processor for this. If you do not have one, a blender works, but you will have to do it in smaller batches. I have a very large Cusinart, so I do a big batch at one time. 

Method: 

Get all ingredients in place. Toast the nuts in a dry skillet. Do not crowd them too much. I did two batches for this recipe. 

While the nuts are cooling, fill the processor bowl with basil, slightly packed, but not too tight. You should have some basil left over, this will go in after the first part is ground. 

Add the salt, pepper, red pepper, 1 cup of olive oil, garlic, all of the lemon zest and juice. Pulse till the basil is reduced in volume, add the rest of the basil and more oil. The oil and the lemon juice allow the basil to be ground down into a paste. The lemon juice is used for flavor, but also to keep the pesto bright green. Add all of the nuts and process again, adding olive oil as needed to make the paste. Add the cheese and more olive oil as needed. It should be a thick paste, but one that easily drops from a spoon. Once you have it all ground up, taste, add more seasoning if you need it. 

Freeze in containers the size that you are likely to be using it. I find that about 1 cup servings are good for two people. This is great on pasta, pizza, fresh mozzarella, ricotta, crostini, chicken, steak and even on scrambled eggs.  I also like to dip bread sticks in it. However, my favorite way to eat it is over pasta. 

Most WONDERFUL Crispy Okra and Curry Leaf Raita

Standard

My friend Ruta Says: “Odly enough, children in India love okra. But it’s hardly surprising; whether sautéed, fried or stuffed, the vegetable is prepared in a way that makes it’s texture pleasing rather than gooey. In this recipe, for instance, the okra becomes crunchy and addictive on it’s own; stirred into spiced yogurt, it is even better. This can be eaten on it’s own, or served with thalipeeth.”
Ruta wrote the book  5 Spices 50 Recipes, a wonderful play on Indian cooking that makes delicious Indian food accessable for every home cook. Several years ago I was invited to a press dinner at her home in Berkeley, California where we cooked and ate a most amazing meal. I have only changed the recipe slightly, adding a bit more mustard seed and added flavor and crunch of curry leaves. They may be hard for you to come by, but they are available at most Indo/Paki grocery stores. I grow my own. If you cannot find them, the dish is still quite good without them, but even better with them. The flavors and textures in this Raita make my mouth sing. You will want to double the ingredients after you have made this once, it is highly addictive.

Ruta has a new book out now, Quick Fix Indian. There are also rumors that she is planning on a restaurant in Goa where she spends some of her time.

 Ingredients: 

8 ounces fresh or frozen, cut okra

3-4 stems of curry leaf, leaves pulled off of the stems.

6 tablespoons canola oil, divided

1 cup plain whole or low fat yogurt

¾ to 1 teaspoon salt (I used my smoked salt for this)

½ teaspoon sugar or jaggery grated

1/8 teaspoon cayenne (or more if you like a real kick)

1/4 teaspoon ground turmeric (so good for you)

2 teaspoons mustard seeds (I use half golden and half black)

Method:

Wash the okra and towel dry each one thoroughly. Slice into ¼ inch-thick rounds. If using frozen okra, do not thaw.

Heat 5 tablespoons of the oil in a large skillet over medium heat. When the oil is very hot, add the okra, toss and let sizzle. Toss occasionally. The okra will slowly crisp and turn brown. Note: frozen okra may not crisp as well, this is OK, just be sure to brown it well. Once all of the okra is well browned, remove to a paper towel lined platter and set aside till ready to serve. Repeat with the curry leaves. They crisp up really quickly, so keep your eye on them.

Make the tadka: Whisk the yogurt with the salt (to taste) and sugar place the cayenne and tumeric in a small pile on the raita, but do not stir in yet. Heat the remaining tablespoon of oil in a butter warmer or small skillet over high heat. When the oil begins to smoke, add the mustard seeds, covering th pan with a lid or spatter screen. After the mustard seeds stop sputtering, pour the hot oil directly on top of the cayenne and turmeric powder. This cooks the powdered spices without burning them. Do not stir the dressing in yet.

For presentation prior to serving, place the crisp okra & curry leaves on top of the dressing. Stir the okra and dressing into the yogurt while serving. I promise you will be licking the bowl in before the night is over.

Serves 2-4