Tag Archives: vegetables

Banh Mi the Ultimate Sandwich

Standard
Banh Mi the Ultimate Sandwich

Banh Mi prep

There is nothing like a Banh Mi Sandwich! There are so many flavors and textures going on between the baguette. There are many ways to make this sandwich, in fact, my friend Andrea Nguyen has written an entire book on the subject! 

For each sandwich:

  • 1 petite baguette roll or part of a longer baguette
  • Mayonnaise (I use Duke’s)
  • Maggi Sauce (available at Hispanic and Asian groceries)
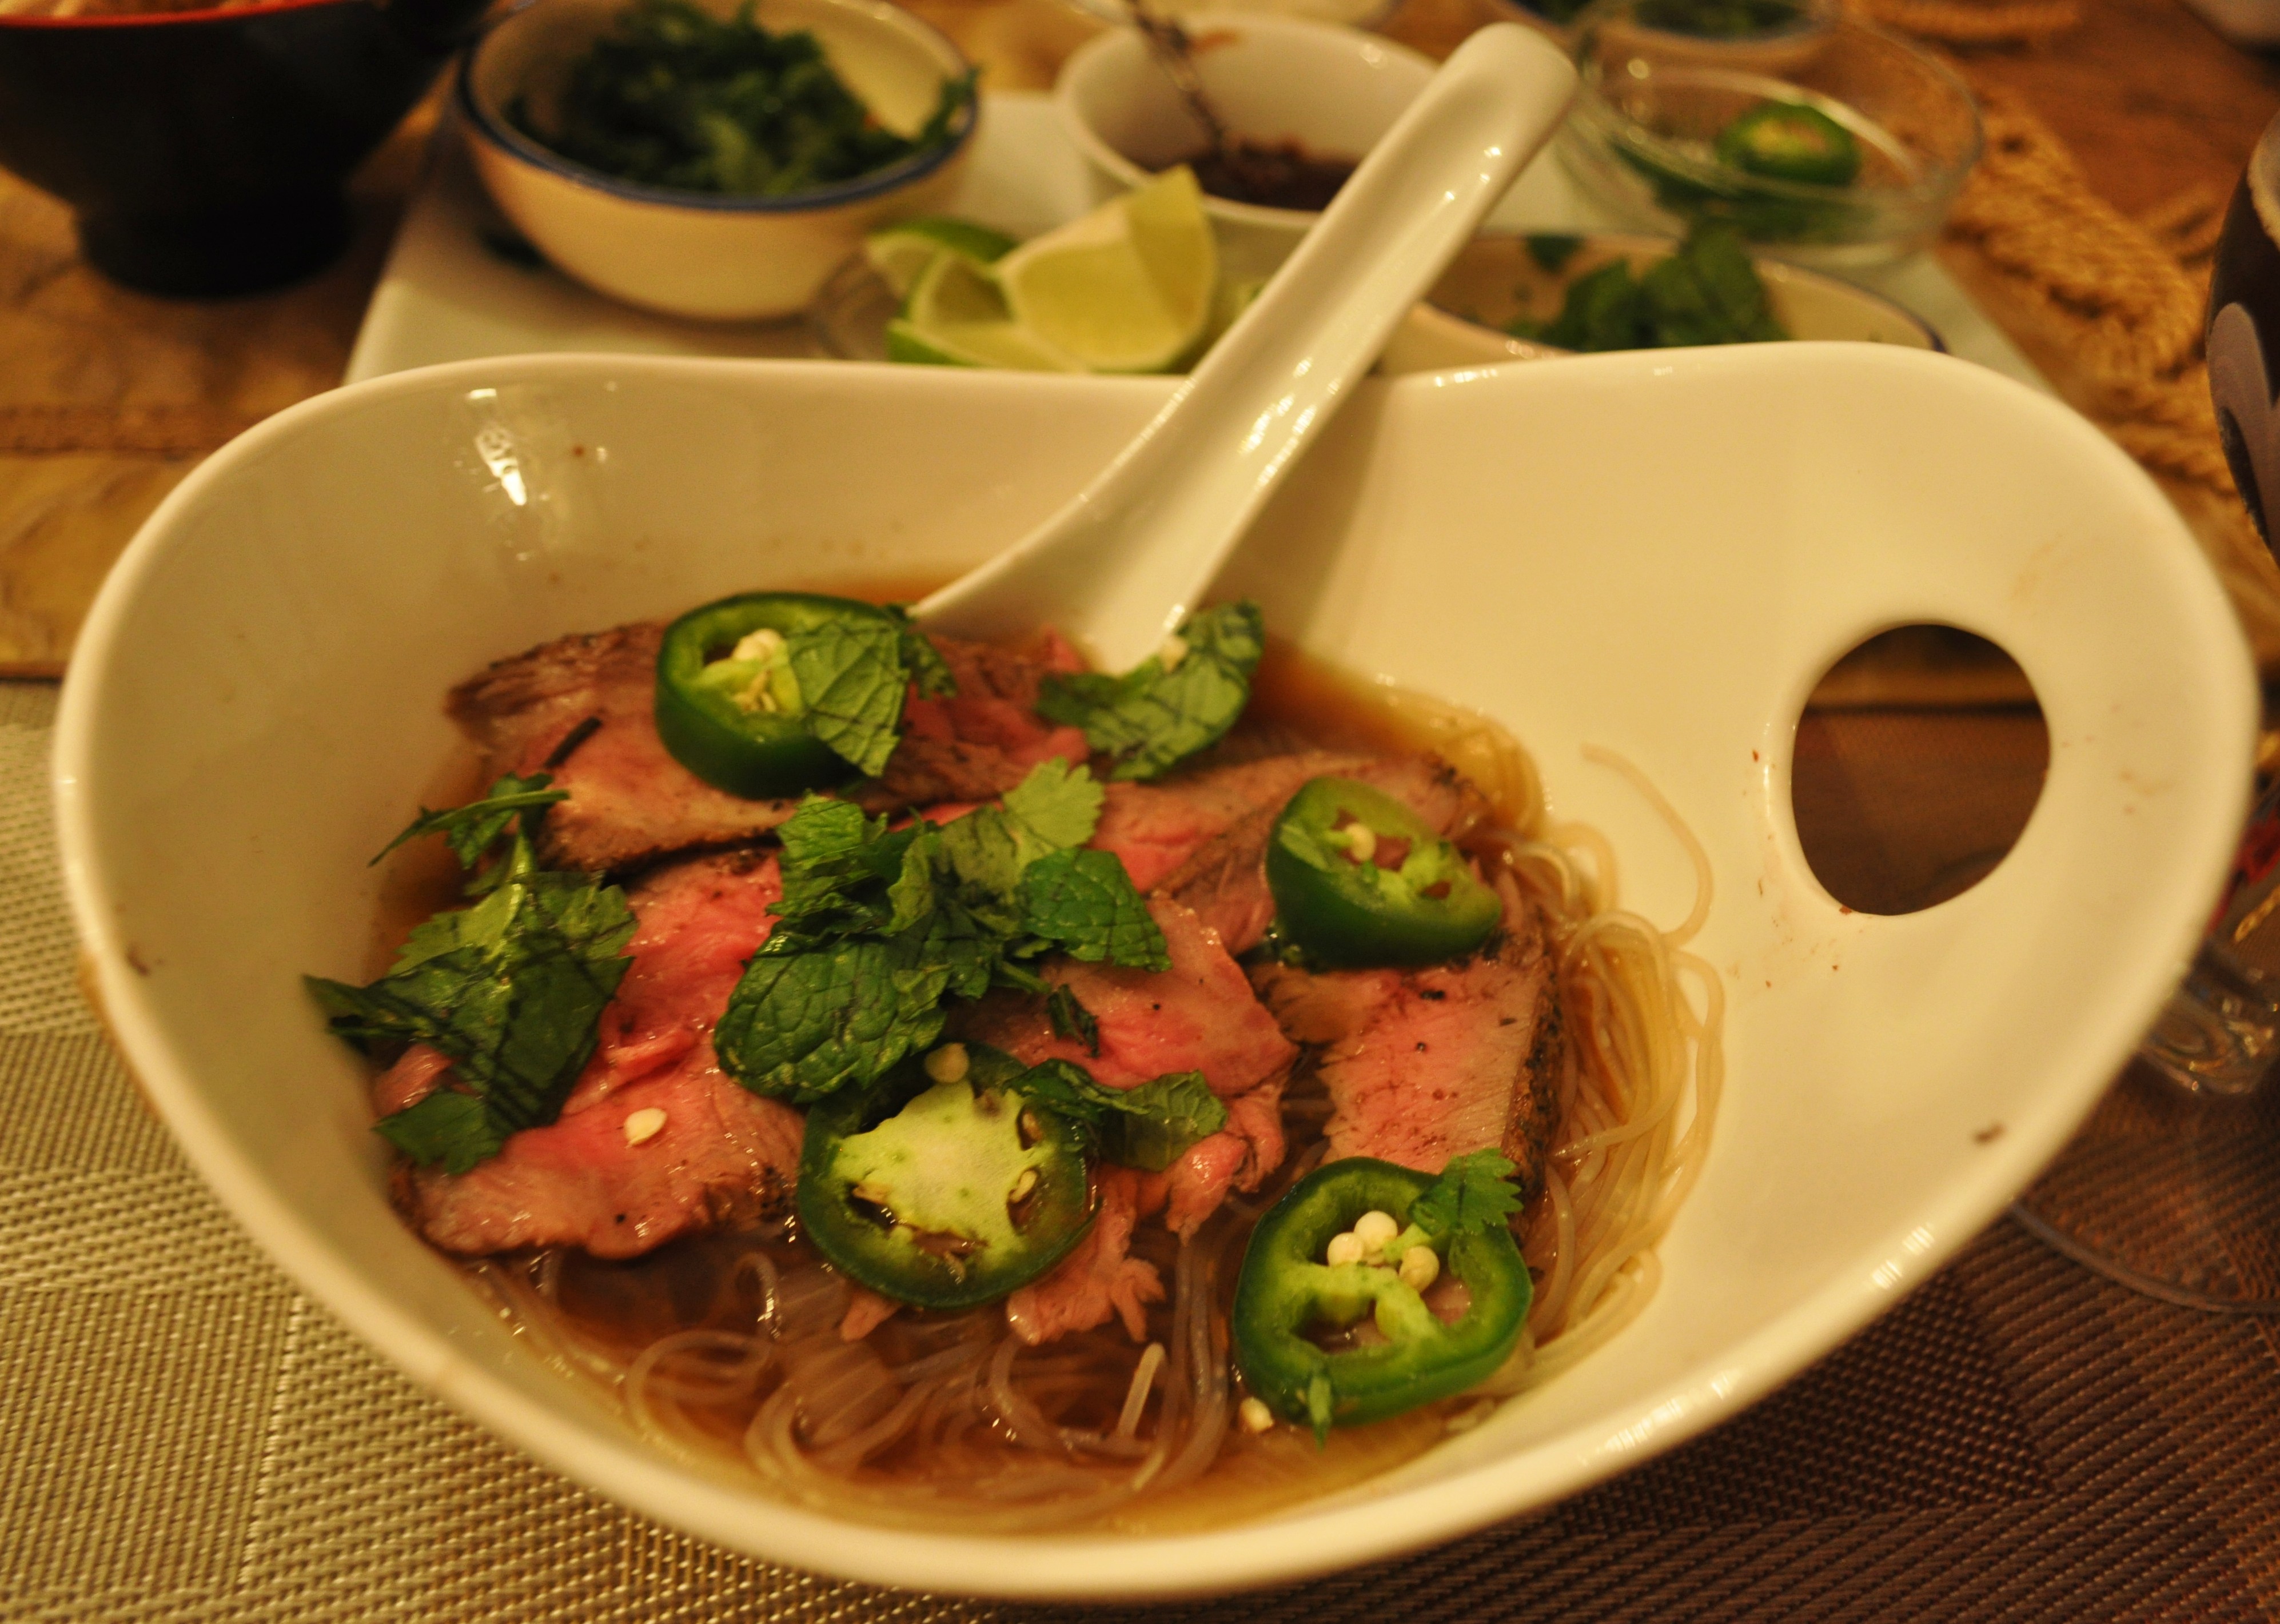
  • Char Su (this is Asian style pork belly) or BBQ chicken, pate’ or slices of rare steak
  • 3 or 4 thin seeded cucumber strips, pickling or English variety preferred
  • 2 or 3 cilantro sprigs, roughly chopped
  • 3 or 4 thin jalapeño pepper slices
  • Bean sprouts
  • Daikon and Carrot Pickle (Do Chua)

Banh Mi 1

  1. Slit the bread lengthwise, and then use a fork to pull out some of the bread, making a trough in both halves. Place the bread halves under the broiler on LOW, but watch carefully!
  2. Generously spread the inside with mayonnaise. Drizzle in some Maggi Seasoning sauce or soy sauce. layer the remaining ingredients. I like to start and end with some herbs.

DSC_0220Daikon and Carrot Pickle (Do Cha)

Makes about 3 cups

DSC_0185

Ingredients:

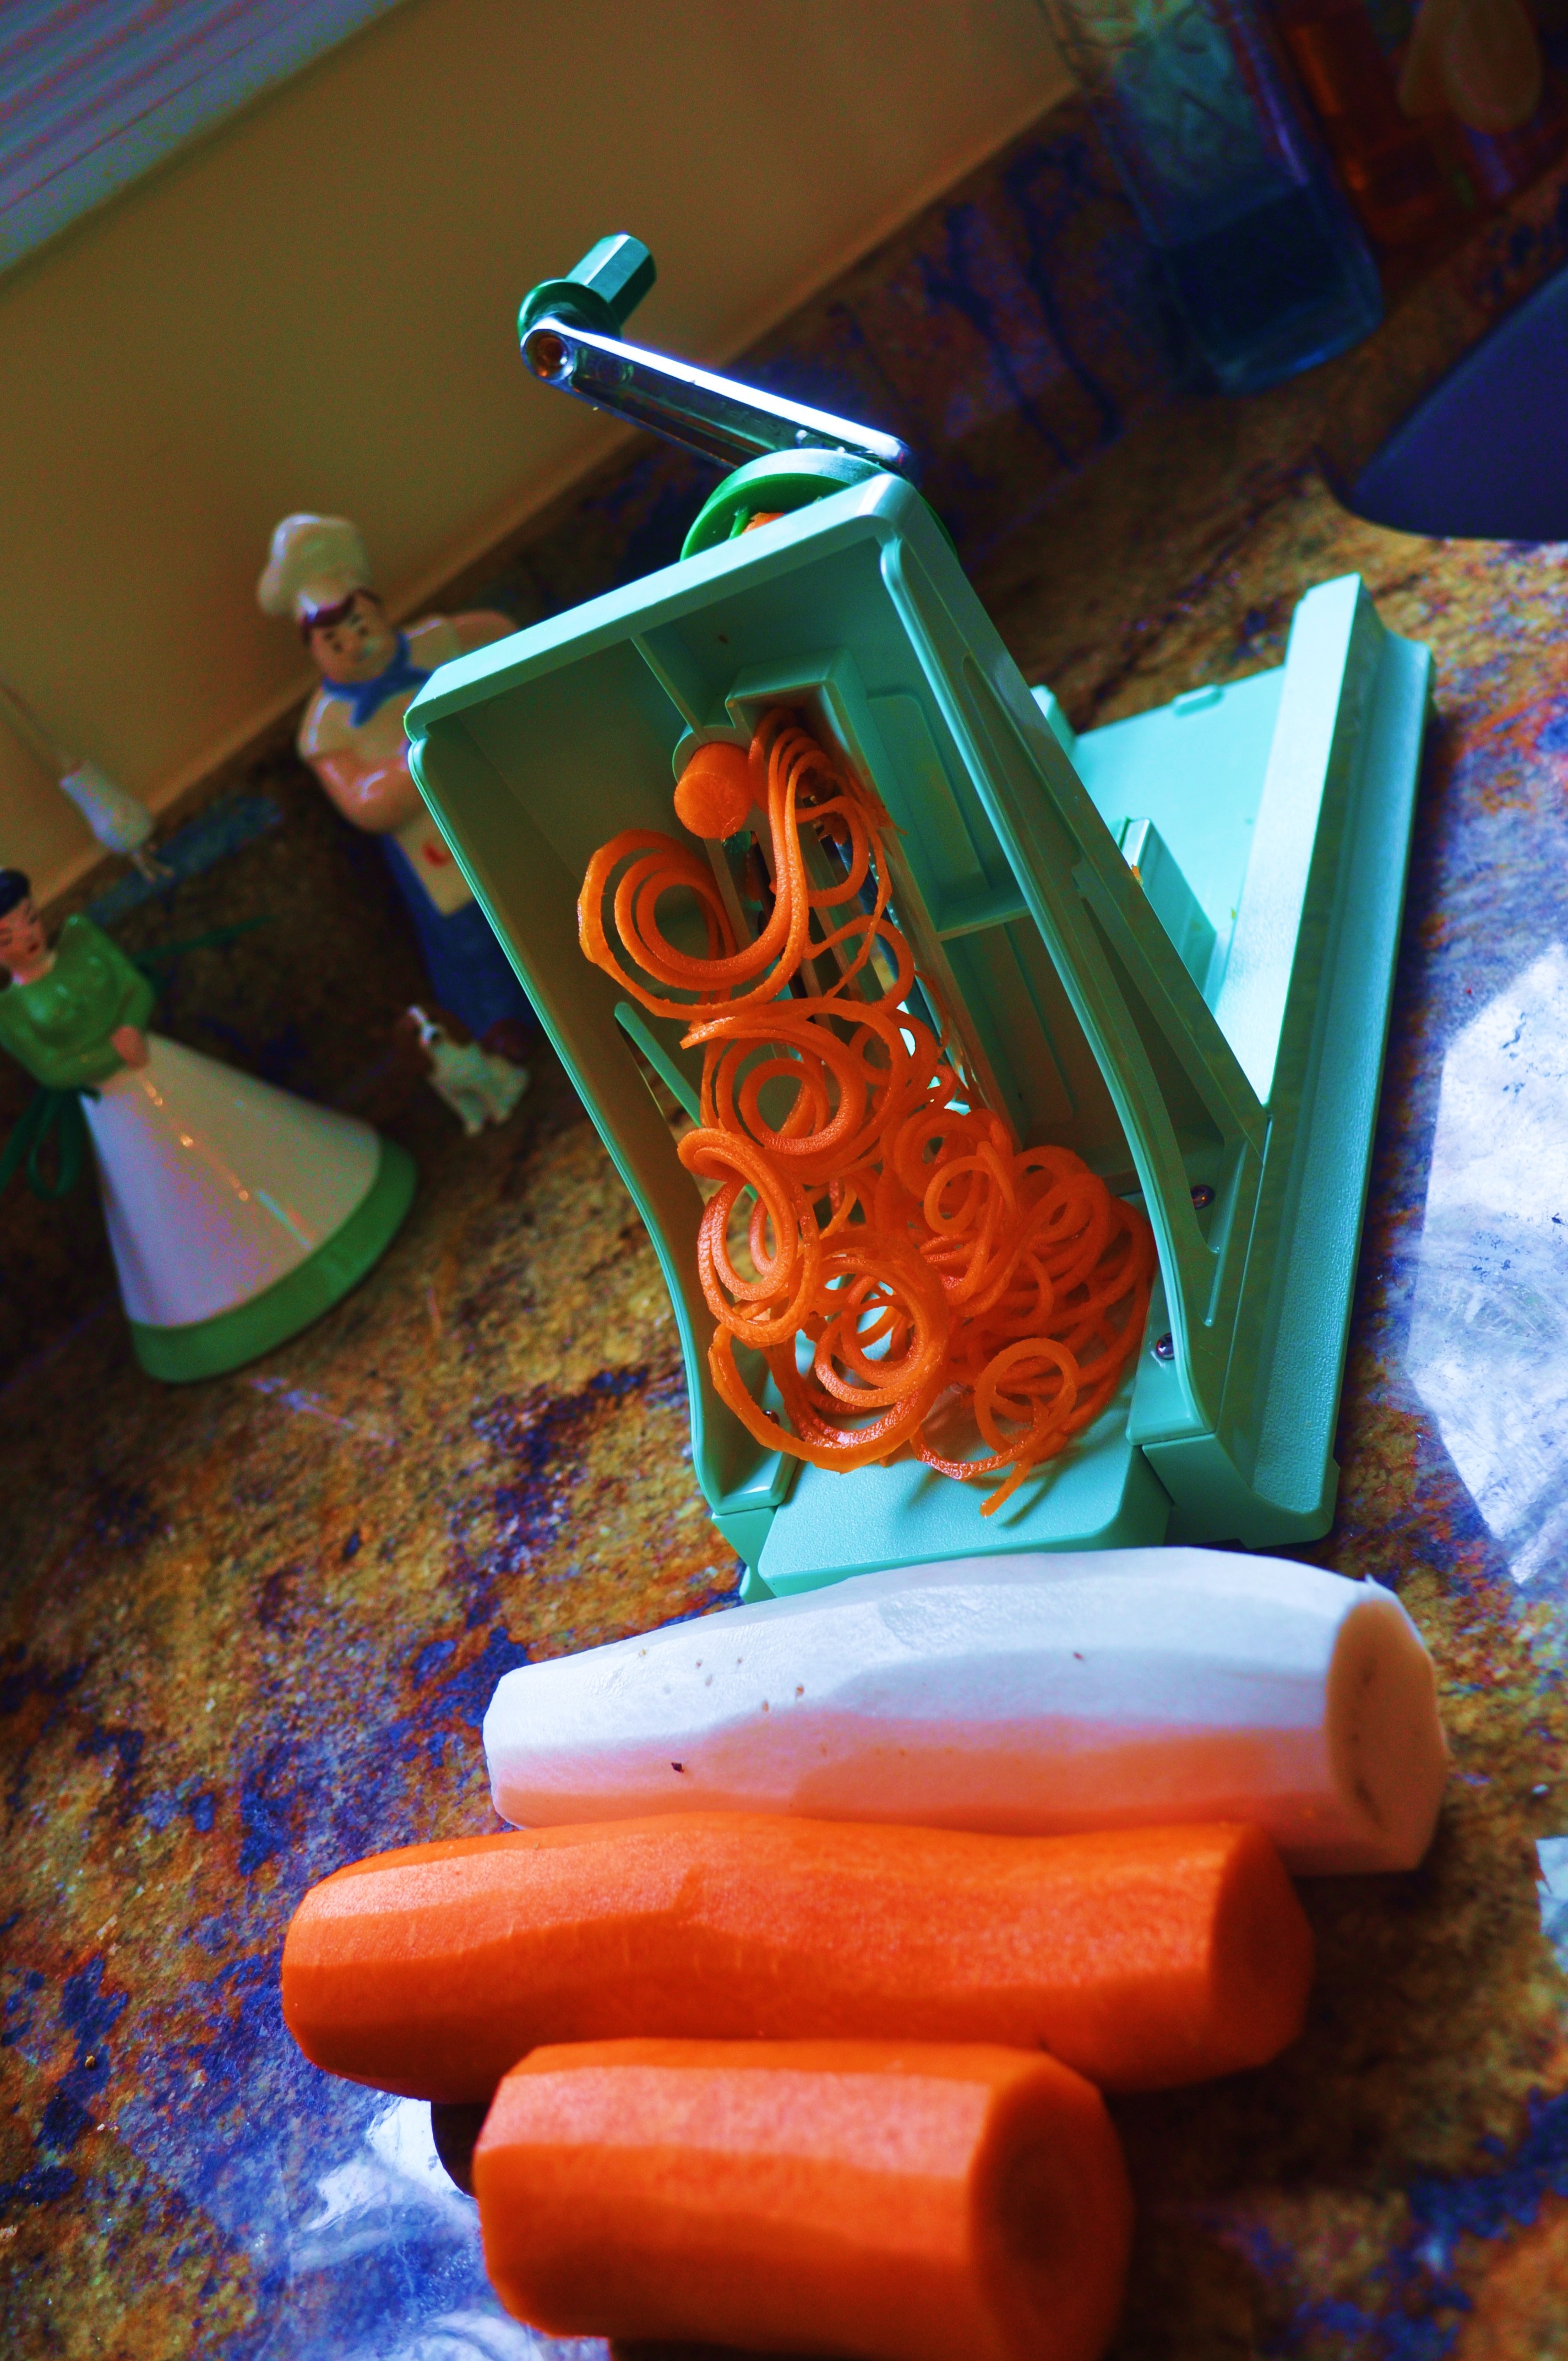
  • 1 large carrot, peeled
  • 1 pound daikons, peeled
  • teaspoon salt
  • 2 teaspoons and 1/2 cup sugar in the raw or grated jaggery
  • 1  1/4 cups distilled white vinegar
  • 1 cup lukewarm water

DSC_0193

Method:

Either cut the carrot and daikon into julienne or use a spiral cutter to cut them. Place the carrot and daikons in a bowl and sprinkle with the salt and 2 teaspoons of the sugar. Use your hands to knead the vegetables for about 3 minutes, expelling the water from them. They will soften and liquid will pool at the bottom of the bowl.

Drain in a colander and rinse under cold running water, then press gently. Return the carrot and daikon to the bowl.

To make the brine, in a bowl, combine the 1/2 cup sugar, the vinegar, and the water and stir to dissolve the sugar. Pour over the carrot and daikon. The brine should cover the vegetables. Let the vegetables marinate in the brine for at least 1 hour before eating. They will keep in the refrigerator for up to 4 weeks. It is not traditional, but I like to add some dried red chile flakes too.

DSC_0227

Advertisement

Homemade Egg Rolls!

Standard

rolls plated

There are many plays on the egg roll. This one is perhaps the “classic” to most Americans, as it is the type we grew up with. A crispy egg noodle exterior, filled with savory flavors and lots of interesting veggies. You do not have to follow an exact recipe, play around with different fillings, different herbs and all kinds of sprouts and greens. The Vietnamese make them with a rice flour wrap. Spring rolls are the same concept except uncooked, those utilize the rice flour wraps soaked in water to soften them.

OK… back to the basic egg rolls. This is so easy and everyone LOVES these! You will never buy those frozen ones again!

I like to use pork sausage, you can also chop up some cooked shrimp or chicken.

Veggies:

Finely chop some of the following (you choose the things you like):

  • Carrots (I shred mine)
  • Celery
  • Shallots
  • Garlic
  • Water chestnuts
  • Mushrooms
  • Cilantro
  • Napa cabbage
  • Red bell pepper
  • Daikon radish
  • A bit of lemongrass
  • A bit of fermented black beans (optional)

Not so chopped goodies:

  • Mung bean sprouts
  • Pea sprouts
  • Thin slices of tofu

Method:

In a hot wok or skillet brown the sausage (or other meat) once browned toss in the veggies and saute. Your mixture should be 1/2 veggies and 1/2 meat. Add some Hoisin, Fish Sauce or Oyster Sauce, just enough to moisten (I prefer the hoisin). Cool. & Chill the filling for 30 minutes.

Filling

Now comes the fun part! Let’s Roll! In four steps you roll up the egg rolls. Brush on an egg wash (1 beaten egg with 1 Tbs of water) on all seams as you fold.

Roll 1

roll 2

roll 3

roll 4

After they are rolled, place on a plate or if you are making a lot, on a tray.

rolls done

If you are frying, heat 4″ of canola or rice bran oil to 350 degrees and fry till golden brown on both sides (about 5 minutes). Drain and serve hot.

If you are baking, spray a baking sheet with oil, then place the egg rolls on the baking sheet. Preheat the oven to 375. Then bake for about 25 minutes, till golden and crispy.

For sauces, you can use many different sauces, the easiest are prepared Duck Sauce, Hoisin Sauce or Sweet Chili sauce. All are available in most any grocery stores. If you are doing the vietnamese version, it is worth it to find a recipe for Nuoc Cham. Here is my friend Andrea Nguyen’s recipe.

These are better when freshly cooked. The wraps and filling will last at least 10 days in the fridge. You can crisp up leftover cooked rolls in a 350 degree oven for 10 minutes. You can also make the rolls before cooking and freeze them on a baking sheet. Once frozen, just put into freezer bags and they will be ready for your next party. Fry or bake as directed.

The Best Lobster Bisque

Standard

Bisque 2

I make this every time we get live lobsters, which is only a few times a year. Over the years I have tweaked this. I always have to buy an extra lobster or two tails to add some meat to the soup. It is the best soup I have ever tasted. While it is rich, a single bowl and some bread make a fine supper with champagne.

Lobster

Lobster Bisque 
Serves 4

Ingredients:

  • 3 1- 2 pound live lobsters

For the stock:

  • Lobster shells
  • 1 onion quartered
  • 2 carrots
  • 2 cups of lobster cooking water
  • Water to cover shells

For the Bisque

  • 3 tablespoons olive oil
  • 1 onion, large dice (I use a sweet onion like Vidalia)
  • 1 large celery stalk, rough chopped
  • 1 large carrot, sliced
  • 12 garlic cloves, peeled
  • 20 grape tomatoes (or one large tomato rough chopped)
  • 2 tablespoons dried tarragon
  • 2 tablespoons dried thyme
  • 2 bay leaves
  • 8-10 whole peppercorns
  • 1/2 cup brandy
  • 1/2 cup dry Sherry (plus more for serving)
  • 4 cups lobster stock
  • 1 small can tomato paste
  • 1 cup whipping cream
  • 2 teaspoons cornstarch
  • 1 tablespoon water
  • Lobster Stock (about 4 cups)
  • Chives and fresh black pepper for serving

Method:

To make stock:

  • Bring large pot of water to boil.
  • Add 1/4 sea salt.
  • Add lobsters head first and boil until cooked through, about 15 minutes. Using tongs, transfer lobsters to large bowl.
  • Reserve 2 cups cooking liquid. Cool lobsters
  • Working over large bowl to catch juices, cut off lobster tails and claws. Crack tail and claw shells and remove lobster meat. Coarsely chop lobster meat; cover and chill. Coarsely chop lobster shells and bodies; transfer to medium bowl. Reserve juices from lobster in large bowl.Or you can serve the lobsters and save the shells, reserving extra meat for the bisque.
  • In a clean pot add shells, onion, carrot and reserved cooking liquid. Add enough water to cover the shells with an additional 2″ of water.
  • Cook low and slow for several hours (I have a simmer burner and let it simmer over night), until the stock has reduced to the level of the shells. Strain over a large pot.
  • You can cool and save this in the freezer or refrigerator or use straight away.
  • Discard solids

Bisque:

Bisque beginning

  • Heat olive oil in heavy large pot over high heat.
  • Add onion and next 8 ingredients. Boil until almost all liquid has evaporated, about 4 minutes. *Note, if you are using tails for the meat, put them in with veggies and cook till meat is white, about 4 minutes Use one tail per serving. 
  • Add lobster stock
  • Simmer 1 hour.
  • Remove bay leaves
  • Use a stick blender to puree
  • Strain soup through sieve set over a pot, pressing firmly on solids. Whisk tomato paste into soup. Add sherry and cognac.
  • Simmer until soup is reduced to 3 cups, about 15 minutes. (Can be prepared 1 day ahead. Cover and refrigerate at this point)
  • Add cream to soup and simmer 5 minutes.
  • Dissolve cornstarch in 1 tablespoon water.
  • Add to soup and boil until slightly thickened, about 2 minutes. 
  • Ladle soup into bowls and top with a pile of lobster meat, some fresh chives, freshly cracked black pepper and a drizzle of sherry. 

Best Fried Green Tomatoes… Southern Bliss

Standard

Fried Green Tomatoes

I never even thought of Fried Green Tomatoes as a recipe until a few people asked me how to make them. They are super easy and very tasty when done right. My great grandmother used to make them, though hers were made with just flour, not the combo of flour and cornmeal that I use now. This method if dredging, dipping and dredging again is the secret to fried chicken and most any coated fried food. The final dredge changes, anything from seasoned flour to panko, but the method stays the same. In the fall green tomatoes are pulled from the vines before first frost, but here in the south, people treasure them all year and green tomatoes are sold in our farmer’s markets. To keep them from ripening, store in the refrigerator till ready to use. They will keep several weeks. I never refrigerate ripe tomatoes, as that kills the sweetness.

fried green tomatoes

Set up a dredging station:

Pan 1: All Purpose flour

Pan 2 :1 cup of buttermilk 1-2 eggs whisked in

Pan 3: This is where you get a little creative:

Then slice up the green tomatoes about 1/2 inch thick. This thickness allows for a crispy crust and tender interior.

Heat canola or peanut oil to 350 degrees in a frying pan, about 1  1/2 inches deep.

Dredge the tomato slices in the flour, then the buttermilk mixture, making sure that the entire slice is covered in liquid.

Finally dredge the slices in the seasoned flour, making sure that all surfaces are covered.

Place in the frying pan, taking care not to crowd. fry till crispy and golden brown on each side and remove to a rack to drain. Repeat.

They can be served with a remoulade sauce, sweet chile sauce or put them on a BLT! They are even good cold.

Fried Green Tomatoes and Remoulade

Big Daddy Does Pho

Standard

Pho 3

Big Daddy makes a few cooking attempts to ease my busy schedule. Last night he hit a homerun. Pho (pronounced FA), the simple (yet complex) Vietnamese Street food charmed him when we lived in Hawaii. He is not one for exotic flavors, so this surprised me a bit. Since then we have been to several restaurants here in Charleston that serve Pho. He decided to make it and it was an astounding winner. We paired it with a Belgian Ale and that was a fantastic match too. We had some leftover rare beef (tri-tip) so he froze it and sliced it thinly. I usually ask for my meat on the side when ordering Pho in restaurants, I don’t like it over cooked. We have enough broth for at least two more meals.

ready for soup

Pho 

INGREDIENTS:

Soup
4 quarts beef stock (homemade is best)
1 large onion, sliced into rings
6 slices fresh ginger root or galangal if you can get it
2 small stalks of fresh lemon grass tied in a knot
1 pound sirloin tip, cut into thin slices
1 (8 ounce) packages dried rice noodles
 
Garnishes and Sauces
1/2 pound bean sprouts
1 cup fresh Thai basil leaves
1 cup fresh mint leaves
1 cup loosely packed cilantro leaves
3 fresh jalapeno peppers, sliced into thin rings
2 limes, cut into wedges
Hoisin sauce
Sriracha (Rooster) sauce
Fish sauce
METHOD :
1. In a large soup pot, combine broth, onion, ginger, lemon grass, star anise, cinnamon, and peppercorns. Bring to a boil, reduce heat, and cover. Simmer for 1 hour.
2. Arrange bean sprouts, mint, basil, and cilantro on a platter with chilies and lime.
3. Soak the noodles in hot water to cover for 15 minutes or until soft. Drain. Place equal portions of noodles into large soup bowls, and place raw beef on top. Ladle hot broth over noodles and top with beef. Pass garnishes and sauces.

Pho 2

Quinoa and Corn Chowder from Ecuador

Standard

This fabulous recipe was inspired by the book The Latin Road Home by Jose Garces. The book explores the cuisines of Ecuador, Spain, Cuba and Mexico. This is one of the best cookbooks I have picked up in a while. In this recipe, I used fresh corn, but good frozen corn would work too. I also added some seasonings and chiles to the recipe. I make my own achiote paste, but you can buy it in Hispanic or Asian markets. Quinoa is an amazing chenopod, full of protein and fiber.

Quinoa and Corn Chowder

Crema de Quinoa de Zuleta; Quinoa Chowder with Sweet Corn

Ingredients:

2 cups Canola Oil for frying

2 small russet potatoes, peeled and cut into match sticks or cut on a spiral cutter 

Kosher Salt

2 Tbs unsalted butter

1 Tbs extra virgin olive oil.

½ Spanish onion, finely chopped or TSTE dehydrated shallots reconstituted

6 cloves minced garlic or 2 Tablespoons TSTE Vik’s Garlic Fix 

1 Tbs achiote paste (click here for my recipe)

1 ½ cups quinoa (any color)

Kernels cut from 3 ears of corn or 1 cup of thawed and drained frozen white sweet corn

5 cups chicken or vegetable stock

1 cup heavy cream

2 Tbs minced fresh parsley

1 Tbs Aji Amarillo Chile Powder 

4 roasted poblano chiles, seeds and membranes removed, then diced

2 Tbs minced fresh chives (or leave in 1 “ strips)

Sliced Avocado for serving (optional)

Method:

  • Fry the potato strips in 375 degree oil till crispy and drain, season with salt
  • Heat the butter and olive oil in a stockpot over medium heat, cook the onion and garlic till translucent, about 10 minutes.
  • Rinse and strain the quinoa
  • Stir in the achiote paste and cook for another 5 minutes
  • Stir in the quinoa and corn.  And cook, stirring often, till the quinoa is lightly toasted
  • Stir in the roasted poblano chiles

Add the cream and stock and bring to a light boil. Lower the heat to a light simmer,  uncovered till the quinoa is tender and the liquid has reduced by about one quarter, about 45 minutes.

Quinoa and Corn Chowder 2

To serve, fold in the parsley, and top with fried potatoes and chives. Garnish with avocado. This also goes perfectly with the Yuca Cheese Bread and Guava Chile Butter I posted last week.

yuca bread close up

Heart Woodfire Kitchen

Standard

Tucked away off of Folly Road on James Island, Heart Woodfire Kitchen is a very special place. It is fun and hip and the first thing that hits you when you open the door is the sweet deep aroma of wood burning. This touches me tenderly, as I once owned a wood burning oven at my cooking school in Chicago and I miss it so much. The very core of this place is the Valoriani wood burning oven and a wood fired rotisserie grill. It does not stop there. Clever cocktails, local produce, pork and chicken raised in the Low Country, nice wine and beer selections and a creative upscale menu without being pretentious. This is not fast food, not BBQ and not white tablecloth dining, it is great flavorful dining at the mid price level, something we do not have a lot of in Charleston.

We went on a Tuesday night after going to see a film. It was balmy outside, so we opted for outside dining. The restaurant was unusually busy for a Tuesday and it was obvious that this was a bit unexpected for the staff. The assistant manager became our server because they were short staffed and we were very lucky because she was on top of her game and gave us second glasses of wine on the house because the kitchen was jammed. The food was excellent. Full of smoky flavor and interesting textures.

splendi heart woodfire

We started with a small order of one of their “Speidie,” little skewers. cooked close to the flame. We had the Fontina wrapped in prosciutto & balsamic with a wheat berry salad. 2 skewers for just $6, quite the perfect thing to nibble on while you are drinking one of their fabulous cocktails. They offer two other Speidie, one with Beef Short ribs, rosemary oil & almonds and another with Bacon wrapped Chicken Livers & chimichurri. The menu has several other small plates including some interesting soups& salads  that change with the seasons.

We shared  a spinach salad with roasted beets, wheat berries, romaine,onions and a green garlic vinaigrette.  It was crisp and yet warming with the roasted beets. The green garlic vinaigrette was perfect. I would have liked a little piece of their fabulous house made bread to go with it.
spinach salad
My husband ordered the blackened catfish sandwich which comes on one  of their sturdy house made rolls. It was round and he was expecting more of a poor boy style bread, but the flavors were fabulous and the fish was crusty with spices on the exterior and warm, tender and white on the interior, just as it should be. He ordered creamed mustard greens as his side and they were stellar. I had a few bites and we brought the rest home because after a bag of popcorn at the movies we were fuller than we thought we were.

flat bread

I had one of their signature flat breads, really a crispy little pizza. I opted for the vegetable flat bread with Acorn Squash & Goat Cheese, fennel, cauliflower & arugula pesto.I bought some home and will be having it for lunch today.

We are looking forward to going back and trying some of their local fish from the wood fired oven. We also saw dishes of their baked pasta with four cheeses walk past us and they looked delicious. Their rotisserie chicken looked fantastic and I can only imagine that their Grilled Butcher’s Steak with roasted mushrooms & onions, herb butter is fantastic. The Wood Fired Vegetable Stew, basmati rice, basil pesto, lemon yogurt, toasted almonds & apricots also sounds interesting to me.

Wood fire cooking

They have an extensive lunch menu and what looks like a fun brunch menu. They have happy hour from 4-6 and the offerings are a good way to taste several things at a reduced price.

My suggestion? Run don’t walk to this hidden gem of a restaurant. Heart Woodfire Kitchen at 1622 Highland Ave Charleston SC 29412  (843) 718-1539 Look for this sign off of Folly Road:
Heart woodfire

Crab Rellenos: Cangrejo Rellenos

Standard

Crab Rellenos

Here in the low country, Blue Crabs abound. But what do you do with all of that crab meat? It is sweet stuff, but not served on the half shell like Dungeness or King Crab. You have to meticulously pick the crab from her tiny shells. So this will be the first in a series of crab adventures. Things you can do with this lovely little Low Country crustacean.

blue-crab-

Day 1:

Make the sauce (below) this can be made up to a week in advance

Make basic filling using 1 pound of crab meat. Here is a primer on how to cook and pick the crabs. You can of course always go to your fish monger and get a pound of crab meat. It is available pasturized in cans. If you buy this, ask for lump meat.

Whip 2 large packages of cream cheese. Add them to the crab and thoroughly blend. Remove 1/3 of this mixture for crab rangoon, tomorrow’s treat.

Ingredients for Relleno Base:

3 ears of grilled Corn on the Cob, cut from the cob

1 cup of grated sharp cheddar, 1 cup of grated jack cheese

1/2 cup of fresh cojita cheese crumbles

2 red onions medium chop, sauteed and caramelized

Add 1 tablespoon of finely chopped garlic into the onions for the last 4 minutes of cooking.

3 green onions finely chopped

1/2 cup slow roasted grape tomatoes cut in quarters

Stir all of this together  

DSC_0010

Poblano Peppers (you can also use the smaller, thinner Anaheim Chile), slit clean and roasted then peel. This part can be tricky. I have learned that if you remove the seeds and membranes before putting them on the grill, they come out easier and there is less ripping of the pepper. Do this by making a T shaped cut, horizontally across the top and then one vertical slit from top to bottom. This picture is of Anaheim chiles on the grill. Grilling-Poblano-PeppersWhenever I grill peppers, I always retain few, usually ones that have torn to be used in sauces and fillings, or ropas. Once you roast your peppers on the grill or the open flame of your stove, place them in a plastic bag to steam. The skin will come off much easier then.

DSC_0013


Allow the peppers to cool and then stuff with the filling. Bring the opening as close together as you can. Since there are only two of us and these are big peppers, I only made two. But you can certainly make at least 6 with this amount of filling. I am going to be making some other dishes with the filling.

Relleno coating:

(for two large peppers, double it for 4)

4 eggs, separated

3 Tablespoons cream

salt

flour for dredging

about 1 inch of oil in a large frying pan

roll the peppers through the flour till coated

While the oil is heating, whip the egg whites & salt till they have stiff peaks. Whisk the yolks with the cream. Fold into the whites carefully.

When the oil is about 250 degrees, take a large spoon and put enough of the egg mixture into the oil to make a bed for the pepper. It will spread slightly. lay the pepper down, then cover with more egg mixture. After about 2 minutes carefully turn the pepper and cook on the other side till golden brown. Place on a drip pan and put in a warm oven while you continue the process.

Sauce and plate: You can choose any kind of sauce for this, but this is the one I made ahead of time. The base is something I use for enchiladas and other meals. I added cream and sherry to lighten this one up because the peppers and crab are so delicate.

New Mexico Rojo

1 cup New Mexico Red Chiles

2 tablespoons masa (finely ground)

2 tablespoons butter

2 cups chicken stock

Melt the butter in a saucepan, slowly stir in the masa,  till a roux is formed. Whisk in the chicken broth and simmer. Allow to simmer for a while adding more stock as it thickens.

For the relleno sauce I then added 1 cup of cream and stirred for a while, letting it reduce a bit, then about 1/4 of Spanish sherry. Stir again and then turn off the heat.

Plating: 

Use a small plate with a good upturn to hold the sauce. Puddle the sauce on the plate, then add the relleno. Squiggle crema on top. Serve with a simple salad of radishes, pea shoots, pepitas and cojita.


interior


New Years Fun Food: Collard Green Empanadas

Standard

empanadas with sauce

I had a New Years Day dinner party and decided to have a Hispanic theme. I usually make my Chiles en Nogada for Christmas, but I was busy working on Christmas Eve and decided to postpone that tradition till New Years. I have done a lot of regional Mexican and South American cooking, spent a great deal of time in Latin America from a young age and went to cooking school in Mexico.  Since moving to the Low Country, I have been interested in the spin that my friend Sandra A. Gutierrez has put on some of the traditional Latino recipes and ingredients in her book The New Southern-Latino Table. I decided to incorporate a few of her recipes into my menu for New Years and the first one  was Collard Green Empanadas. In the south it is a tradition to eat two things on New Years, greens  which represent folded money and black eyed peas which represent good luck. Sandra had recipes using both ingredients, so I made them her way with a few twists of my own.

New Southern2

Here is the recipe for the empanadas. She suggested frying  store bought empanada dough or baking pastry dough. and I wanted to bake, so I used store bought pie pastry & baked them because of the time and mess crunch with all of the other parts of the meal I was doing. But you can make them with your favorite pastry dough too. I have filling leftover and plan on doing that next weekend.

Heat oven to 375

Ingredients: 

  • 2 Tablespoons Bacon Drippings (or vegetable oil)
  • 1/2 cup finely chopped red onion or shallots
  • 4 garlic cloves finely chopped in a a teaspoon of salt
  • 1 bag of chopped frozen collard greens
  • 1/2 cup cooked and chopped bacon (I bake my bacon with Sweet Onion Sugar on it)
  • 1 8 ounce package of cream cheese
  • 1/2 cup cojita or fresco cheese (optional) these cheeses can be found at Hispanic markets or most grocery stores now days.
  • 1/4 teaspoon cayenne
  • 1/4 teaspoon chipotle powder
  • 1 egg whisked
  • Raw sugar for topping
  • 16 empanada disks or 1 package of Pillsbury pie dough.

Method:

Empanadas

  • In a large skillet heat the oil/drippings and cook the onions till translucent. Add the garlic and saute for about 20 seconds, then add the drained collard greens. Saute for a few minutes and remove from the heat, cool for 20 minutes. Add cheeses and spices.
  • On a floured surface roll out the pie dough to an increase of about 25%. Cut circles with a biscuit cutter or glass. *you can make them bigger if you have a larger cutter, using more filling.
  • Put a teaspoon of filling on each disk and brush the egg wash around the edges. Close and seal, using a fork to crimp the edges. Use the remaining egg was on top of the empanadas. Sprinkle with the flavored sugar. Top with Habenero Sugar. Bake for 20 minutes. Serve warm or at room temperature with salsa.

DSC_0012

Refrigerator Pickles: Easy Bread and Butter Cucumbers and Okra

Standard


Easy, delicious and a perfect way to preserve some of the last of this summer’s produce, in this case some cucumbers and okra. Refrigerator pickles are great, crispier and fresher tasting than their canned cousins.  This is a recipe that is both sweet and tart, much like Bread and Butter Pickles. Put them on your burgers, alongside sandwiches and use the okra in Bloody Marys. Add them to a cheese plate or charcuterie platter. It is SO easy and you do not need a whole bushel of produce and lots of equipment to make these, just some clean jars, a knife (or food processor) and the ingredients. Here is the recipe to make 3 quart jars. It only takes about 30 minutes working time to do these. Well worth the effort.

Ingredients:

2 onions, thinly sliced

8 medium cucumbers thinly sliced (I used the food processor to make fast work of slicing)

4 cups okra ( I did the okra in one jar and the cukes in two others, but you could do more cukes if you are okra adverse).

3 cups of water

3 cups of cider vinegar

6 cups sugar

1 tablespoon kosher salt

2 tablespoons mustard seeds

2 1/2 teaspoons turmeric

2 teaspoons celery seeds

2 tablespoons pickling spice

2 teaspoons grains of paradise

2 teaspoons juniper berries

crushed red pepper to taste

6 cloves of garlic (2 per jar)

6 sticks of cinnamon (2 per jar)

Method: 

Slice cucumbers and okra.

The food processor makes slicing a breeze and maintains consistent size

Place in a jar with 2 sticks of cinnamon and 2 cloves of garlic slightly bruised

Pack the jars tightly

Pack the jars tightly. This can also be done in a plastic container.

Cook all remaining ingredients to a boil and then simmer for four minutes. Allow to cool for 5 minutes. Pour the pickling liquid over the vegetables and close jars. Allow to cool completely, then place in refrigerator. The pickles will be ready to eat in 24 hours. You can use a variety of vegetables to make pickles, peppers, carrots, jicama, sugar snap peas, asparagus, okra, even peaches.