Tag Archives: fried

Husk…. Sean Brock’s Southern Food

Standard

Bon Appetit hailed it as the Best New Restaurant in the US…. accolades have been streaming ever since. It is not all hype, the food is amazing, creative and interesting. Husk is the love child of James Beard Award-winning Chef Sean Brock of McCrady’s and the Neighborhood Dining Group. Since opening Husk in Charleston he opened another outpost of Southern ingredients in Nashville. He recently opened Minero, a taqueria in the high rent district of downtown Charleston. There is word that he is also taking that concept to Atlanta where the Neighborhood Dining Group is headquartered. He transforms the essence of Southern food over and over again. Solid… delicious… promising. Sean is dedicated to bringing back old Southern grains, beans, greens and other treasures that were all but lost. He is the champion of the old non-gmo crops that were grown 200 years ago in the south. His food reflects that without being obvious. It is just delicious food, and then you learn its history and all of the work that went into bringing it to the table.

Led by Brock and Chef de Cuisine Travis Grimes, a Lowcountry native, the kitchen reinterprets the bounty of the surrounding area, exploring an ingredient-driven cuisine that begins in the rediscovery of heirloom products and redefines what it means to cook and eat in Charleston.

Starting with a larder of ingredients indigenous to the South, and set within a building complex dating to the late 19th century, Brock crafts menus throughout the day, responding to what local purveyors are supplying the kitchen at any given moment. The entrance beckons with a rustic wall of firewood to fuel the wood-fired oven and a large chalkboard listing artisanal products currently provisioning the kitchen, but like the décor that inhabits the historic building, the food is modern in style and interpretation.

At Husk there are some rules about what can go on the plate. “If it doesn’t come from the South, it’s not coming through the door,” says Brock, who has even stricken olive oil from the kitchen. As he explains, the resulting cuisine “is not about rediscovering Southern cooking, but exploring the reality of Southern food.” This modern approach results in playful dishes such as Deviled Eggs with Pickled Okra and Trout Roe, and new classics like South Carolina Shrimp and Choppee Okra Stew with Carolina Gold Rice and Flowering Basil.

Seed-saving, heirloom husbandry, and in-house pickling and charcuterie efforts by the culinary team are the basis of the cuisine at Husk. The restaurant is as casual as it is chic, evoking a way of life centered on seasonality and the grand traditions of Charleston life—one lived at a slower pace, preferably with a cocktail and a wide porch in the late afternoon. It is a neighborhood gathering place for friends, and a destination dining spot for travelers, with a little bite of the South for everyone’s palates.

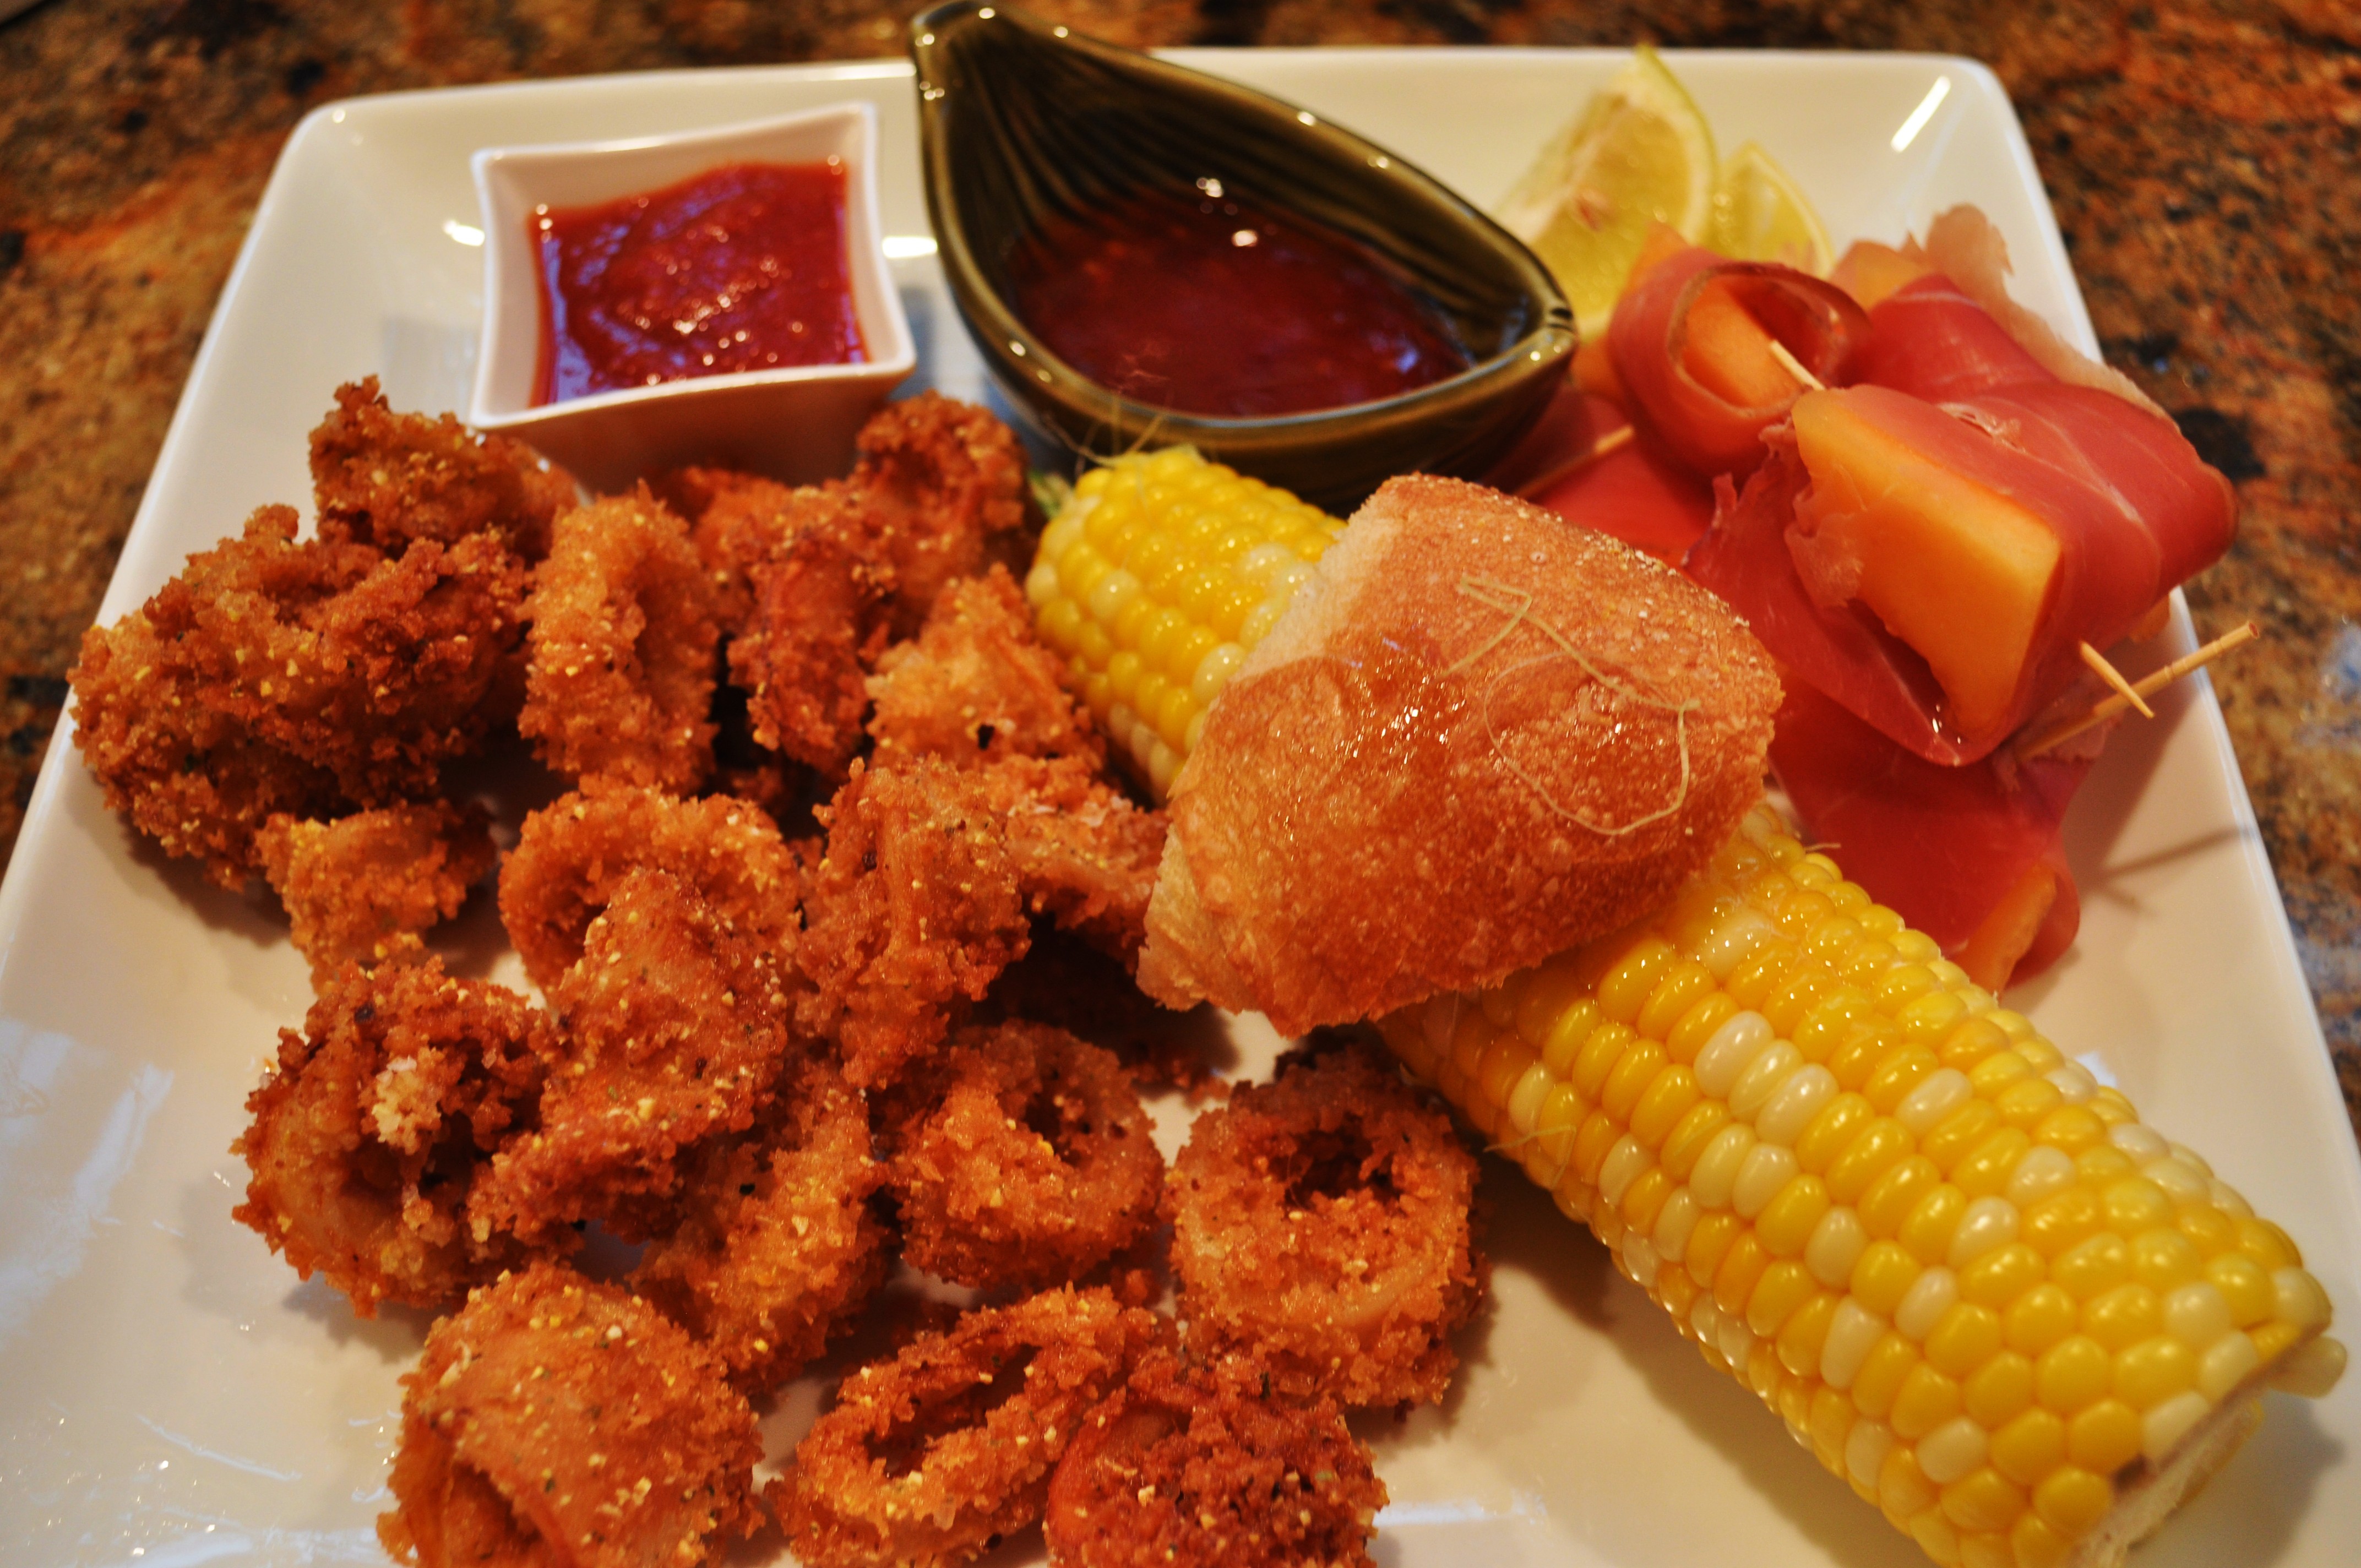
These photos are from my lunch there with Nathalie Dupree and Holly Herrick, two Charleston based friends of mine than rank in the upper echelons of Food Writers.  And so we were treated to many things that we did not order. On of the most amazing things that day was totally unexpected, the fried chicken skin with honey and hot sauce. It is a dish I have reconstructed at home a few times. I also reconstructed Husk’s Sweet Tea Brined Kentuckyaki Chicken Wings and you can get the recipe here.

Advertisement

Crispy Panko Calamari

Standard


Calamari 1

This is a super easy recipe, the key is finding good quality squid. I bought fresh tubes at the Whole Foods Seafood Counter, if you like tentacles you may have to buy them frozen. Always look for cleaned calamari/squid.This recipe is for a main dish for two or an appetizer for four. It is easily doubled for larger servings. The combination of flour, polenta and panko assure a crispy crust. Furikake adds some umami and the sesame in it adds another element of crunch.

Ingredients:

1/2 pound squid

4 egg whites

1/4 cup milk

2 cups panko

1/2 cup all purpose flour

1/4 cup grits or polenta

2 Tablespoons Furikake Wasabi seasoning (Japanese seasoning for rice) to taste

4 Tablespoons Sweet Onion Sugar

Sweet Chili Sauce and Seafood Cocktail Sauce for dipping

calamari3

Method:

  • Slice the calamari into rings.
  • I like to soak my calamari in buttermilk before cooking, salt water is another option. Soak for about 30 minutes then rinse and dry.
  • Heat a wok and add canola or peanut oil to a depth of about 2 “. You want it about 350 degrees.

Calamari 2

  • Mix the egg white and milk in one pan/bowl
  • Mix the dry ingredients in another pan/bowl
  • Set up a draining pan or use a plate with paper towels
  • Dredge the calamari through the egg white mixture, making sure to open the rings so they get coated on the inside too
  • Dredge them through the breading mix, also getting the insides coated.

Calamari close up

  • Work in small batches of about 8-10 rings and fry, turning once. When both sides are golden brown, move to draining tray.
  • When finished serve with sauces and chopsticks.

Calamari plated

Homemade Egg Rolls!

Standard

rolls plated

There are many plays on the egg roll. This one is perhaps the “classic” to most Americans, as it is the type we grew up with. A crispy egg noodle exterior, filled with savory flavors and lots of interesting veggies. You do not have to follow an exact recipe, play around with different fillings, different herbs and all kinds of sprouts and greens. The Vietnamese make them with a rice flour wrap. Spring rolls are the same concept except uncooked, those utilize the rice flour wraps soaked in water to soften them.

OK… back to the basic egg rolls. This is so easy and everyone LOVES these! You will never buy those frozen ones again!

I like to use pork sausage, you can also chop up some cooked shrimp or chicken.

Veggies:

Finely chop some of the following (you choose the things you like):

  • Carrots (I shred mine)
  • Celery
  • Shallots
  • Garlic
  • Water chestnuts
  • Mushrooms
  • Cilantro
  • Napa cabbage
  • Red bell pepper
  • Daikon radish
  • A bit of lemongrass
  • A bit of fermented black beans (optional)

Not so chopped goodies:

  • Mung bean sprouts
  • Pea sprouts
  • Thin slices of tofu

Method:

In a hot wok or skillet brown the sausage (or other meat) once browned toss in the veggies and saute. Your mixture should be 1/2 veggies and 1/2 meat. Add some Hoisin, Fish Sauce or Oyster Sauce, just enough to moisten (I prefer the hoisin). Cool. & Chill the filling for 30 minutes.

Filling

Now comes the fun part! Let’s Roll! In four steps you roll up the egg rolls. Brush on an egg wash (1 beaten egg with 1 Tbs of water) on all seams as you fold.

Roll 1

roll 2

roll 3

roll 4

After they are rolled, place on a plate or if you are making a lot, on a tray.

rolls done

If you are frying, heat 4″ of canola or rice bran oil to 350 degrees and fry till golden brown on both sides (about 5 minutes). Drain and serve hot.

If you are baking, spray a baking sheet with oil, then place the egg rolls on the baking sheet. Preheat the oven to 375. Then bake for about 25 minutes, till golden and crispy.

For sauces, you can use many different sauces, the easiest are prepared Duck Sauce, Hoisin Sauce or Sweet Chili sauce. All are available in most any grocery stores. If you are doing the vietnamese version, it is worth it to find a recipe for Nuoc Cham. Here is my friend Andrea Nguyen’s recipe.

These are better when freshly cooked. The wraps and filling will last at least 10 days in the fridge. You can crisp up leftover cooked rolls in a 350 degree oven for 10 minutes. You can also make the rolls before cooking and freeze them on a baking sheet. Once frozen, just put into freezer bags and they will be ready for your next party. Fry or bake as directed.

Best Fried Green Tomatoes… Southern Bliss

Standard

Fried Green Tomatoes

I never even thought of Fried Green Tomatoes as a recipe until a few people asked me how to make them. They are super easy and very tasty when done right. My great grandmother used to make them, though hers were made with just flour, not the combo of flour and cornmeal that I use now. This method if dredging, dipping and dredging again is the secret to fried chicken and most any coated fried food. The final dredge changes, anything from seasoned flour to panko, but the method stays the same. In the fall green tomatoes are pulled from the vines before first frost, but here in the south, people treasure them all year and green tomatoes are sold in our farmer’s markets. To keep them from ripening, store in the refrigerator till ready to use. They will keep several weeks. I never refrigerate ripe tomatoes, as that kills the sweetness.

fried green tomatoes

Set up a dredging station:

Pan 1: All Purpose flour

Pan 2 :1 cup of buttermilk 1-2 eggs whisked in

Pan 3: This is where you get a little creative:

Then slice up the green tomatoes about 1/2 inch thick. This thickness allows for a crispy crust and tender interior.

Heat canola or peanut oil to 350 degrees in a frying pan, about 1  1/2 inches deep.

Dredge the tomato slices in the flour, then the buttermilk mixture, making sure that the entire slice is covered in liquid.

Finally dredge the slices in the seasoned flour, making sure that all surfaces are covered.

Place in the frying pan, taking care not to crowd. fry till crispy and golden brown on each side and remove to a rack to drain. Repeat.

They can be served with a remoulade sauce, sweet chile sauce or put them on a BLT! They are even good cold.

Fried Green Tomatoes and Remoulade

Sriracha Buffalo Chicken Wings

Standard

Wings plated with Beer

I love sassy stuff. Sriracha is a staple in my house. So is Frank’s Hot Sauce. This recipe is easy and delicious too. If you want to make it healthy, you can use the sauce as a marinade and grill the wings. I opted for the fry method here, but I do grill them too.

Sauce:

1 stick of unsalted butter

1 bottle of Frank’s Hot Sauce

2/3 cup Sriracha Sauce (Rooster on the bottle)

3 tablespoons Vik’s Garlic Fix 

1 tablespoon Sweet Onion Sugar 

Place all in a pan and simmer while frying the wings.

sauce

I used Drummets, they have more meat on them and they are readily available here. When we lived in Hawaii they were impossible to find. I wonder what they do with all of the other wing parts…. cat food?

In a large deep pan, heat oil to 400 and then adjust the heat to maintain 350-400 degrees while frying.

Fry in small batches so the wings do not stick together.

This should take about 6-8 minutes, remove when golden brown.

wings fried

Drain.

Place in a pan once all are fried and pour the sauce over and stir to make sure the wings are completely covered with sauce.

Bake at 350 for 20 minutes. Serve with celery, carrots and blue cheese dressing. FINGER LICKING good.

wings plated

Want another great wing recipe: Here I recreated Husk’s Sweet Tea Brined Smoked Kentuckyaki Chicken Wings. 

And here is a post from my friend Scotty Harris, who lives near Buffalo about wings… he insists there is no such thing as Buffalo Wings, they are just wings to him.

Making Perfect Potato Chips; Bet you can’t eat just one!

Standard


Somethings are so simple and yet we don’t often take time to make them. Potato Chips are one of those things. Sunday morning I decided to do BLT sandwiches for brunch. I thought about making hash browns or fried potatoes as a side and then suddenly a light bulb came on , Potato Chips! Having  just moved, I had already unpacked the necessary tools. I had the big pot of peanut oil, the mandoline and some potatoes. I had some of what I call “Devany Seasoning.” It is an all purpose flavor enhancer with smoked salt, smoked paprika, pepper, a bit of sugar and whatever spices I am cleaning out when I make it. This is so simple, I can hardly call it a recipe, it is much more of a method. There are just a few hints as to how to do this. First I put the bacon in the oven so it would be ready for the sandwiches when the chips were finished frying.

Mise en place for BLT

As in all cooking, get everything out that you will need, Mise en place is the culinary term for having every thing ready and in place before you start preparing a meal. It is probably the single most important thing you can do when preparing a dish. We can probably thank Escoffier for this, as he was famous for running an efficient kitchen. Once everything is set   in place, start cooking.

Ingredients: 

Russet Potatoes, washed well. I leave the skins on. You will be cutting these paper thin, you may as well skip the peeling and go for the nutrition that is in the skin. You can also do this with other root vegetables such as  sweet potatoes, taro and even carrots.

Peanut or Canola oil in a large deep pot or fryer. Peanut oil has a high burning point and is great for frying. You can find it for a really good price in stores that sell turkey fryers.

Seasoning. You can use sea salt, BBQ seasoning or other flavors. Next time I am using truffle salt.

Equipment: 

You will need a mandoline to cut the chips into very thin slices. It can be done with a knife, but it is doubtful that you will be able to consistently cut uniform paper thin slices. If you do not already own a mandoline, there are many inexpensive models available.

If you do not own a deep fryer, you will need a large deep pot. This prevents splattering.

You will also need a rack to drain the chips on. I use a steam table pan and rack, but you can use a sheet pan with a cookie rack. If you do not have a rack, you can use paper towels, but do change them out as they get drenched with oil.

A fat thermometer is quite helpful. This looks like other instant read thermometers, but it has a very long probe and can be attached to the side of the pan. This is a tool that is helpful for making jams, candy & cheese. I use mine a lot. You need to maintain a consistent heat of 350 degrees. If you do not have one of these, you can eyeball it, but you will have much better success if you use a thermometer.

A spider to remove the chips from the oil.

Method: 

Pre-heat the oil to 350 and then turn the heat down slightly to maintain that temperature.

Using the mandoline on the thinnest setting possible, evenly slice the potatoes, one at a time. One potato will take 4-5 frying sessions. You do not want to crowd them.

In batches, gently drop the slices , one at a time into the oil. Turn them using the spider and separate any that are touching each other. Note, these cook very fast, you must give them your full attention while frying.

Place the chips on the draining rack and IMMEDIATELY season. Doing the seasoning immediately will make it adhere better.

Once the chips have cooled slightly they can be placed in a bowl. If you are making them ahead of use,  wait till all are completely cool and then place them in an airtight container. They never last very long at our house, but they do keep well for several days if you need to do them in advance.

Home made fries with a BLT. Mr. Garlic approves

Squash Blossoms

Standard

Image

Squash or pumpkin blossoms offer up multiple opportunities. While in cooking school in Mexico, we used them as a filling ingredient for quesedillas, empanadas and tacos. They were also tossed in salads and soups for color and nutrition. Of course they are also lovely when filled and fried or baked. Squash blossoms are a unique ingredient. Unless you have a big patch of squash or pumpkins, you are at the whim of the farmer who brings these highly perishable ingredient to market. At the Charleston Farmer’s Market yesterday, I spied a little box of the blooms and grabbed it. My mind was swimming with filling ideas as we drove home. I decided on some queso fresco that I bought at a small Hispanic market on John’s Island with herbs and peppers & a little mascarpone for smoothness.

Image

The recipe:

Ingredients

10-12 squash blossoms

1/2 cup queso fresco ( you can also use a creamy feta) allow it to warm up to room temperature

1 jalapeno or hotter pepper if you want more spice cut into small pieces

3 tablespoons mascarpone or cream cheese

a hand full of grated jack cheese

1 Tablespoon TSTE Vik’s Garlic Fix

1 Tablespoon of TSTE Aleppo chile

6 sprigs of cilantro

salt and pepper to taste

For batter:

1 1/2 cups flour

1 can or bottle of beer

salt and pepper

Method

About 2 hours before you plan to serve, mix the beer and flour together with salt and pepper. Cover and leave on the counter.

Clean blossoms by brushing off any soil, do not run under water. Pull out the stamen.

For filling:

Place the cheeses, cilantro, Vik’s Garlic Fix, aleppo pepper, jalapeno and salt and pepper in the small bowl of a food processor. This can also be done by hand, but if you are doing it that way, you will need to finely chop the pepper and cilantro.

Pulse until the filling is smooth. Using a spatula, fill a small zip lock bag. Push all of the filling down so that there is no air in the bag. Just before filling cut a small piece of the corner off and pipe the filling into the blossom, carefully wrapping the petals around the filling. Leave the top 1/2 inch unfilled and twist to enclose the filling. Refrigerate.

In a large pot or fryer heat peanut or canola oil (at least 3 inches) to 375 degrees.

Image

Put a few stuffed blossoms into the batter and then place carefully into the hot oil. After about a minute of frying, turn the blossoms and allow them to fry till golden. Remove with a spider and drain. Serve immediately.

ImageYou can find another post of mine about squash blossoms made with sourdough batter here on my Hawaii blog.

Polenta and Furikake Crusted Vidalia Onion Rings

Standard


image
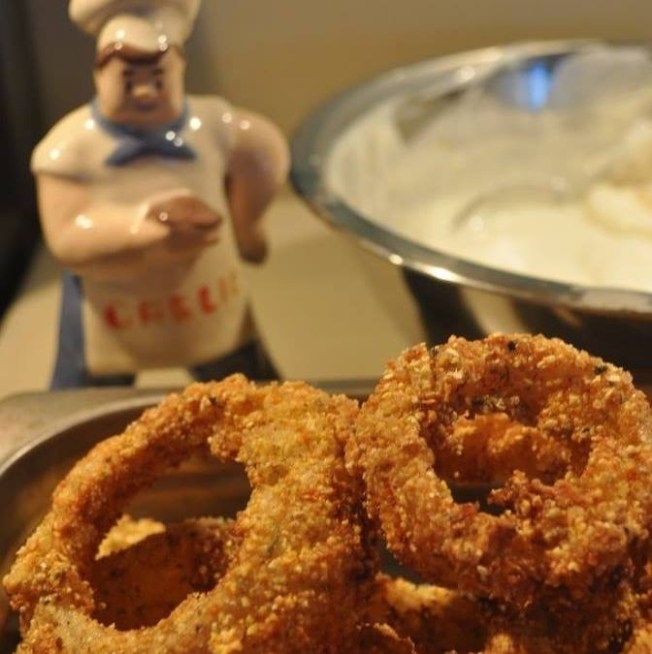
It is that magical time of year when Vidalia onions appear in the markets. Yes, even here in Hawaii, home of the Maui Onion (which is almost as sweet) we get Vidalias. I have been making cornmeal crusted onion rings for a long time, but I decided to change it up a little by using Greek yogurt instead of buttermilk to soak my onion rings in and to add Furikake  to the Polenta. In this recipe I used a course ground Polenta which added a lot of texture. You could also use stone ground grits for this. Furikake is a Japanese seasoning used to spice up plain rice. I use it for lots of things and love adding it to the panko crumbs when making fish. My favorite Furikake is wasabi, sesame and nori. It ads little pops of flavor in the crust.

Ingredients: 

2 cups of Greek Yogurt, thinned with 1/2 cup of milk

4 large Vidalia onions

2 cups coarse polenta

1/2 cup all purpose flour (or rice flour if you are gluten free)

1/4 cup Firikake

plenty of fresh cracked pepper

1 teaspoon of salt

Peanut oil for frying


Method:

  • Slice onions into thick slices, place the slices in the bowl of yogurt and milk and allow to rest for 30 minutes
  • Mix all other ingredients except oil in a shallow container
  • Heat oil to 350
  • Pull out slices of onion and shake off excess yogurt but allow a bit to remain
  • Dredge the onion slices in the breading, making sure it adheres to the onion slices
  • Fry the onions, 6 or so slices at a time for about 3 minutes, draining on a grid.
  • Serve immediately

I like to make a chipotle mayo for dipping. In a small blender mix 1 cup of mayonnaise with half a can of  chipotles. (freeze remaining peppers for another use) Blend till they are combined.